I often get feedback from Raspberry Pi homebrewers from around the world, showing me their latest digital picture frame projects.
It’s great to see a community of people interested in this topic, as it creates a lot of satisfaction and joy for the tinkerers, the photographers, and the people watching great photos.
I thought I should share some of these projects with you. I plan to update this post often, but it all depends on you sending me pictures and reports about your project.
In order to make this easy, please see at the end of this post where you can enter the information that I would need from you so that we can inspire others.
Without much further ado, let’s get started. Thank you to all participants!
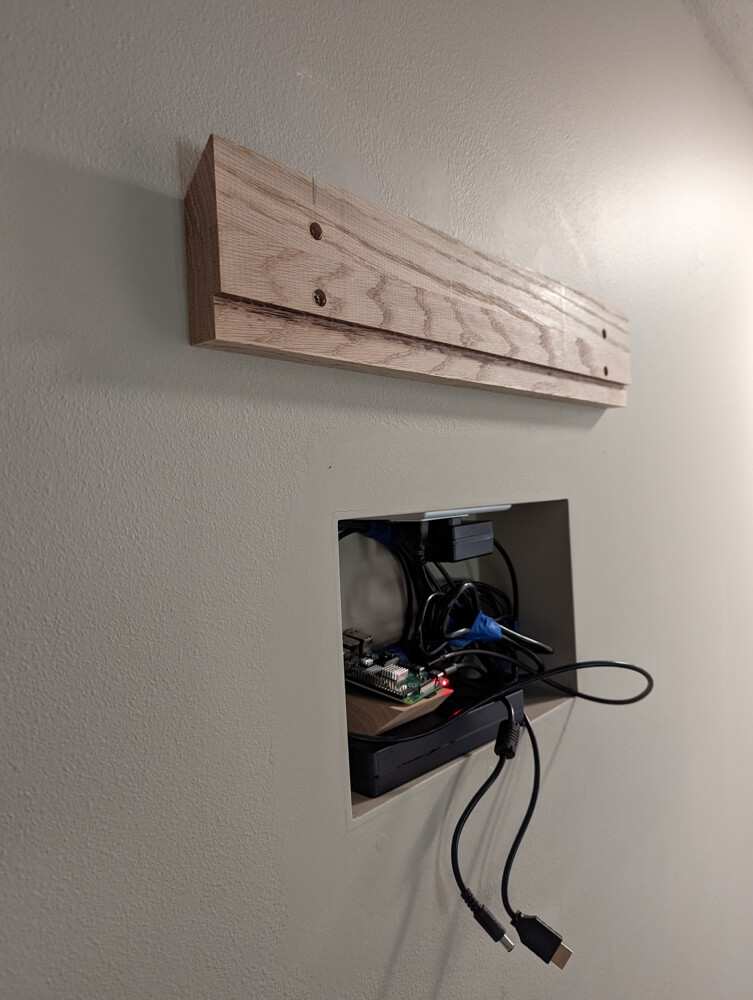
Travis from Seattle, WA, USA
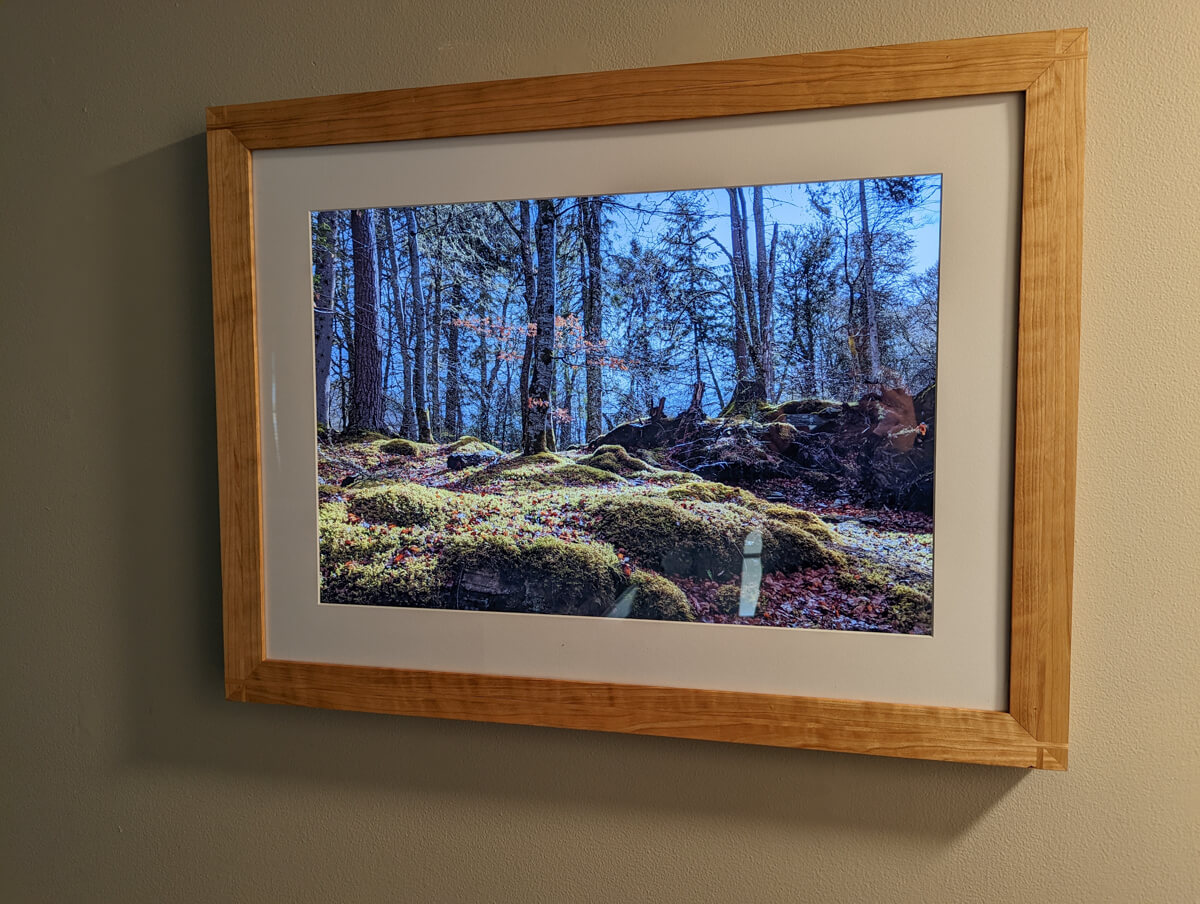
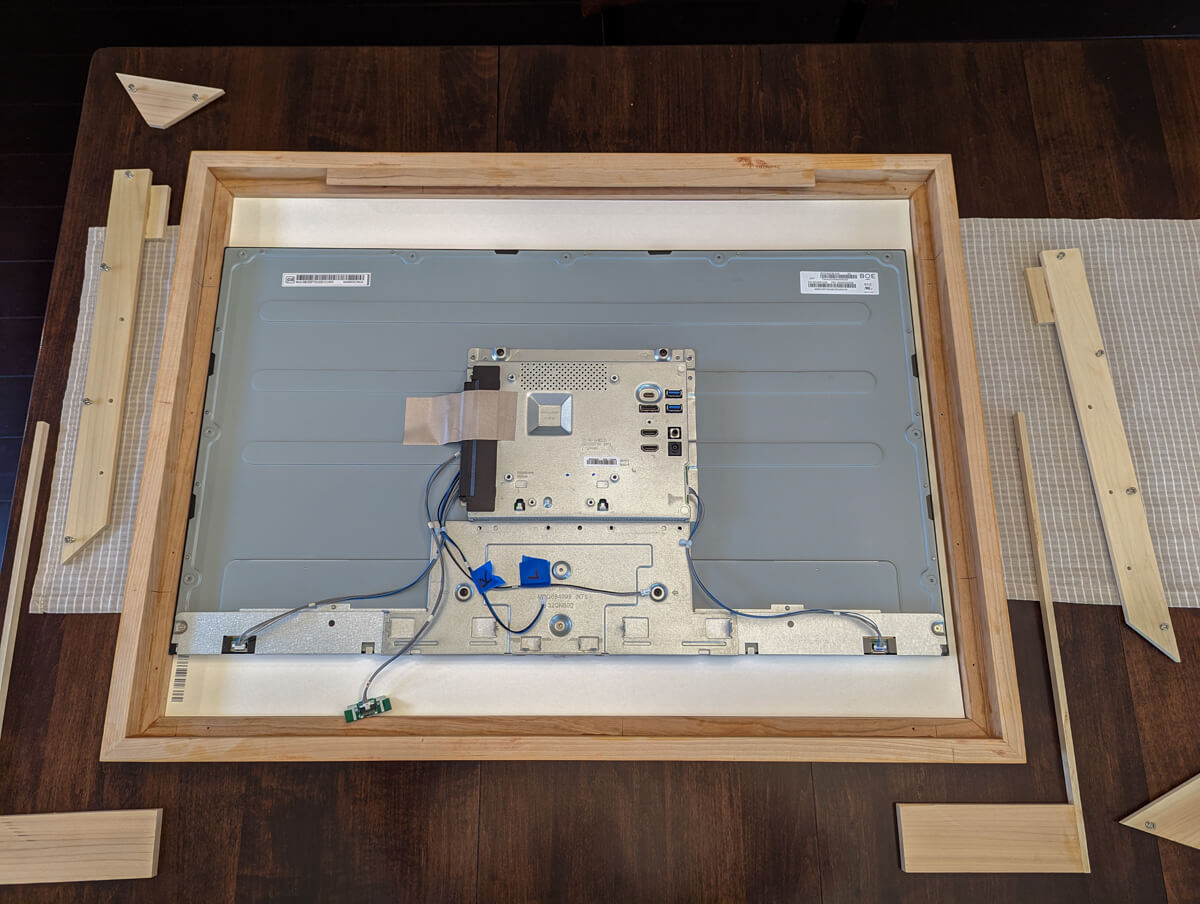
| Description | A photo frame made out of cherry wood |
| Hardware | Raspberry Pi 4 8GB, with an LG 32″ UltraFine Display Ergo 4K HDR10 Monitor 32UN880-B |
| Software | Pi3D PictureFrame image viewer |
| Notes | I made the frame myself out of cherry. I had a local framing company make the matting for me in a 3:2 ratio. I cut a piece of acrylic on a table saw to protect the screen. The HDMI and power connections go straight out of the back of the monitor, which is not ideal, but I figured if I already had an outlet for power on the wall, why not just make a pocket? Seems to work great so far. To hang it, I used a french cleat which is very strong but makes access very easy. Right now, I am using CRON jobs to turn the software/screen on and off and to adjust the brightness, but I am hoping to find a way to measure the ambient light around the frame and adjust the brightness based on that. |
Dave from Scotland

| Description | Photo / Art frame for our entrance hall |
| Hardware | Raspberry Pi 4 8GB, with a Samsung UE43AU8000KXXU 43″ Smart 4K Ultra HD HDR LED TV |
| Software | Pi3D PictureFrame image viewer |
| Notes | Samsung is a brilliant screen for photo frames – it has loads of features from their ‘Samsung The Frame’ line, super sharp 4K, and is very cheap at £350 for a 43″ picture frame. I built a quick frame out of some local walnut offcuts and drilled a small hole through the wall for the power and HDMI cable. Fantastic bit of software – great work, guys! |
Gary from Lisle, IL, USA


| Description | Twin 21″ 4:3 monitors in an oak frame |
| Hardware | Raspberry Pi 3B+, 512MB RAM, 32GB SanDisk High Endurance microSD, 2 (Portrait 3:4 ratio/Landscape 4:3 ratio) NEC 2190UXp monitors in fluted, oak frame |
| Software | Pi3D PictureFrame image viewer, MQTT Mosquitto |
| Notes | I started out using Wolfgang’s original DIY Digital Picture Frame back in 2014. I had been thinking about this for years. Paddy’s Pi3D brought the magic to reality. Our photos that were stored in albums & boxes came back to life. Then I saw that Paddy, Helge & Friends did something magical. The software was completely rewritten to offer beautiful crossfading transitions and matting and much more. I am currently working on building out my study with another Raspberry Pi Pi3D. This time I’m using a Raspberry Pi 4 with 4GB RAM. The display of pictures remains great. However, working on the RPi 4 is so much faster! |
Shawn from Raleigh, NC, USA

| Description | A pair of frames gifted to the grandparents for Christmas |
| Hardware | Raspberry Pi 3B+, Dell SE2419Hx 24″ monitor (1920×1080) |
| Software | Pi3D PictureFrame image viewer, Google Photos shared album integration |
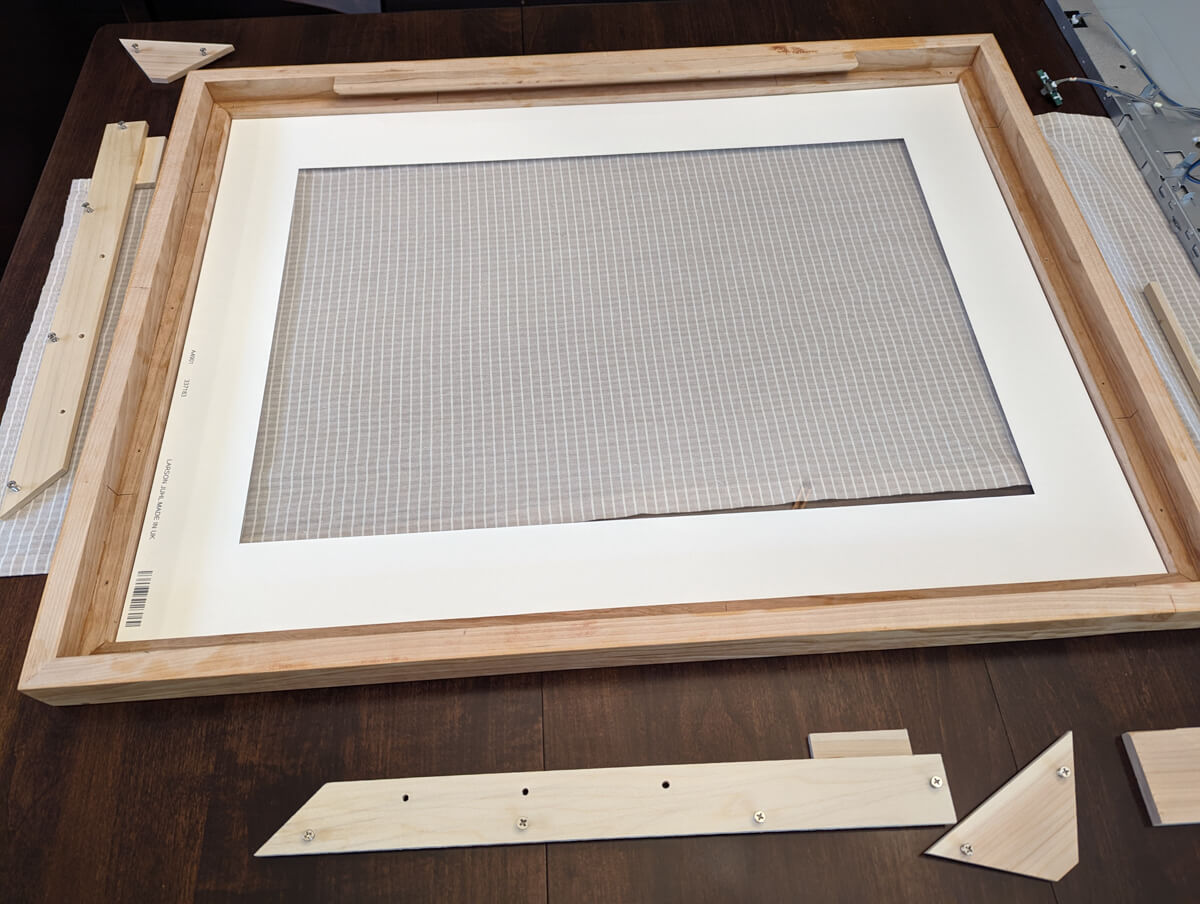
| Notes | This was my first time doing a woodworking project that was this precise. I built a series of jigs to be used on the table saw to make the joints. Both frames needed to be self-sufficient from a software perspective (one pair of grandparents lives several hundred miles away). A script checks (running rclone sync) a shared Google Photos album hourly for new images. The sync script can’t tell when Photos have been edited, so a second script deletes all the photos once a month. It runs overnight and is scheduled a few minutes before the hourly download check, so isn’t noticeable. |
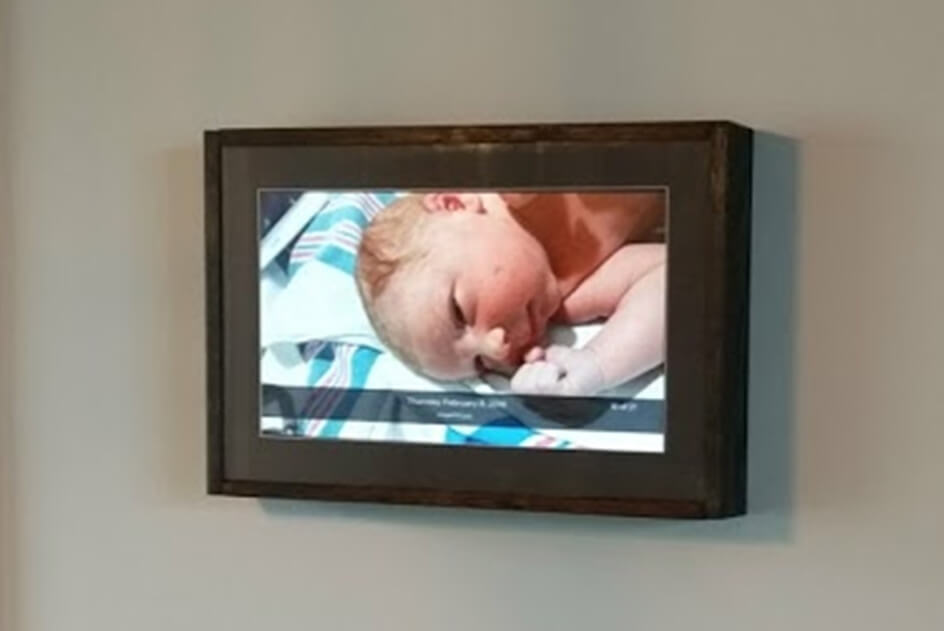
Thaddée from Schaeffersheim, France
| Description | My first Raspberry Pi hardware project |
| Hardware | Raspberry Pi 3, an old LCD screen that I had on hand |
| Software | Pi3D PictureFrame image viewer |
| Notes | I reused the plastic back of the monitor to close it properly. Be sure to remove all plastic from your screen before taking measurements. Better to use an SD slot extension cable to make it easy to update the SD card. I ordered the wooden frame in a DIY store. Not easy because they wanted the picture to be framed to confirm the order. I had to explain the concept of the digital frame to the store employee. |
Alan from Toronto, Canada


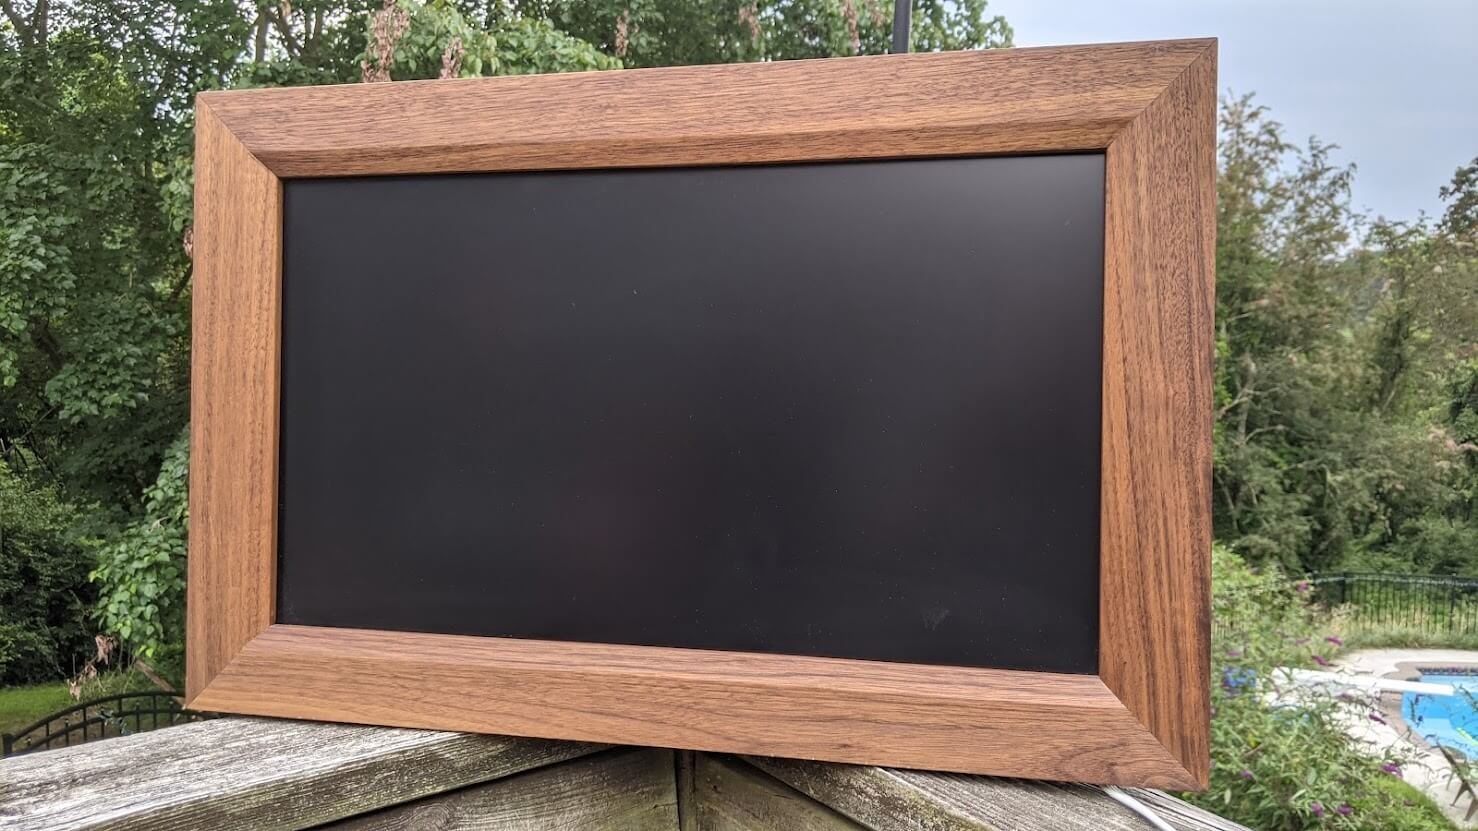
| Description | A classy walnut frame for my parents and a rustic aged frame for me. |
| Hardware | Raspberry Pi 4, 24-inches 16:10 IPS monitors |
| Software | Pi3D image viewer |
| Notes | Adding a power button for the pi is a must, especially if the power cord is hidden behind the frame. I use a button on the underside of the frame and the shutdown script found here. |
Benedikt from Luzern, Switzerland


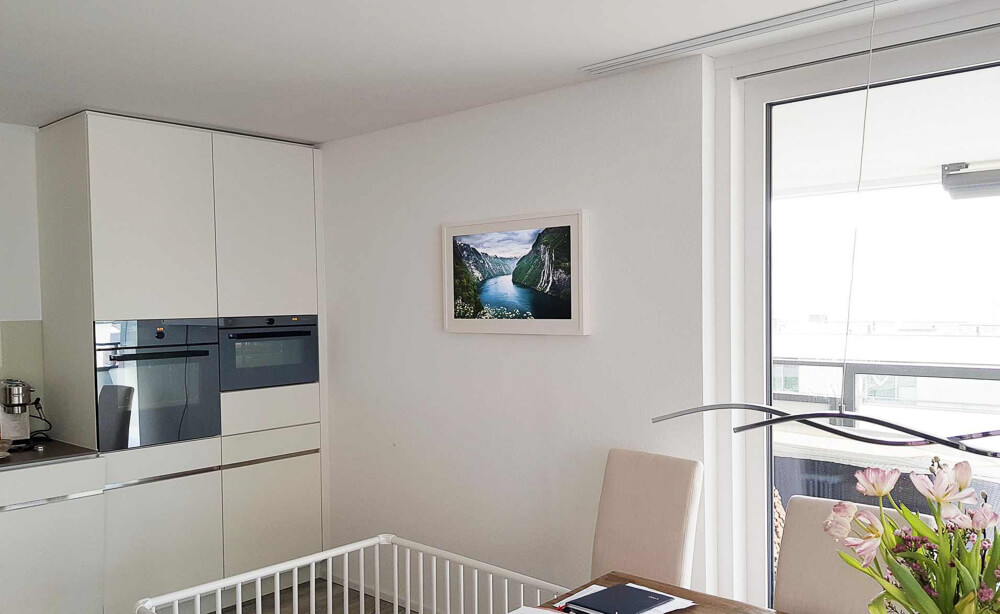
| Description | A 32-inches 4K display in an exclusive tailormade white wooden frame. The wooden frame has two slots along the top and bottom for cooling. This allows closing the gap between the wall and the frame. |
| Hardware | Raspberry Pi 4, Eizo EV3237 4K monitor |
| Software | Pi3D image viewer, MQTT for remote control |
| Notes | The Eizo EV3237 has a nice working ambient light adjustment. The sensor was placed on top of the frame. All settings can be done via USB. The power consumption is exceptionally low for a 32′ by activating the dimming of the backlight LED in the settings. For the components, I tried to achieve the minimum height. To do this, I mounted the electronics prints directly on the back of the screen. |
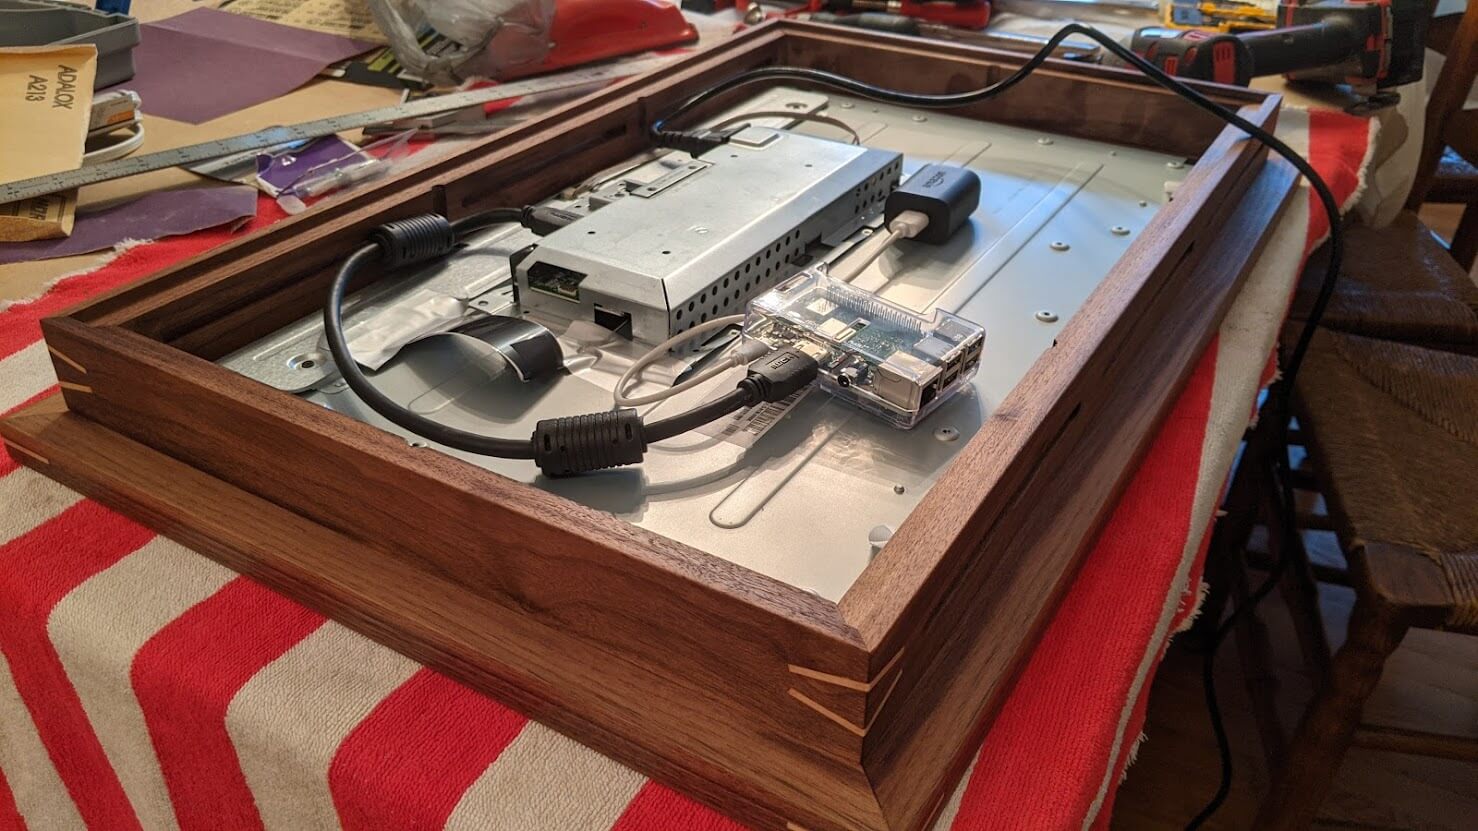
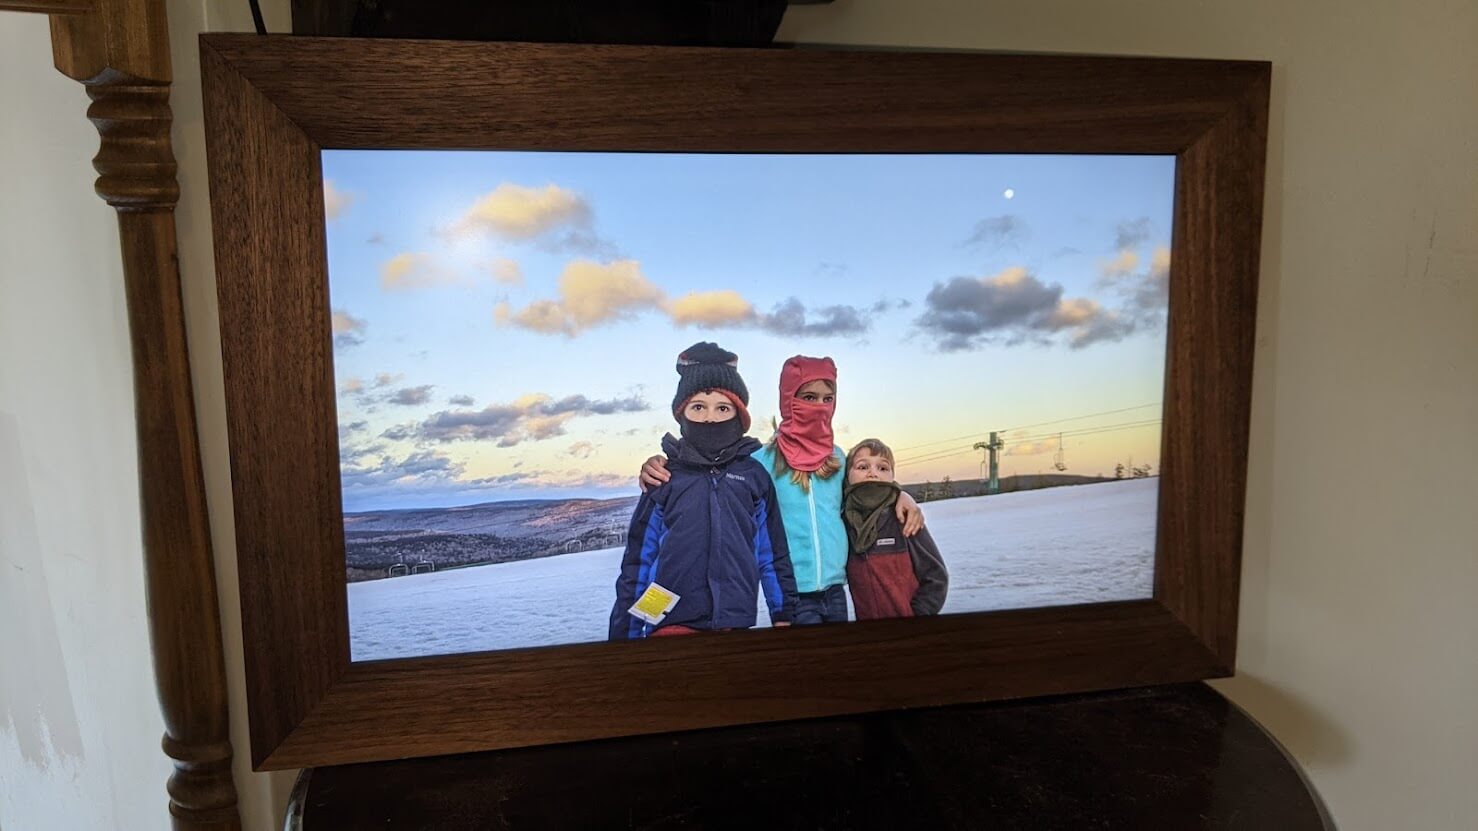
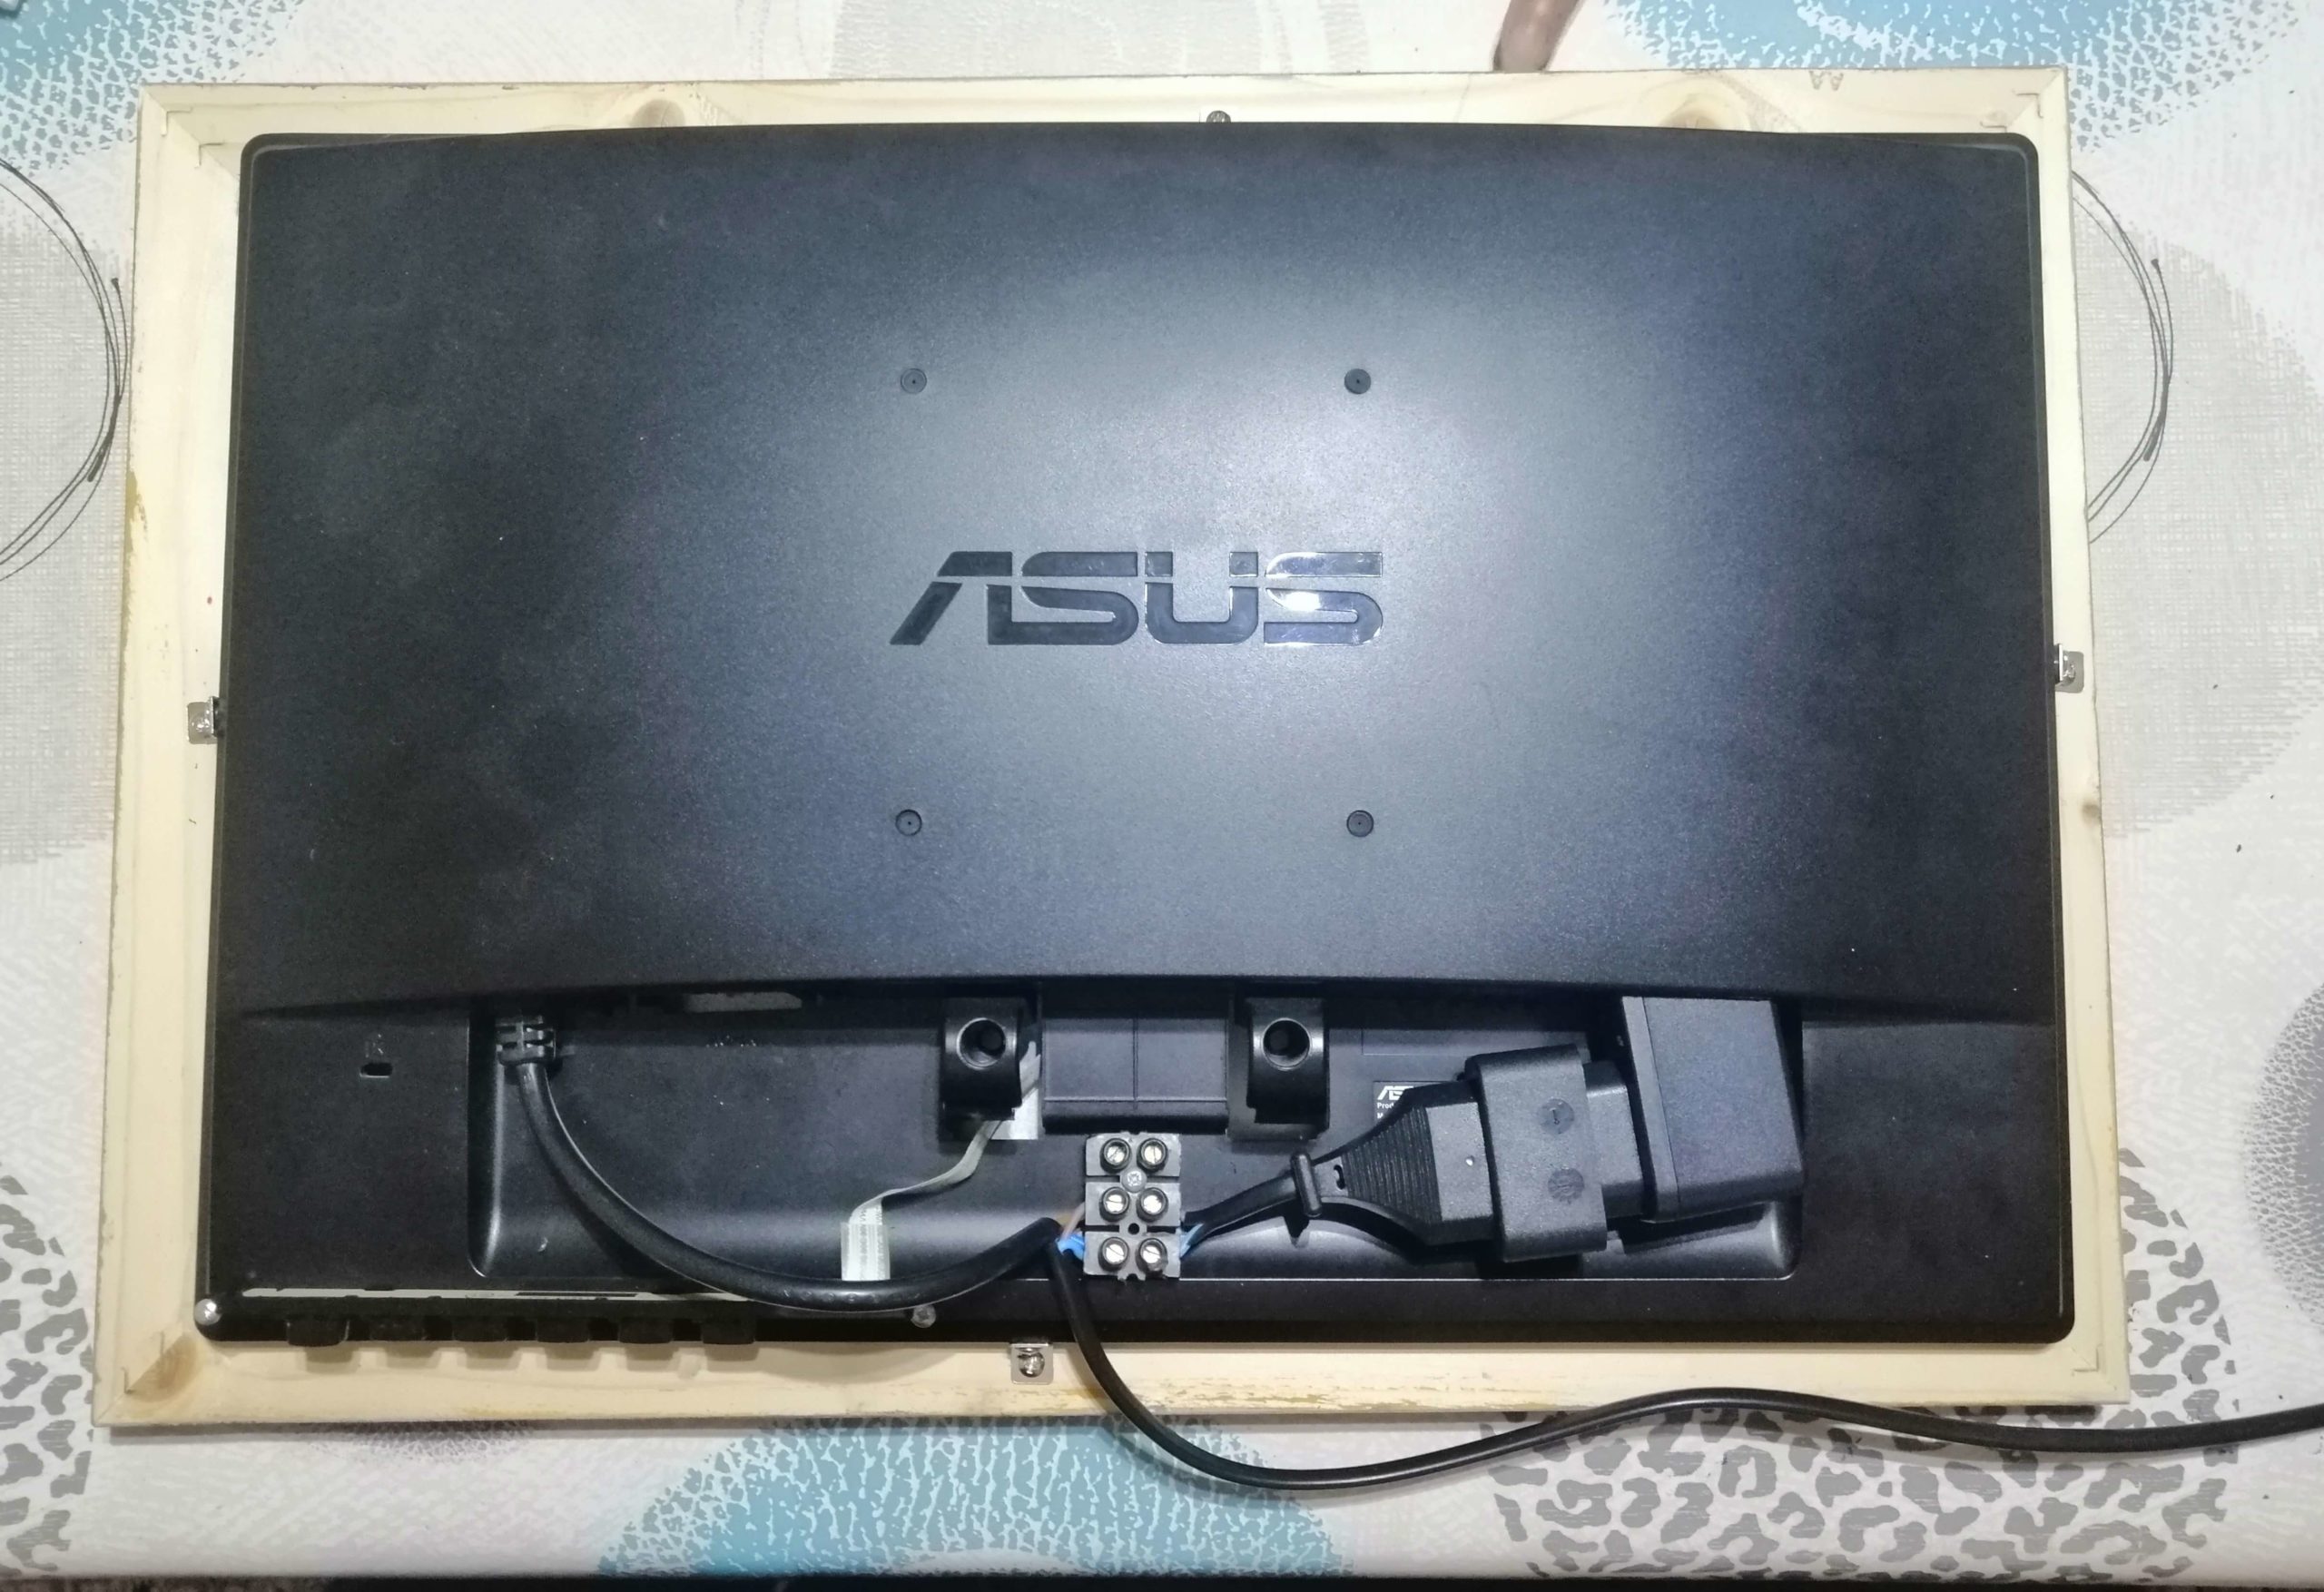
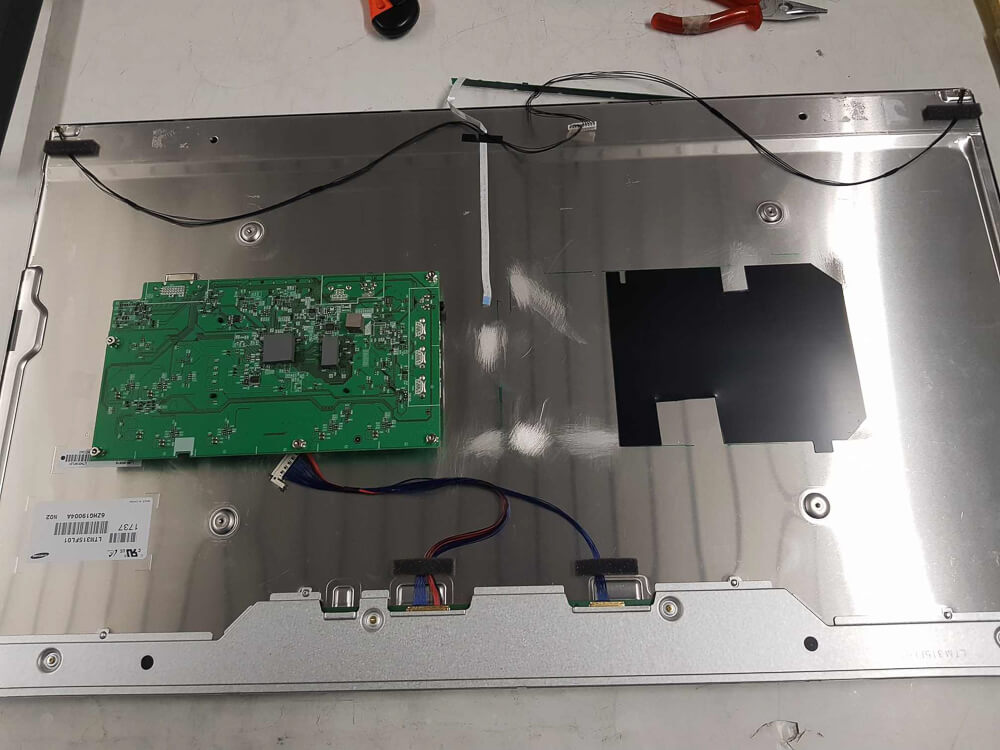
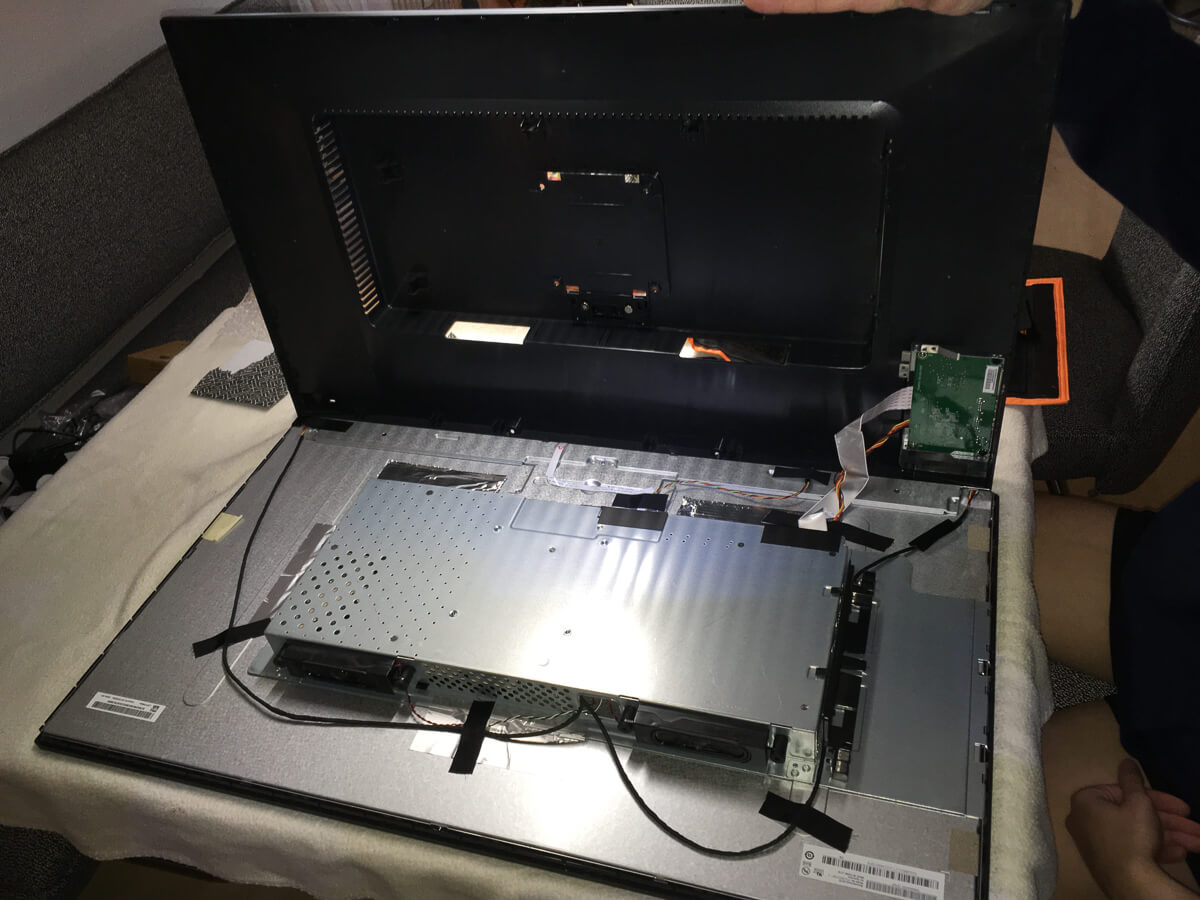
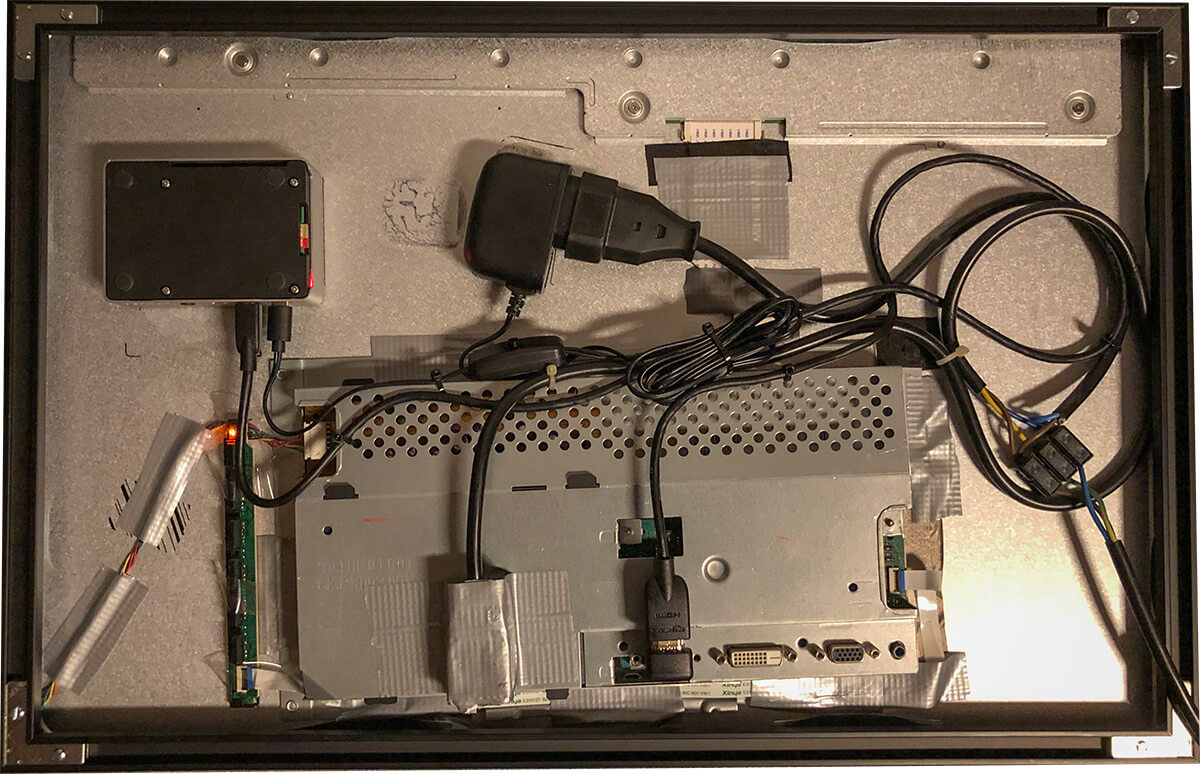
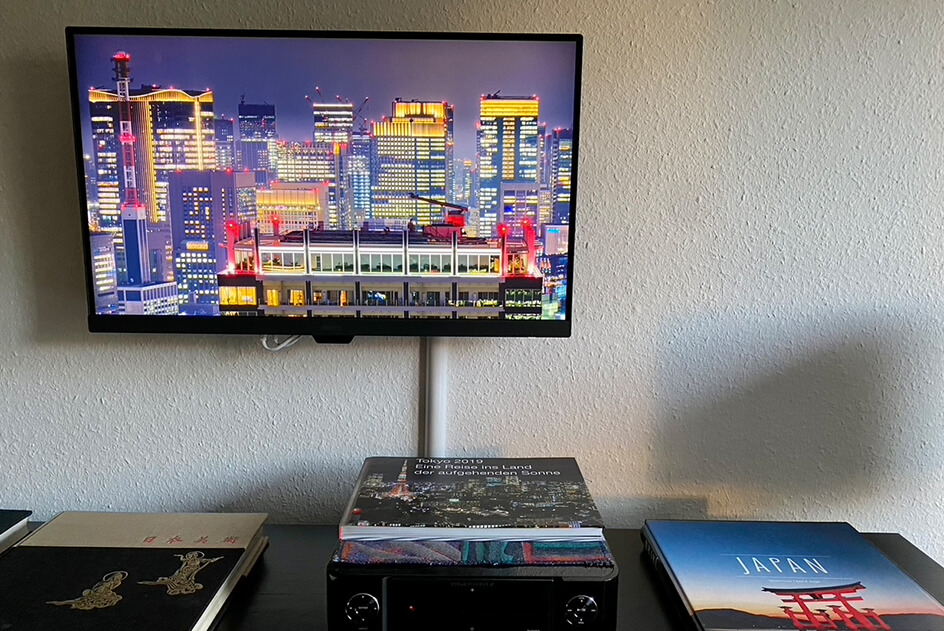
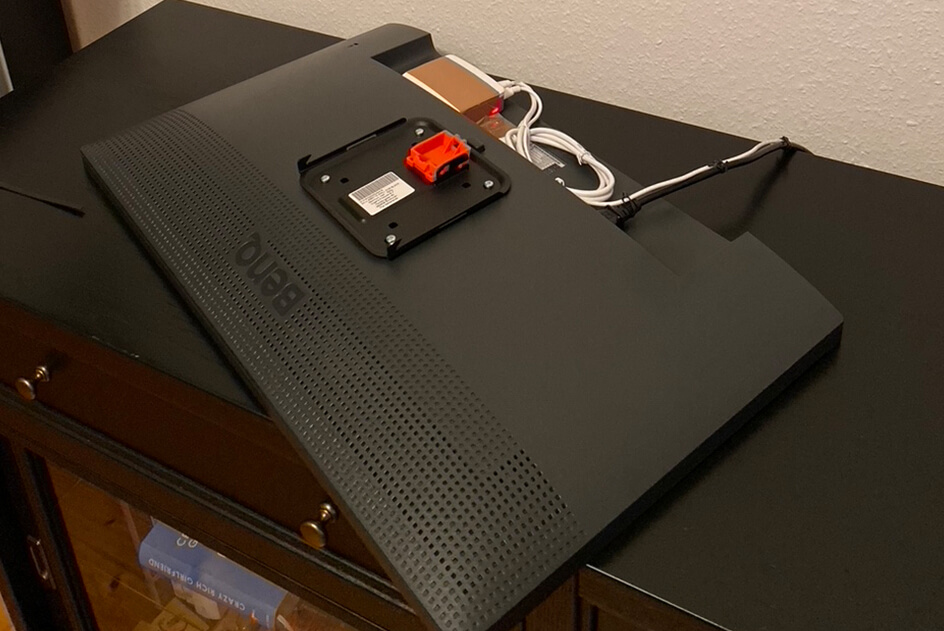
Daniel from Karlstein, Germany
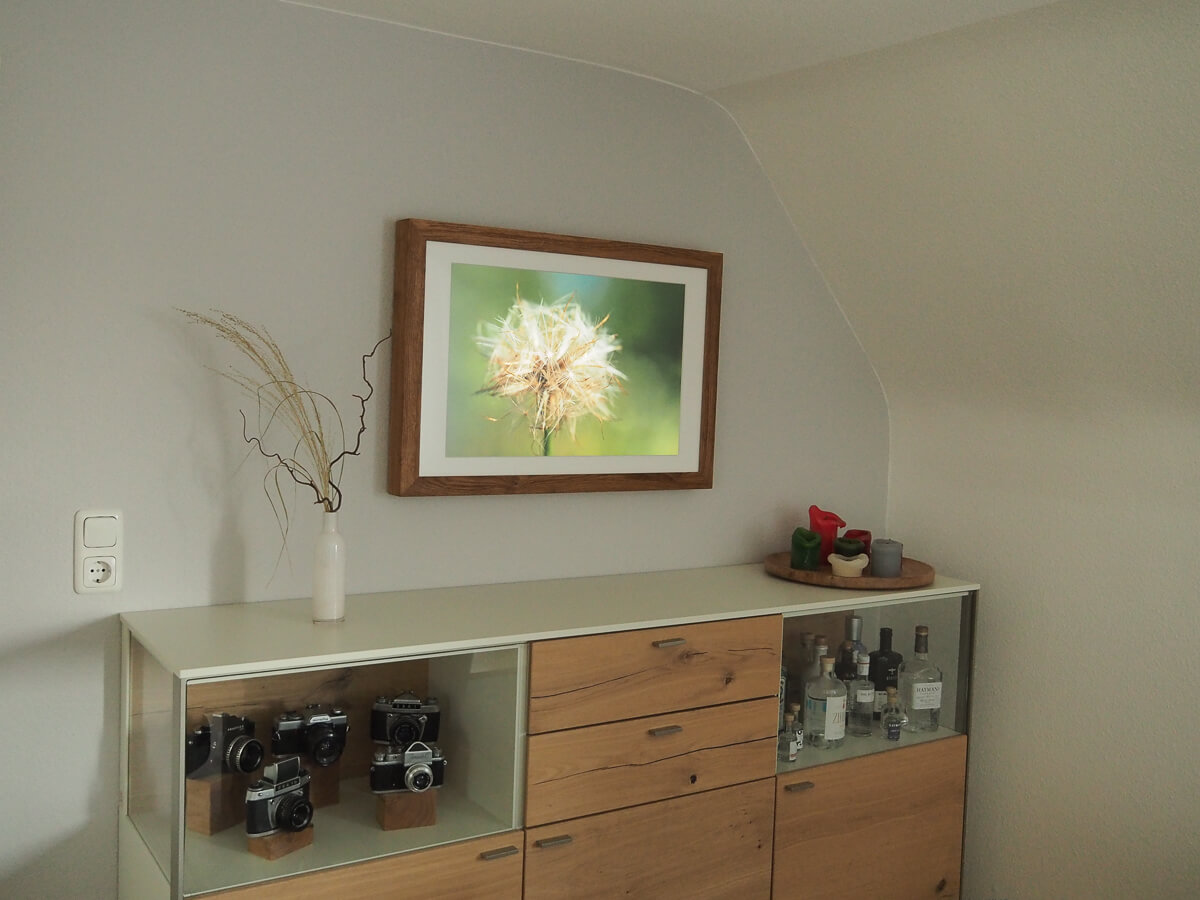
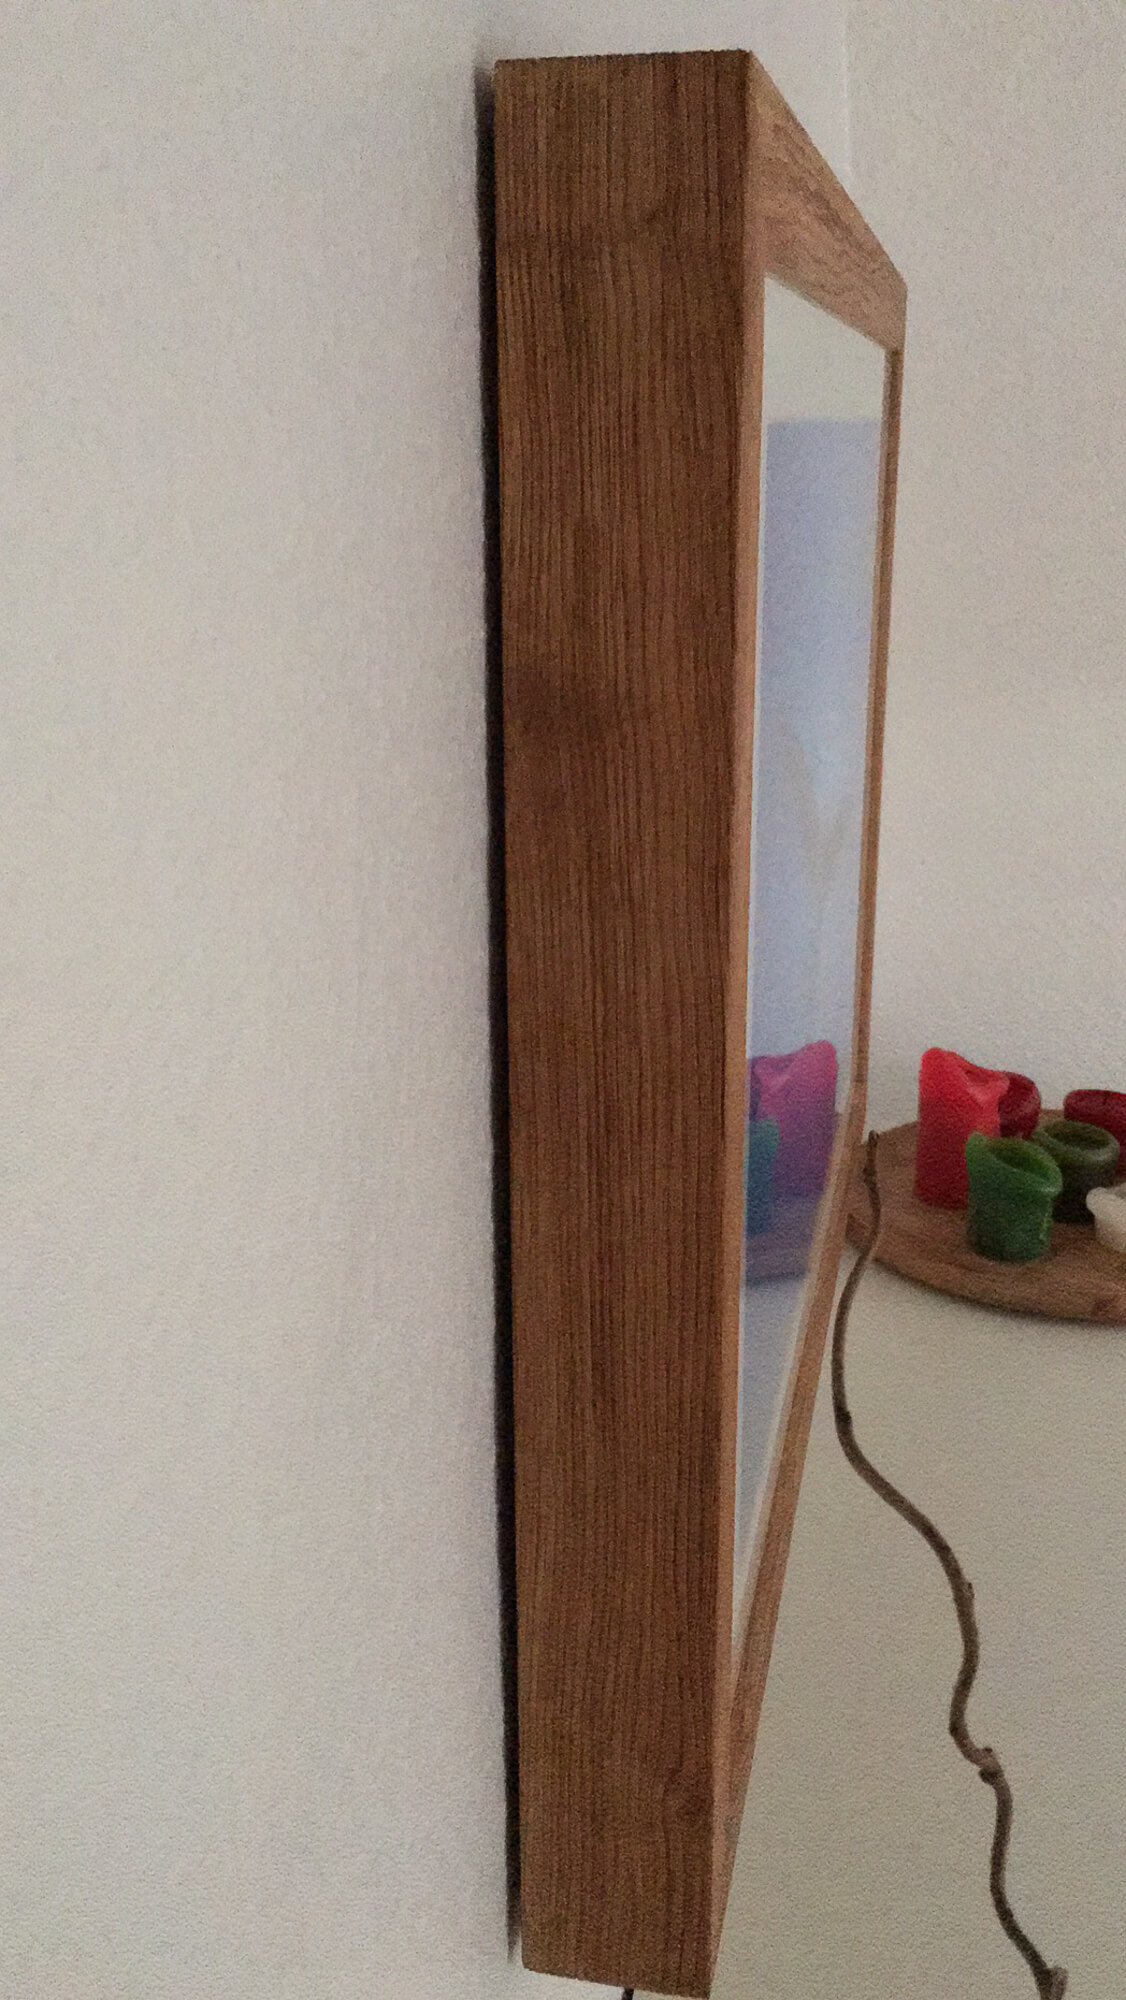
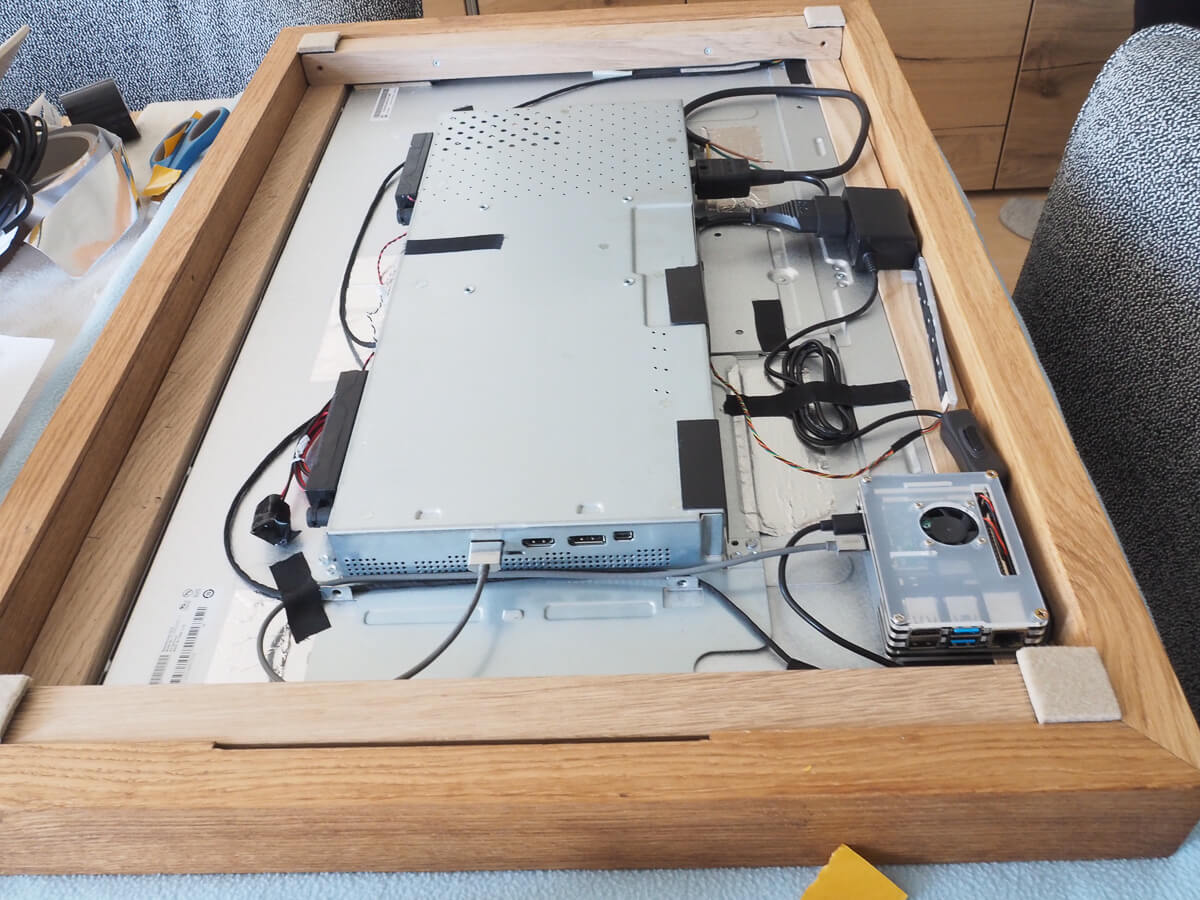
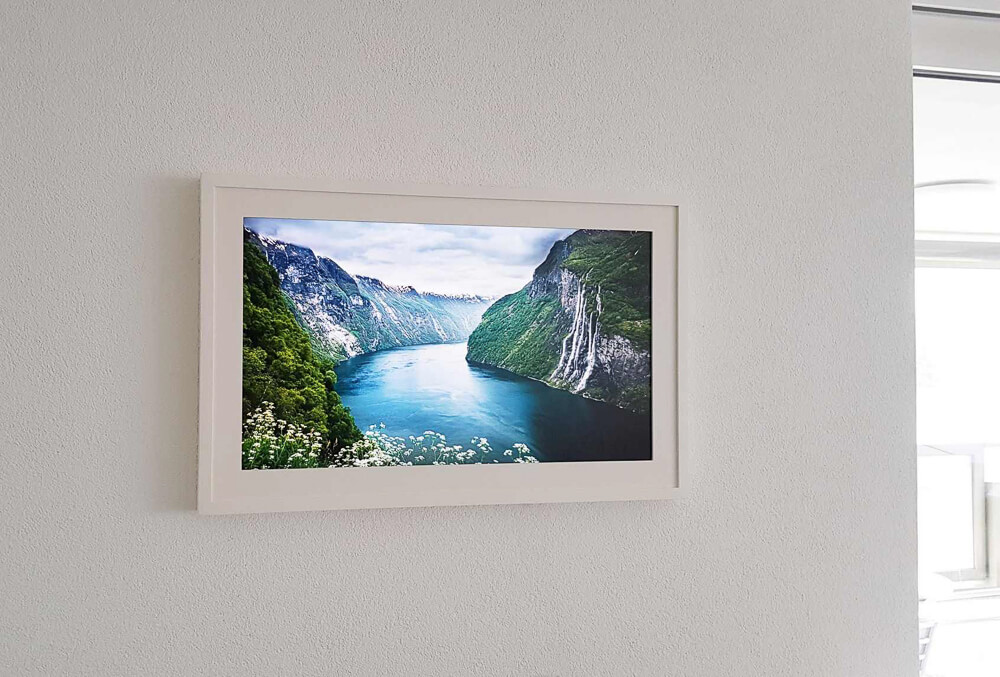
| Description | A 32-inches 4K display in an exclusive tailormade wooden frame |
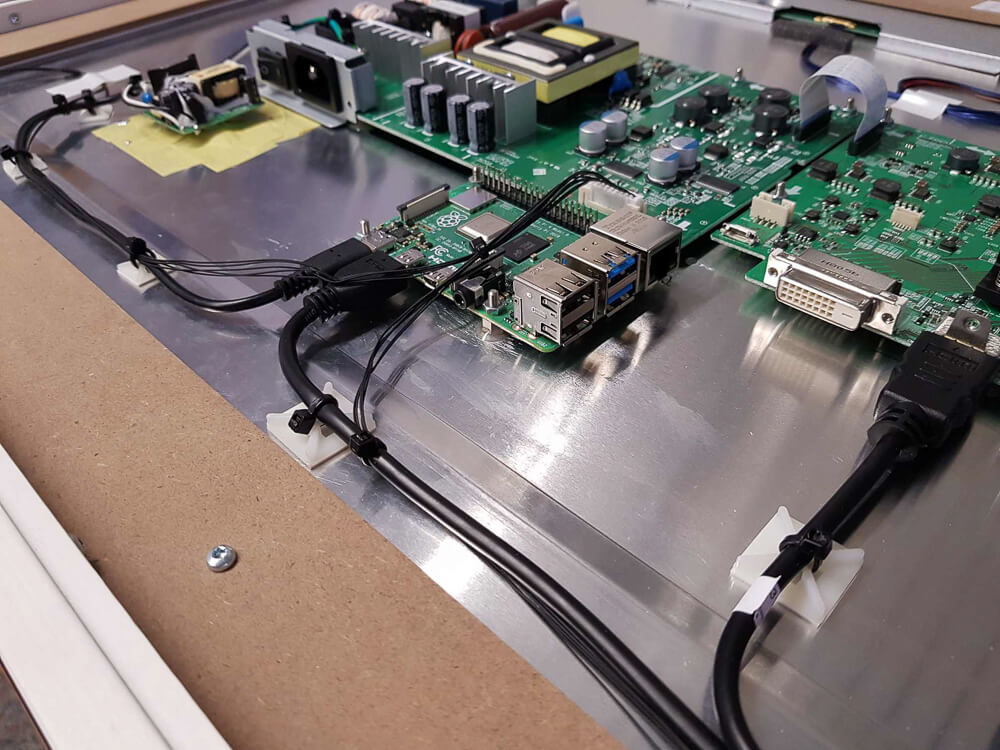
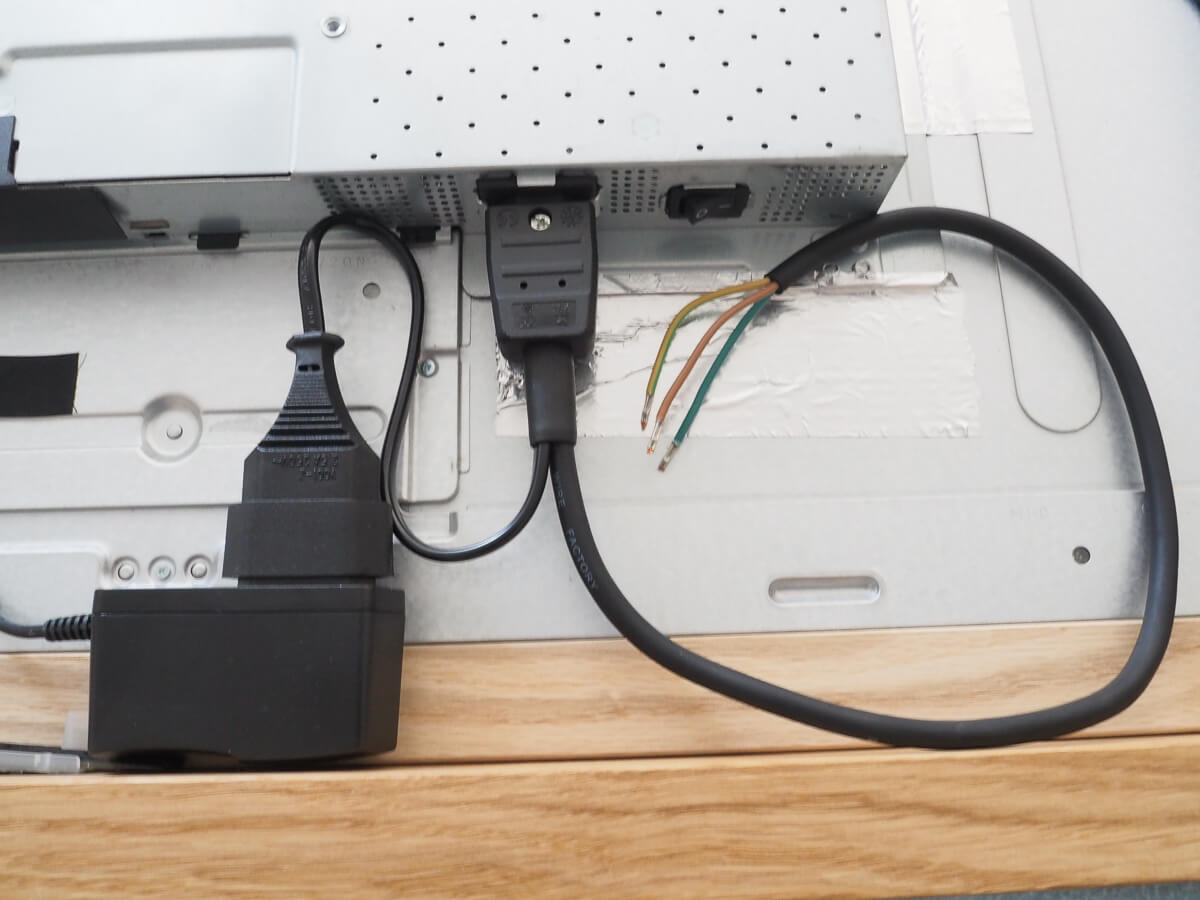
| Hardware | Raspberry Pi 4GB, 128 GB SD card, Pi case including heatsinks, BenQ 3200U 4K monitor Regarding the monitor, I was inspired by Rob’s story. However, I decided not to remove the technology box but construct the frame a bit deeper (just under 1cm). I was able to remove the case as described in Rob’s post, and with a lot of patience, I was able to open the frame undamaged with picks. Originally, I had planned, like Rob, to supply the Raspberry via a voltage converter to the monitor’s power supply. I had even designed and 3D-printed a case for this. However, it seemed safer to me to branch off the power supply at the monitor’s input. For this purpose, I bought a cold-device plug (C13), in which I accommodated both the supply and the branch to a Euro socket. |
| Software | Pi3D image viewer, Samba server, MQTT for remote control, a few self-made scripts on the Raspberry Pi, and the iOS Shortcuts app which is controlled via widgets |
| Notes | For frame planning, the first thing to determine is the desired visible image format. We decided on 3:2. Furthermore, for the matte, it must be considered whether this should also have 3:2 OUTSIDE or the same frame width on all four sides. This is not the same! We decided on an outside format of 3:2. Here are the dimensions in case anyone wants to recreate the project exactly: Frame: Outside dimensions 791x548mm, light dimension 711x468mm, profile width 40mm, rebate dimension 731x488mm, frame depth 60mm. Matte: outer dimension 729x486mm, centered inner cutout with bevel 591x390mm In addition, strips are needed at the top and bottom of the frame for padding. The LCD panel has an aluminum frame that is wider at the bottom than at the top, so the ledges are different! Top: 729×34,5x16mm (WxHxD) Bottom: 729×29,5x15mm (WxHxD) A 3mm thick, anti-reflective glass plate forms the front closure. The cooling is currently done via a shadow gap with about 5mm wall distance. The suspension is done via a bar, which has recesses to the wall so that the warm air can also escape via the shadow gap. |
Tim from Phoenix, AZ, United States
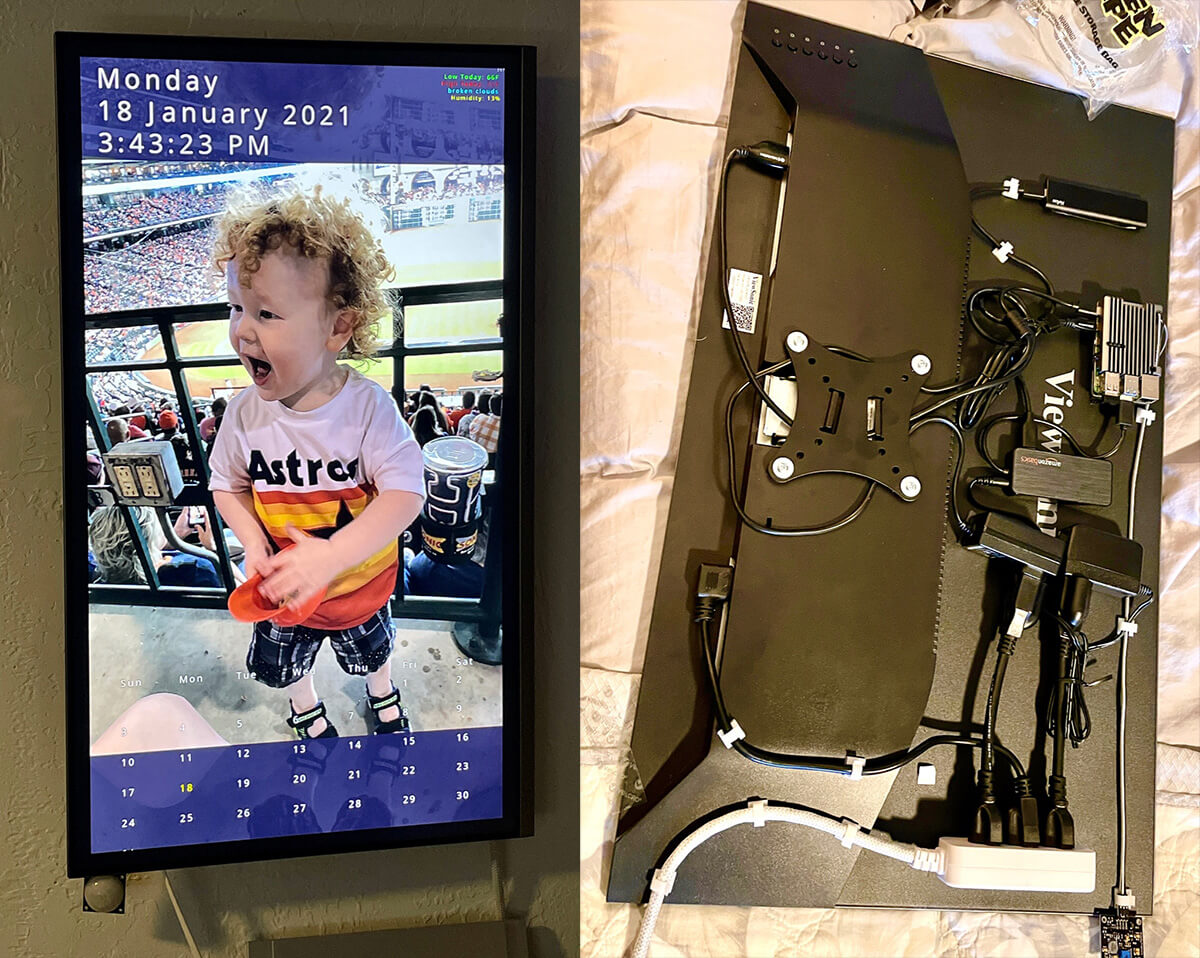
| Description | A 2K-32″ Calendar/Frame (cheat) |
| Hardware | Raspberry Pi 4GB, Viewsonic VX3276 MHD 2K, Netac 500Gb Slim SSD, SwiftMount LP VESA, Parallax 28032 Wide Angle PIR Sensor, BT Keyboard/Trackpad, Powered USB Hub. Attached hardware to monitor with Alien tape and HD Velcro (easy to move/remove); fake frame (privacy coverage) with 2″ Gaffers tape + hot glued corners. Constructed in two phases, without a frame (for the test) and with; finding a monitor that is thin with down-facing connectors with VESA mount was critical. |
| Software | Pi3D image viewer with modified PictureFrame.py, Samba server |
| Notes | Bluetooth keyboard/trackpad allows info to be added/stored to Calendar; back of the monitor allows all hardware to be hidden by tape; top open to allow heat to escape. Infrared sensor (PIR) has a true 30′ range and + 180-degree field of view (it’s expensive at $15, but really works (I’ve used commercially) if no motion is detected for 5 min (configurable), it powers down the screen, power up on motion (<1s). Could not get RPi to boot from SSD without powered USB Hub (timing not power delivery). I will use Frame’s 500GB storage to host other Frames, 6K images now, and the other 35K will be downloaded from Google Play. Plan to add organization by folder (+40K images) and selection via keyboard (pop-up menu) and or Google/Alexa eventually. Frame software looks for change after every randomised cycle for new images. Has local weather info top right of frame with screen power down countdown. Many PictureFrame options made configurable (Source from Sept 2019, been working on it for a while). |
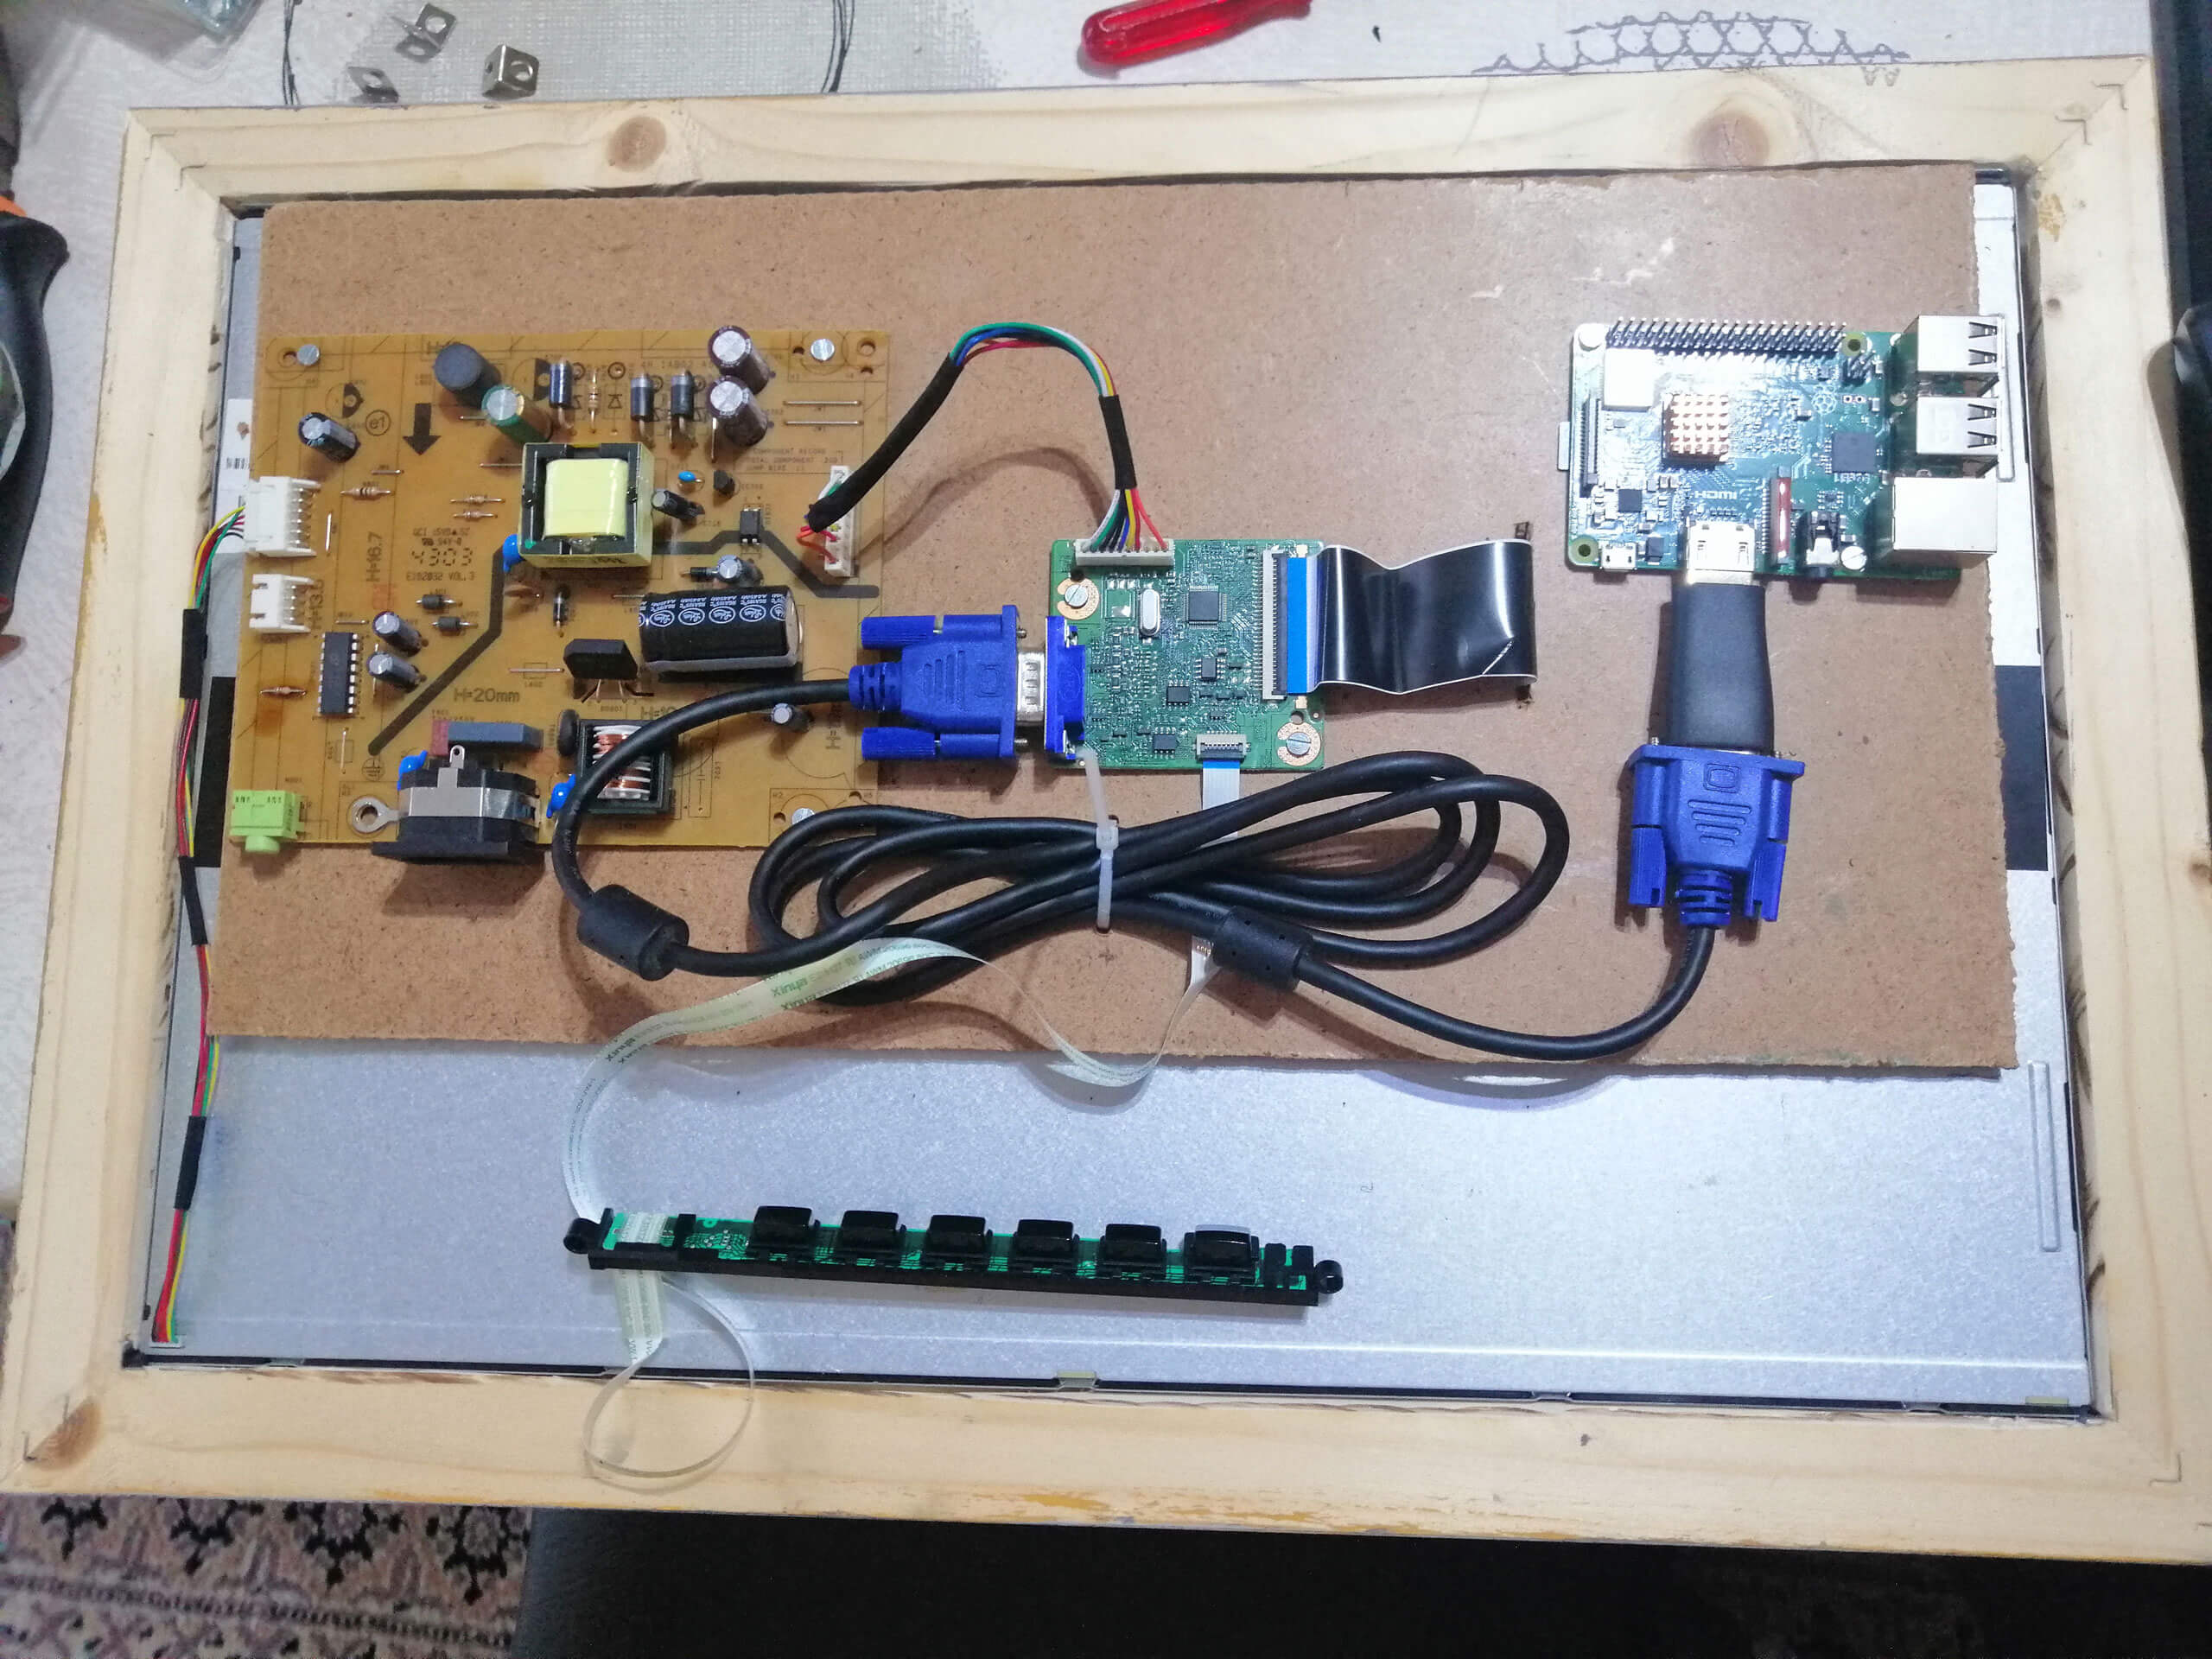
Jason from Palatine, IL, United States
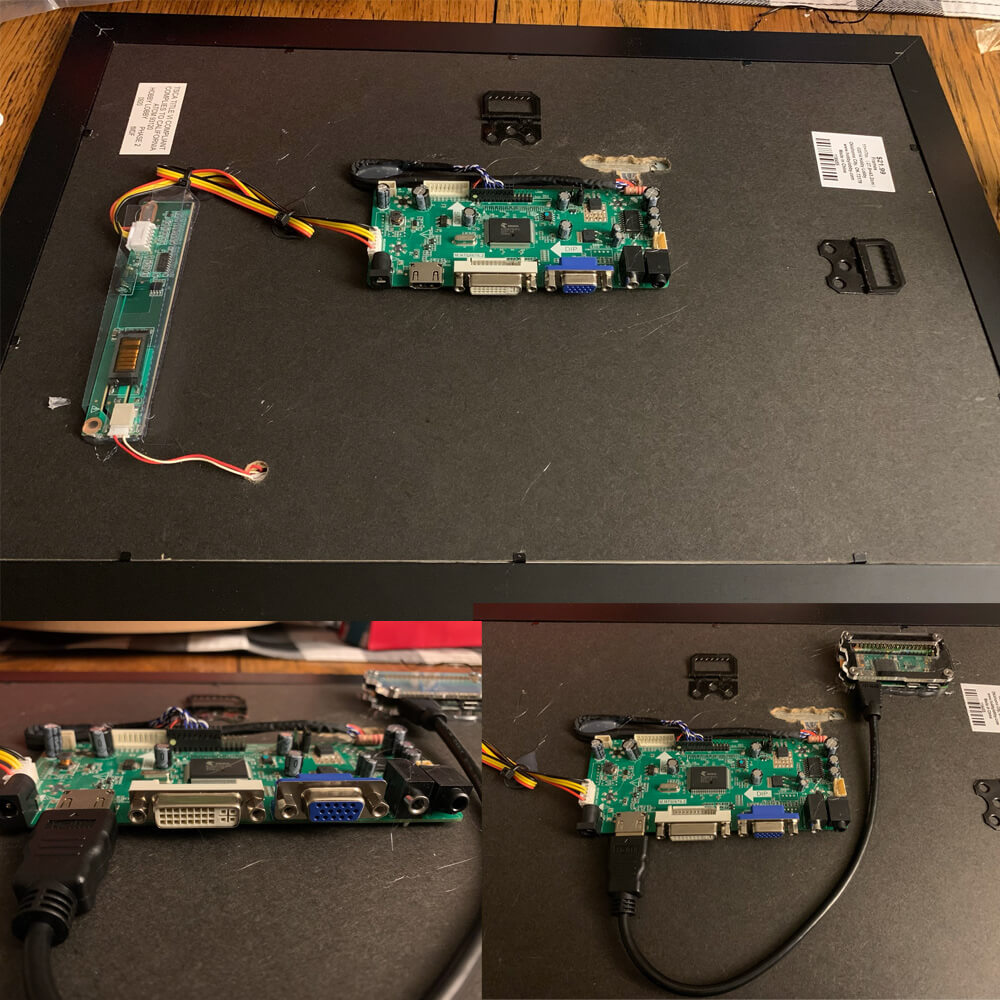
| Description | An amazing frame from an old laptop screen! |
| Hardware | Raspberry Pi Zero W; 15.6″ 1366×768 TFT Panel from old Compaq laptop with a controller board from Amazon |
| Software | Pi3D image viewer, Samba |
| Notes | Create a password-protected Samba share from the default /pi/home/Pictures directory. That way you can send photos from any computer in the house. Default transitions are working beautifully from a Pi Zero despite the instability warnings! I set blur_edges to true, so portrait photos aren’t super zoomed in. Even with landscape photos, we have our phones set to 4:3, so it won’t zoom those in either. Next on my list is to source a much better IPS panel. Viewing angles on this thing are terrible! |
Paddy from the United Kingdom
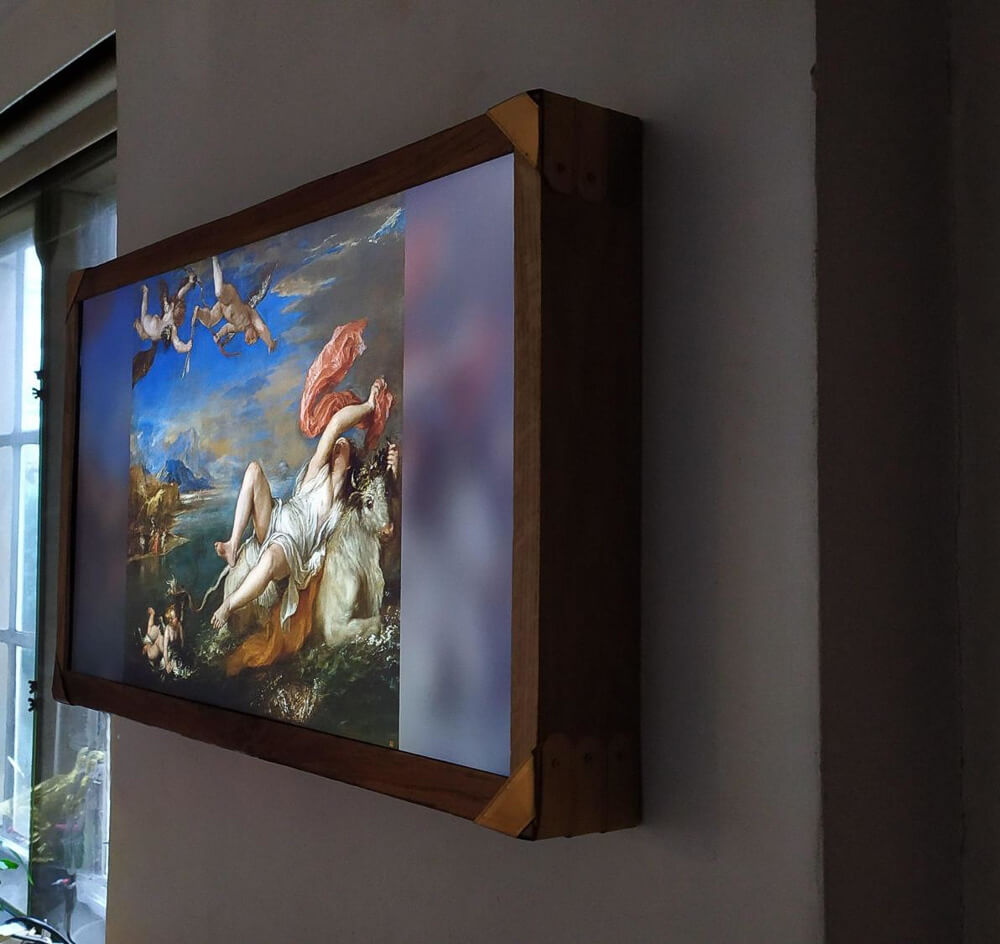
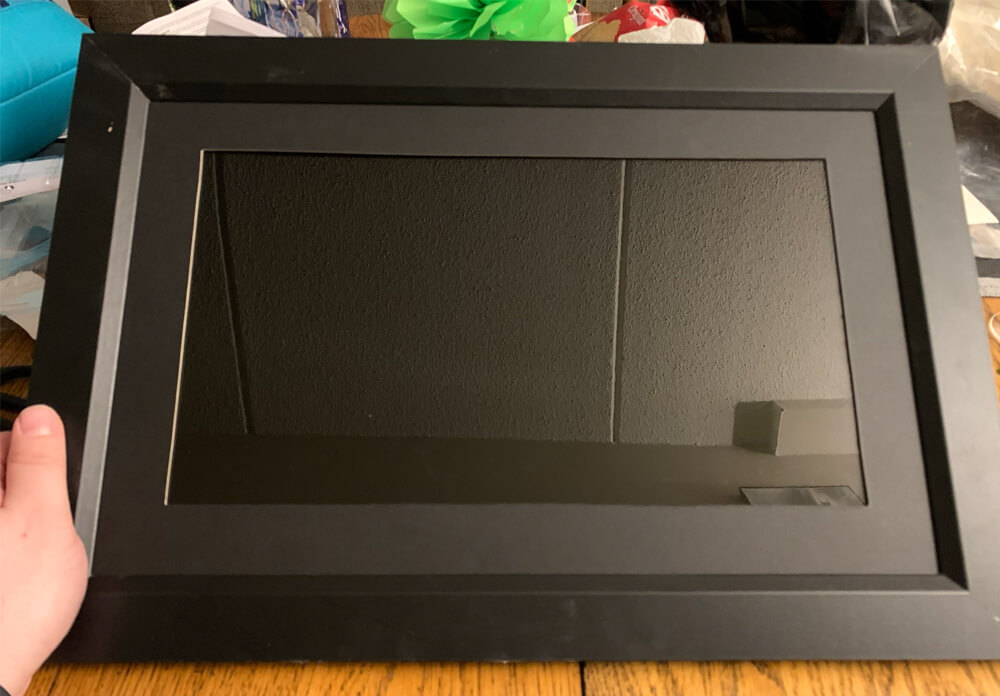
| Description | A 16:9 aspect ratio, 27” digital picture frame with the bleeding edge Pi3D Develop Branch code |
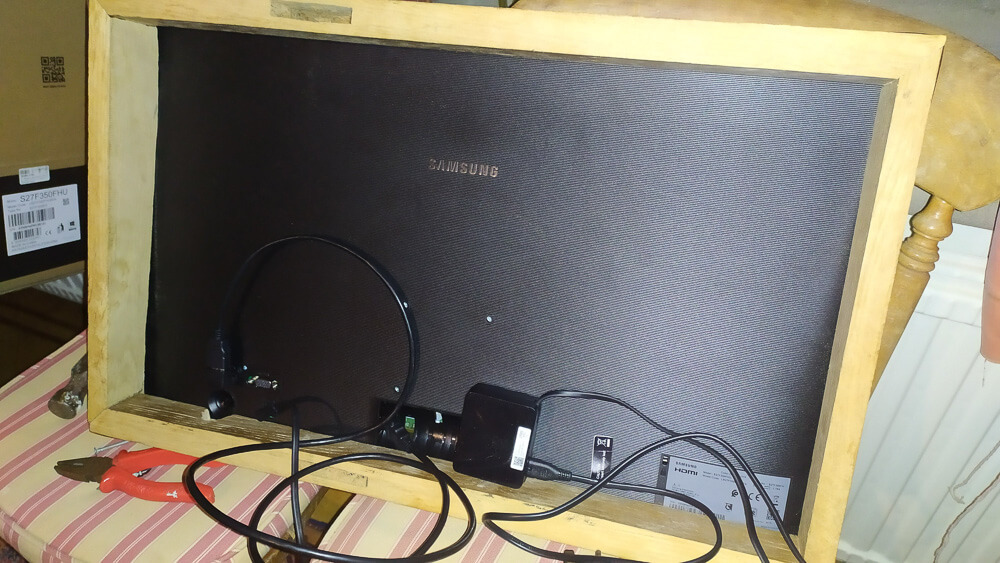
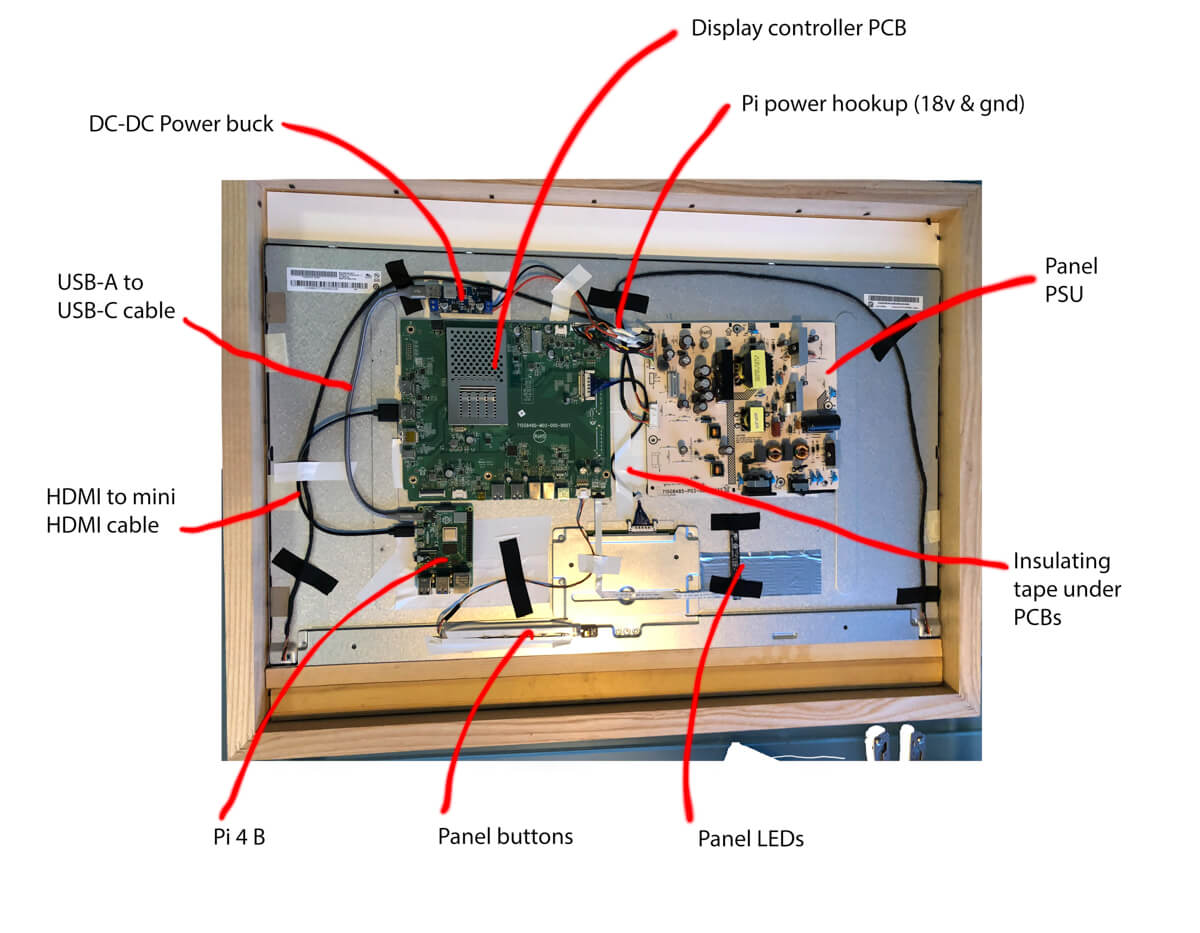
| Hardware | Raspberry Pi 3, 27” Samsung S27F350FHU 1920 x 1080 px monitor, custom made wooden frame |
| Software | Pi3D image viewer, MQTT Mosquitto |
| Notes | Paddy is the author of Pi3D PictureFrame, the script I universally recommend for the image viewer software. He says: “If I went for a full strip-down including hacking the board to turn the HDMI socket on its side on the circuit board (or soldering on an additional one), then it could be a really thin monitor… but given the risk of breaking it, I decided to get a 90-degree adapter for the HDMI cable and build the frame as a kind of box using some spare oak boards I had lying around. There is actually more space than I need, so I might trim the whole thing down at some stage.” |
Dave from Virginia/United States


| Description | A 4:3 aspect ratio, 22” digital picture frame with Email-2-Frame feature and modded Pi3D script |
| Hardware | Raspberry Pi 3, Acer SB220Q bi 22” IPS monitor, custom made wooden frame |
| Software | Pi3D image viewer, MQTT Mosquitto, Email-2-Frame, iOS Shortcuts |
| Notes | For the full story of this project, read Dave’s article here. |
Rob from Cardiff/United Kingdom

| Description | A superslim 32-inch 4K digital picture frame based on the BenQ PD3200 and the Raspberry Pi 4 |
| Hardware | Raspberry Pi 4, BenQ PD3200 32” monitor, custom made wooden frame with a mat to fit 3:2 images. |
| Software | Pi3D image viewer and other software as described here. |
| Notes | For the full story of this project, read Rob’s article here. |
Josh from Flint/MI/United States
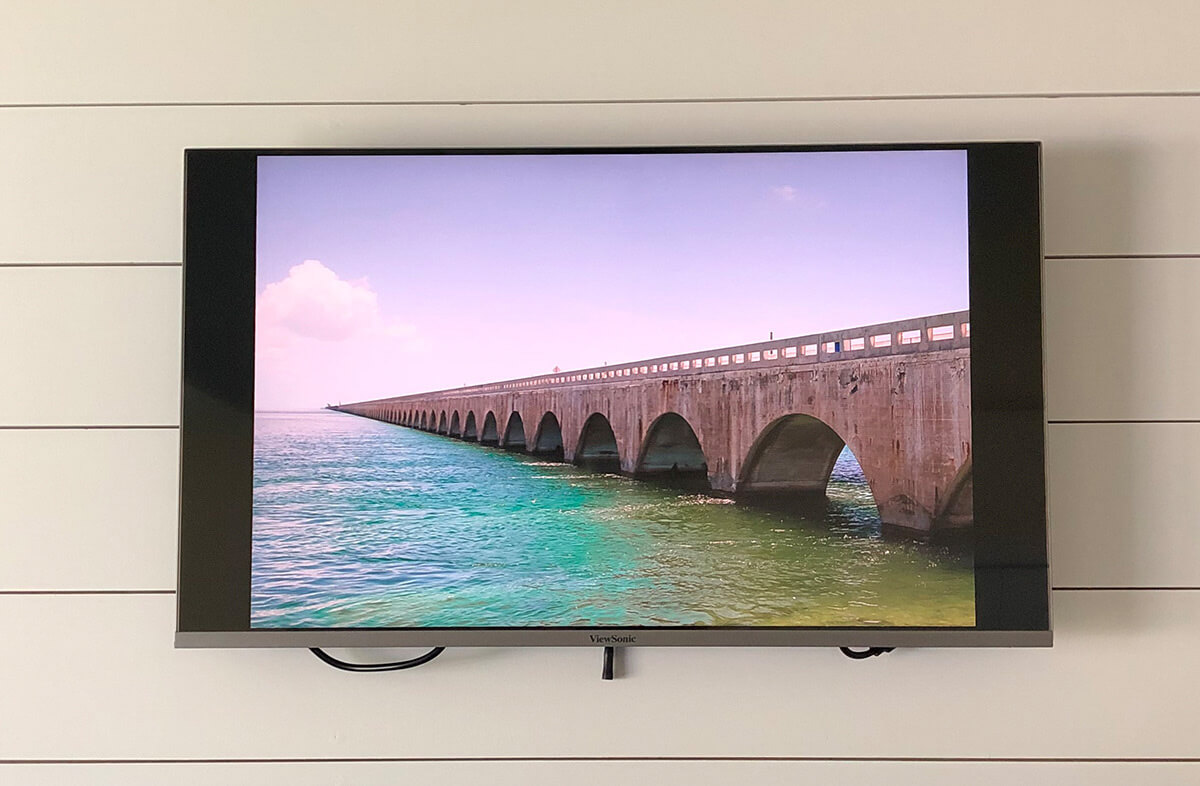
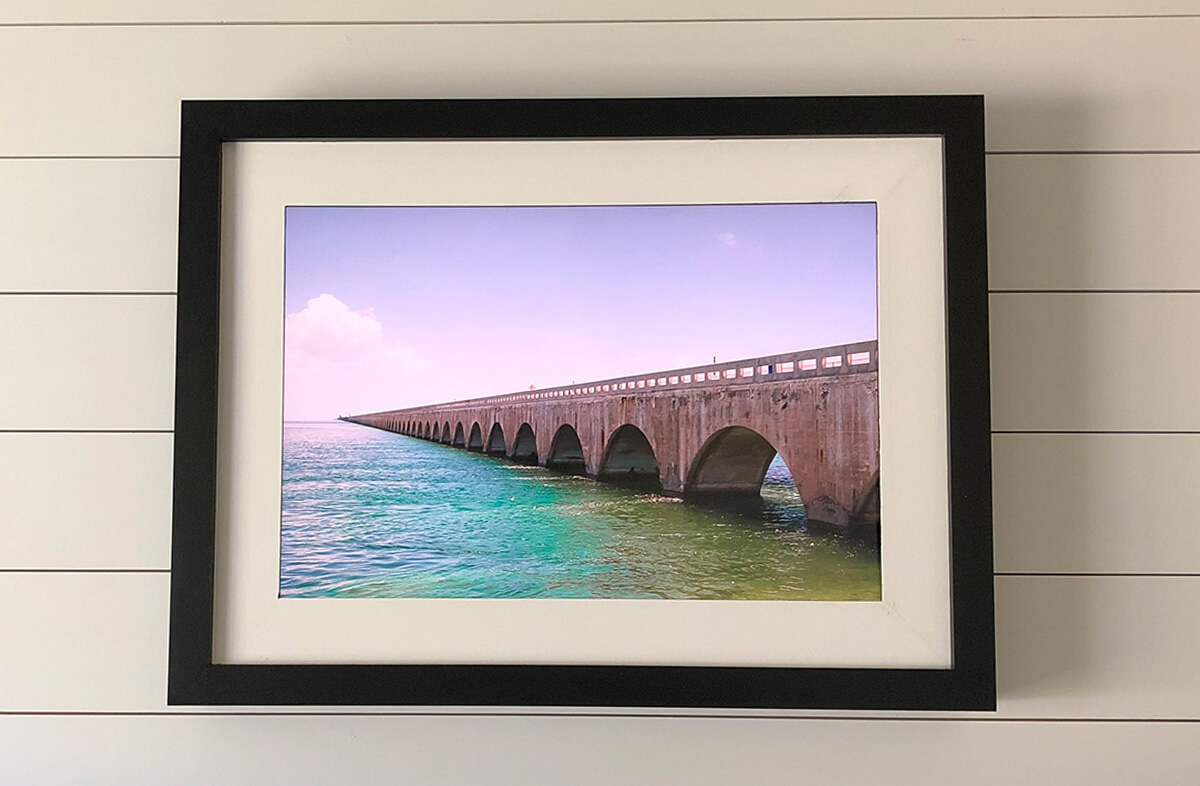
| Description | A 32” monitor matted to a 3:2 aspect ratio with a wooden structure to hide the cables. |
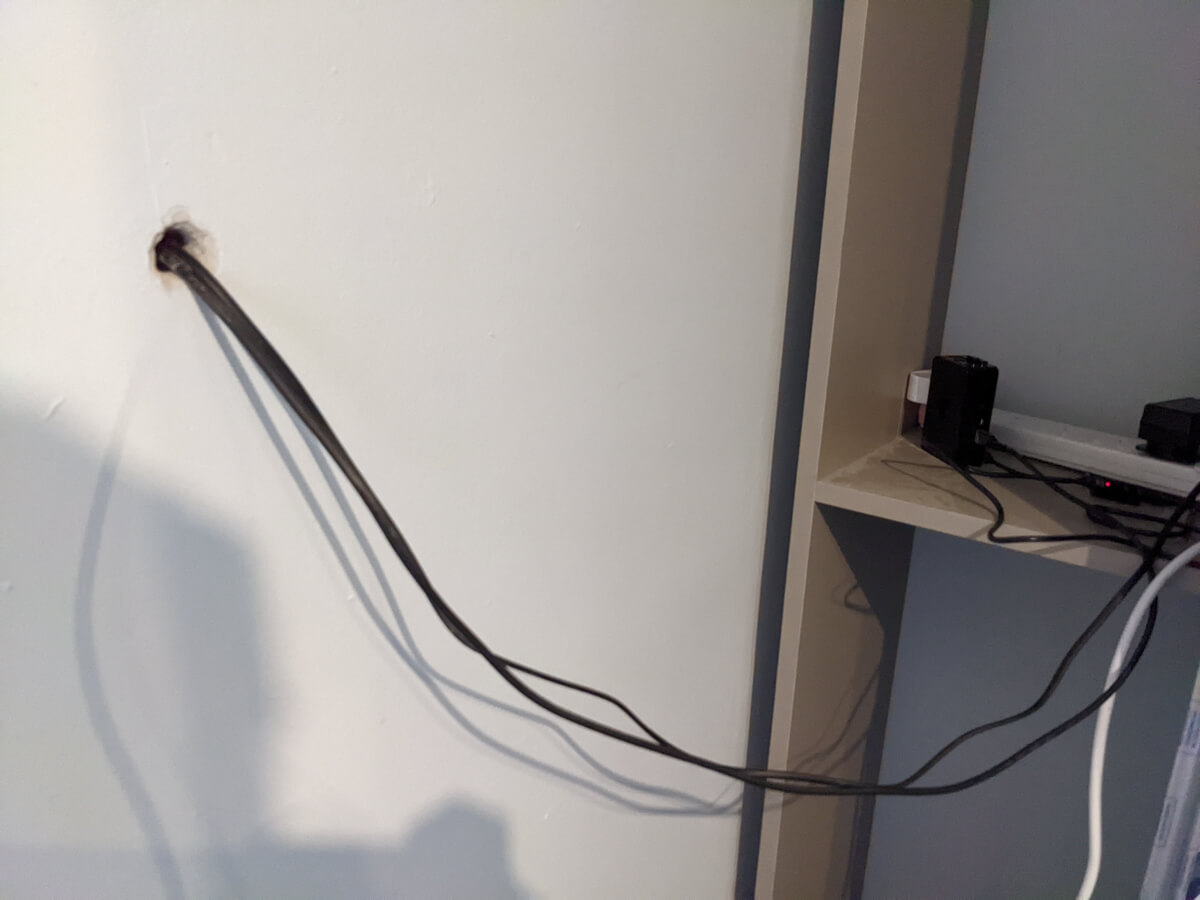
| Hardware | Raspberry Pi 3B+, ViewSonic 32” monitor, SanDisk 64 GB MicroSD card, custom made wooden frame with a wooden mat to fit 3:2 images. The power is supplied with a flat extension cord. The cord is hidden behind the shiplap, mantle, and trim. |
| Software | Pi3D image viewer, Syncthings, Samba file sharing, and PiHelper. |
| Notes | For the full story of this project, read Josh’s article here. |
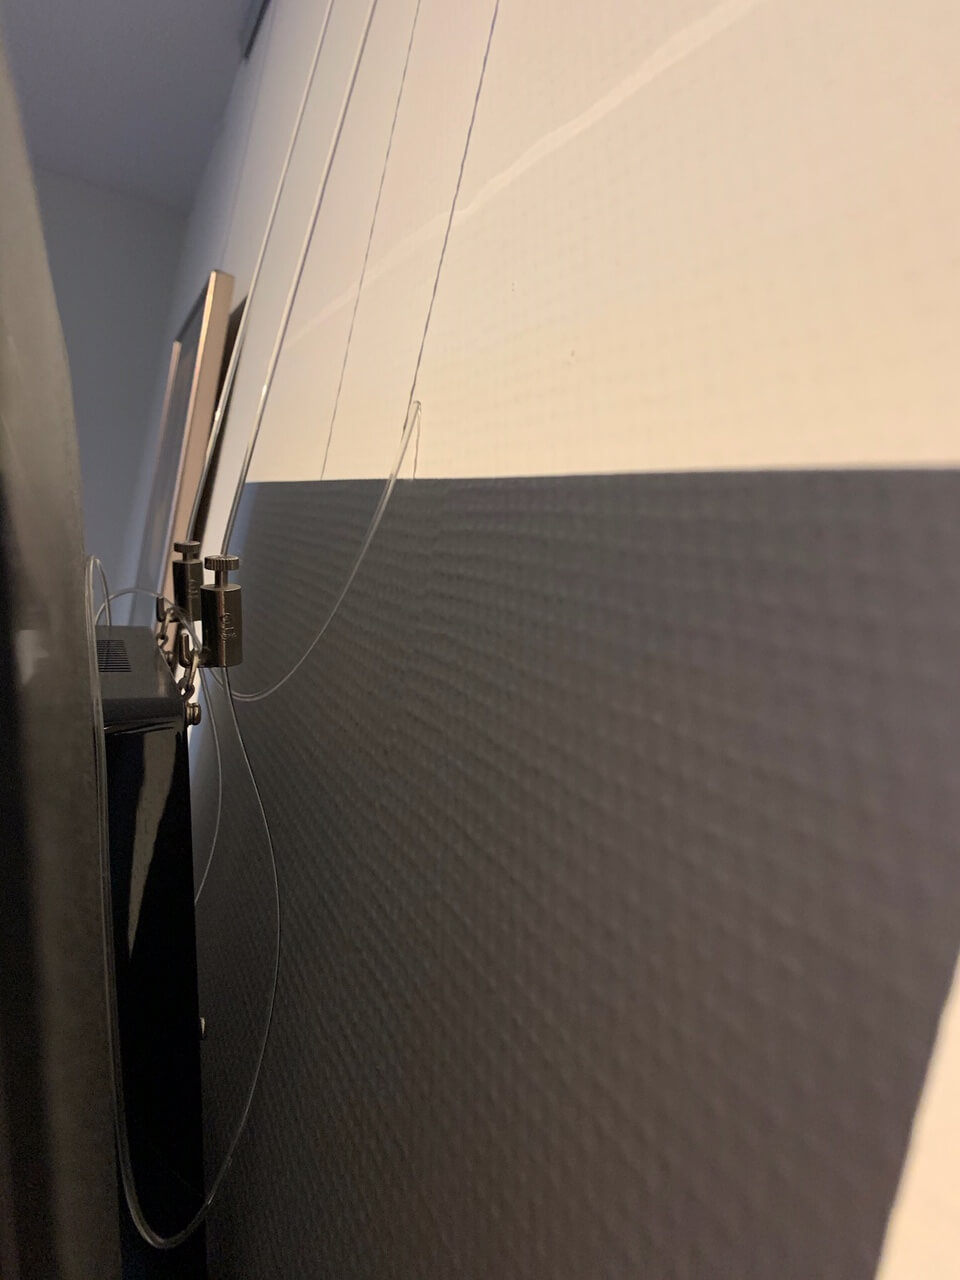
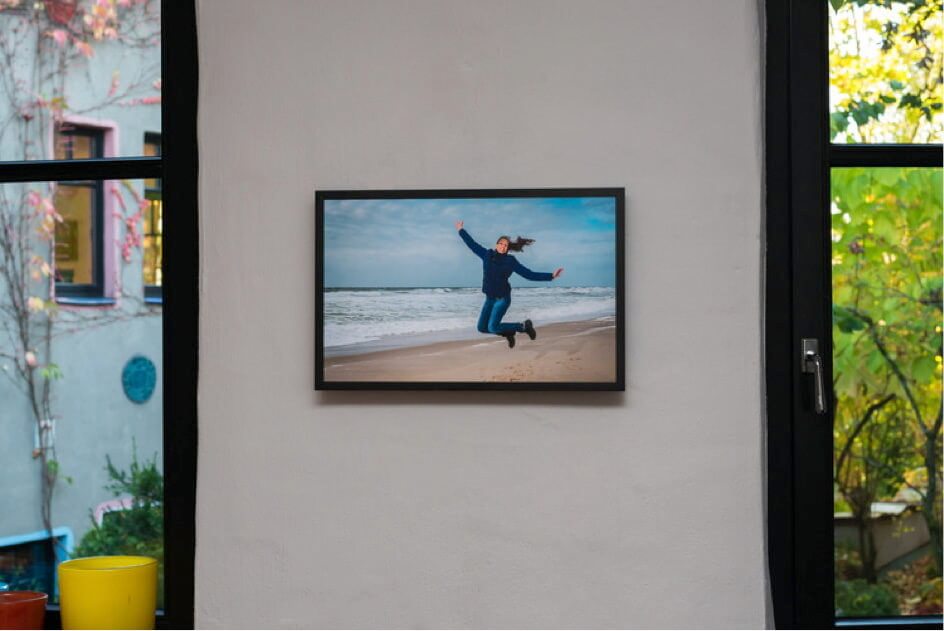
Fred from The Netherlands
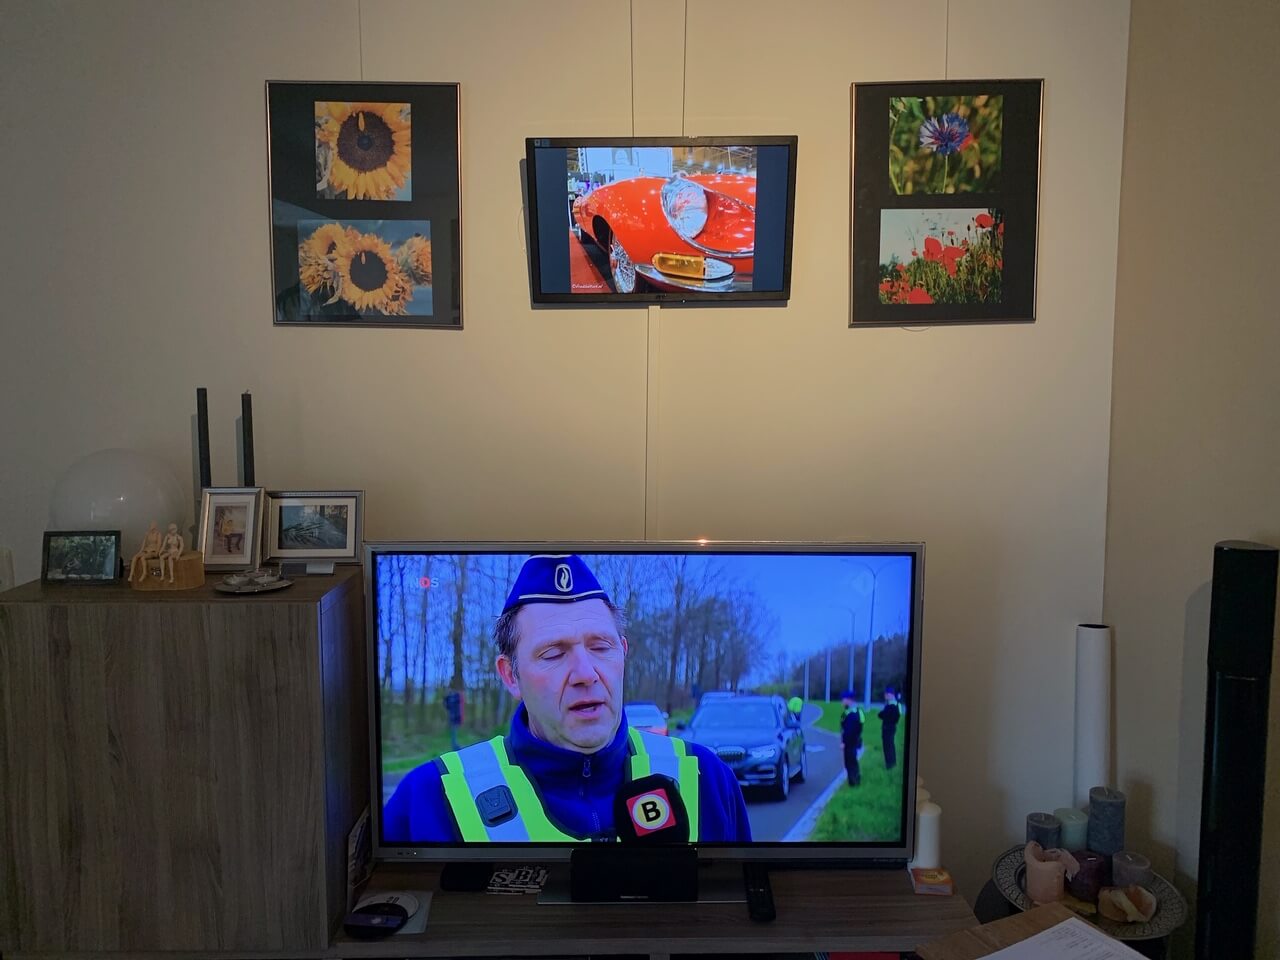
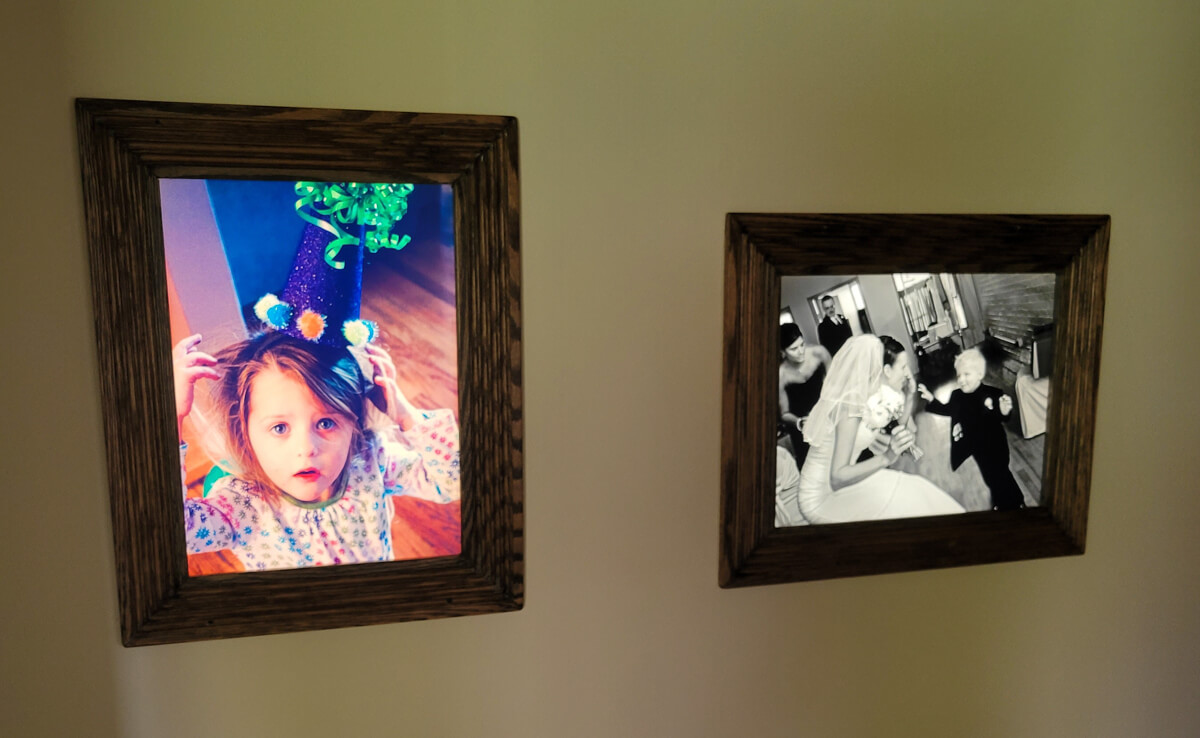
| Description | A digital picture frame among analog ones |
| Hardware | Raspberry Pi 3. AOC IPS screen with VESA mount. I make use of the Artiteq Hanging system. On the back I have screwed two hangers, so the display is hanging like other photos. |
| Software | Pi3D, Images are stored on a NAS system to which the Raspberry Pi is connected via WiFi. |
| Notes | The power and also the HDMI cable comes from beneath where it is connected to a Raspberry Pi 3. |
Chris from Melbourne/Australia
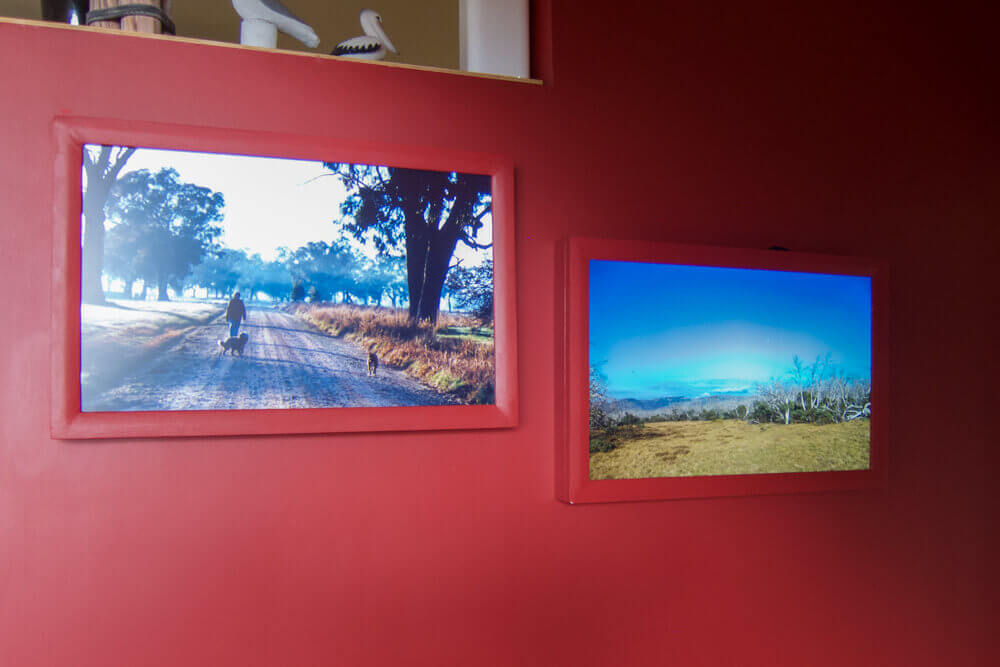

| Description | Two Digital Picture Frames controlled by PiHelper (from iPhone) and SSH (from Mac) with frames made from excess skirting board. The frame is attached to the wall using heavy-duty hollow wall anchors and two keyhole type slots. |
| Hardware | Two 24″ 16:10 Samsung monitors using two Raspberry Pi 3B+ |
| Software | Pi3D and PiHelper (iPhone and iPad version) |
| Notes | If programming with a Mac, don’t use TextEdit. And this Raspberry Pi forum post is also a fantastic resource. |
Wolfgang from Frankfurt/Germany
| Description | 24” 16:10 monitor in a black metal frame |
| Hardware | Raspberry Pi 4, 4GB RAM, Flirc case, 64GB Samsung microSD (updated from Raspberry Pi 3 in Dec 2020). Metal custom-made frame, 24” ASUS 16:10 monitor; find instructions here. |
| Software | Pi3D Image viewer, Mosquitto MQTT, Syncthings, Voice control via Amazon Alexa, Integration with Home Assistant, Samba file sharing, PiHelper |
| Notes | The power cable is hidden in the wall. For the full story of this project, read this article. |
Brad from Knoxville/TN/United States

| Description | Simple modern digital picture frame |
| Hardware | Raspberry Pi 3b+ 22″ spectre screen |
| Software | Pi3D Image viewer |
| Notes | I used some oak and a table saw to make the frame, had glass and matting cut at hobby lobby, and fit the screen into that. If you are using a matting over your screen, undersize it! You will never get the tv/monitor PERFECTLY straight! With the help of this site, I got it up and running using Pi3d. I’ve only had it going for about a day but it already looks so much more ‘finished’ with the fade through. I have a feeling I will be making more of these in the future! |
Wolfgang from Saarbrücken/Germany
| Description | 4K 27-inch digital picture frame |
| Hardware | Raspberry Pi 4, 4GB Model, 32GB SanDisk Card, Original Pi 4 power supply and case with heatsinks, BenQ PD2700U 4K Monitor, 27 Zoll, 10Bit, 3840×2160, 100% sRGB, Vogels wall mount Wall 3105 |
| Software | Pi3D Image viewer, Samba server, UniFi access point local WiFi |
| Notes | Another great 4K monitor using Pi3D’s crossfading capabilities. Images are scaled to perfectly fit the monitor aspect ratio and 4K pixel size. The Vogels wall mount Wall 3105 ensures a tight fit close to the wall. A wooden bezel and a matte are expected to follow in the future! |
Send me your project!
Have you built a digital picture frame based on the Raspberry Pi or another solution? Tell me about your project!
Please don’t forget to send me your images (high resolution if possible) via to hello@tathros.com.
Thanks for sharing your project!
Was this article helpful?
Thank you for your support and motivation.
Related Articles
- How I built a multi-photo digital frame for a tall, narrow space
- How to show your current picture frame photo in Home Assistant (2024 Edition)
- Personalizing Pi3D PictureFrame: How to localize your photo geodata in any language
- Why Raspberry Pi Connect is the perfect screen sharing and remote shell tool for your digital photo frame maintenance