
Tested with a Raspberry Pi 5 and OS Bookworm January 2025.
Some time ago, I wrote about using Resilio Sync to easily synchronize images between your digital picture frame and your desktop/laptop. While Resilio Sync is free for basic home use, it requires a license for an advanced personal version and business use.
There is one alternative that has escaped me up to now, which is Syncthing, an open-source, multi-platform software that has been around since 2014 and has consistently been improved over time. It used to be a bit complicated to install but no more!
Syncthing is free and uses strong encryption to ensure that any eavesdropper will never gain access to your data. Just like Resilio and unlike Dropbox, it doesn’t store data anywhere else other than on your computers. There is no central cloud server that might be compromised or requires a subscription model.
In this article, I will explain how to install Syncthing on your Raspberry Pi and Mac.
Note: If your photos reside on a NAS, you may want to use Syncthing rather than connecting PictureFrame directly to your NAS. The system is bound to be more stable because of the lack of network connection issues.
I will then show you how to sync the images folder so that you can add photos of your laptop/desktop, and they will automatically show up in your digital picture frame.
About Syncthing
Syncthing is a file synchronization program. As the authors say on their homepage, “It synchronizes files between two or more computers in real-time, safely protected from prying eyes. Your data is your data alone, and you deserve to choose where it is stored, whether it is shared with some third party, and how it’s transmitted over the internet.”
The Syncthing Foundation is a small registered Swedish non-profit foundation that supports the infrastructure required to run Syncthing (like the syncthing.net website, discovery servers and build servers). The software was originally written in 2014 by Jakob Borg, Audrius Butkevicius, and Simon Frei and has since been actively maintained on Github by some twenty core contributors.
It works on macOS, Microsoft Windows, Linux, FreeBSD, Solaris, and OpenBSD and doesn’t need IP addresses or advanced configuration. It works across a local network or the Internet. Every machine is identified by an ID, which you use to share a folder between your local or remote computers with friends or colleagues.
It uses forward secrecy to prevent any eavesdropper from ever gaining access to your data, and a strong cryptographic certificate identifies every node (=computer). Only nodes that you have explicitly allowed have access to your data.
In addition, it is well maintained and free of charge for personal and business use. What’s not to like?
The underlying logic
So how does it work? Syncthing synchronizes folders on remote devices. You know this from Dropbox, but the major difference is that Syncthing does not keep any copies of your files on any servers. The files are only synchronized between the computers you connect to your folder-sharing network.
As a first step, you need to install Syncthing on every computer in your network where you want a copy of your folder. So in the case of a digital picture frame, you would install it on your Raspberry Pi and your everyday computer. You can also install it on every computer in the family so that everybody can add images to the digital picture frame from the comfort of their laptop/desktop.
Secondly, you connect the remote devices with their Device ID.
Thirdly, you designate the folder(s) you want to share on all connected nodes (computers).
In our example, we will share the /Pictures/ourphotos folder used by our Raspberry Pi image viewer to display your wonderful images on the picture frame.
Installing Syncthing on macOS
Jump to the Download Page of Syncthing, click on “syncthing-macos” version under “Integrations” and download the “Syncthing-xxx.dmg” file. Double-click the file and move the app to the Applications folder – as you would with any other software.
Launch the app. You will see an icon in the menu bar; nothing is shown in the dock. The functionality of the app is limited to the basic functionality, most of the settings are in the browser GUI.
At the top, you can start, pause, and stop the sync process. “Open” will launch a browser window for further settings. “Folders” will show you which folders are being synched. The rest is self-explanatory.
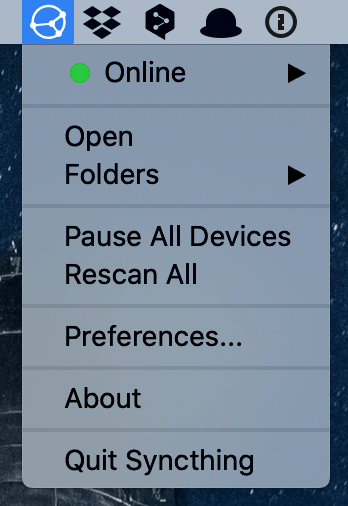
At the top, you can start, pause, and stop the sync process. “Open” will launch a browser window for further settings. “Folders” will show you which folders are being synched. The rest is self-explanatory.
Select “Open” and a browser window will come up. If you can see this, the installation on your Mac will have succeeded.

On a fresh installation, you may see a sample folder under “Folders” and no device under “Remote Devices”.
You don’t need to make any changes at this time. We will first set up Syncthing on your Raspberry Pi.
Installing Syncthing on Microsoft Windows
Jump to the Download Page of Syncthing, click on SyncTrayzor version under “Integrations” and follow the instructions. As I don’t have a Windows machine, I haven’t tried this part, but I would be astonished if it worked much differently than the macOS version. If it does, please let me know.
You don’t need to make any changes at this time. We will first set up Syncthing on your Raspberry Pi.
Installing Syncthing on the Raspberry Pi
This is a bit more complicated than on macOS or Windows but, fear not, I’ll walk you through. Open a Terminal window from your laptop/desktop and connect to your Raspberry Pi with
ssh pi@ip-address-of-your-raspberrypiThen copy and enter the following commands one by one:
curl -s https://syncthing.net/release-key.txt | gpg --dearmor | sudo tee /usr/share/keyrings/syncthing-archive-keyring.gpg > /dev/null

echo "deb [signed-by=/usr/share/keyrings/syncthing-archive-keyring.gpg] https://apt.syncthing.net/ syncthing release" | sudo tee /etc/apt/sources.list.d/syncthing.list

sudo apt update

sudo apt install syncthing -y

sudo systemctl enable syncthing@pi
sudo systemctl start syncthing@pi
Replace pi with your actual username if it’s different.
Syncthing will now take a moment to set up the program and add some files and certificates.
Wait five minutes before proceeding for the installation to finish. Or quit the system status overview and repeat the command until you see the last line, “Joined relay relay”.
Now, verify that Syncthing is running with
systemctl status syncthing@piIt will look something like this:
pi@Pi5:~ $ systemctl status syncthing@pi
● syncthing@pi.service - Syncthing - Open Source Continuous File Synchronization for pi
     Loaded: loaded (/lib/systemd/system/syncthing@.service; enabled; preset: enabled)
     Active: active (running) since Sat 2025-01-11 20:20:02 CET; 2min 10s ago
       Docs: man:syncthing(1)
   Main PID: 1372 (syncthing)
      Tasks: 18 (limit: 4757)
        CPU: 1.644s
     CGroup: /system.slice/system-syncthing.slice/syncthing@pi.service
             ├─1372 /usr/bin/syncthing serve --no-browser --no-restart --logflags=0
             └─1380 /usr/bin/syncthing serve --no-browser --no-restart --logflags=0

Jan 11 20:20:04 Pi5 syncthing[1372]: 2025/01/11 20:20:04 connection doesn't allow setting of receive buffer size. Not a *net.UDPConn?. See htt>
Jan 11 20:20:04 Pi5 syncthing[1372]: [E7L6P] INFO: Ready to synchronize "Default Folder" (default) (sendreceive)
Jan 11 20:20:04 Pi5 syncthing[1372]: [E7L6P] INFO: GUI and API listening on 127.0.0.1:8384
Jan 11 20:20:04 Pi5 syncthing[1372]: [E7L6P] INFO: Access the GUI via the following URL: http://127.0.0.1:8384/
Jan 11 20:20:04 Pi5 syncthing[1372]: [E7L6P] INFO: My name is "Pi5"
Jan 11 20:20:04 Pi5 syncthing[1372]: [E7L6P] INFO: Completed initial scan of sendreceive folder "Default Folder" (default)
Jan 11 20:20:14 Pi5 syncthing[1372]: [E7L6P] INFO: Detected 3 NAT services
Jan 11 20:20:23 Pi5 syncthing[1372]: [E7L6P] INFO: quic://0.0.0.0:22000 detected NAT type: Port restricted NAT
Jan 11 20:20:23 Pi5 syncthing[1372]: [E7L6P] INFO: quic://0.0.0.0:22000 resolved external address quic://79.193.115.27:22000 (via stun.syncthi>
Jan 11 20:20:52 Pi5 syncthing[1372]: [E7L6P] INFO: Joined relay relay://202.61.203.46:22067
When you see this last line, you can terminate the program with “q” as it doesn’t stop automatically.
Next, open the Syncthing config file with
sudo nano ~/.config/syncthing/config.xmlAs a digital picture frame is typically controlled through a Terminal window from another computer, we need to change the IP address from localhost to allow an external browser connection. Look for the paragraph
    <gui enabled="true" tls="false" debugging="false">
        <address>127.0.0.1:8384</address>
        <apikey>UuWyXgJiJ9Wu9wQGPsfKRFUX3yURSMSE</apikey>
        <theme>default</theme>
    </gui>
and change the “127.0.0.1” to “0.0.0.0”.
Reboot your Raspberry Pi and wait three minutes for Syncthing to run through the start-up sequence.
sudo rebootNow connect from your browser with
http://ip-of-your-raspberry-pi:8384You will probably see a note like this:

To get rid of this message, go into “Actions” – “Settings” and add a user and a password.

Activating “Use HTTPS for GUI” would probably make sense, but it creates issues in the browser that you have to figure out on every computer. Should you have checked that box and can’t get access anymore, just manually change back the syncthing config file to tls=”false”. It has to do something with Syncthings certificates being self-signed, so it is expected for them not to be trusted. It probably doesn’t matter much to just use HTTP for our purpose.
Sharing a folder across devices and platforms
Now, that we installed Syncthing on all devices, it’s time to share a folder. Create a folder “ourphotos” in the Pictures directory of the Raspberry Pi.
First, in the browser GUI of Syncthing on your Raspberry Pi, you have to add “Remote Devices” that you want to connect to and on their side, this needs to be confirmed.
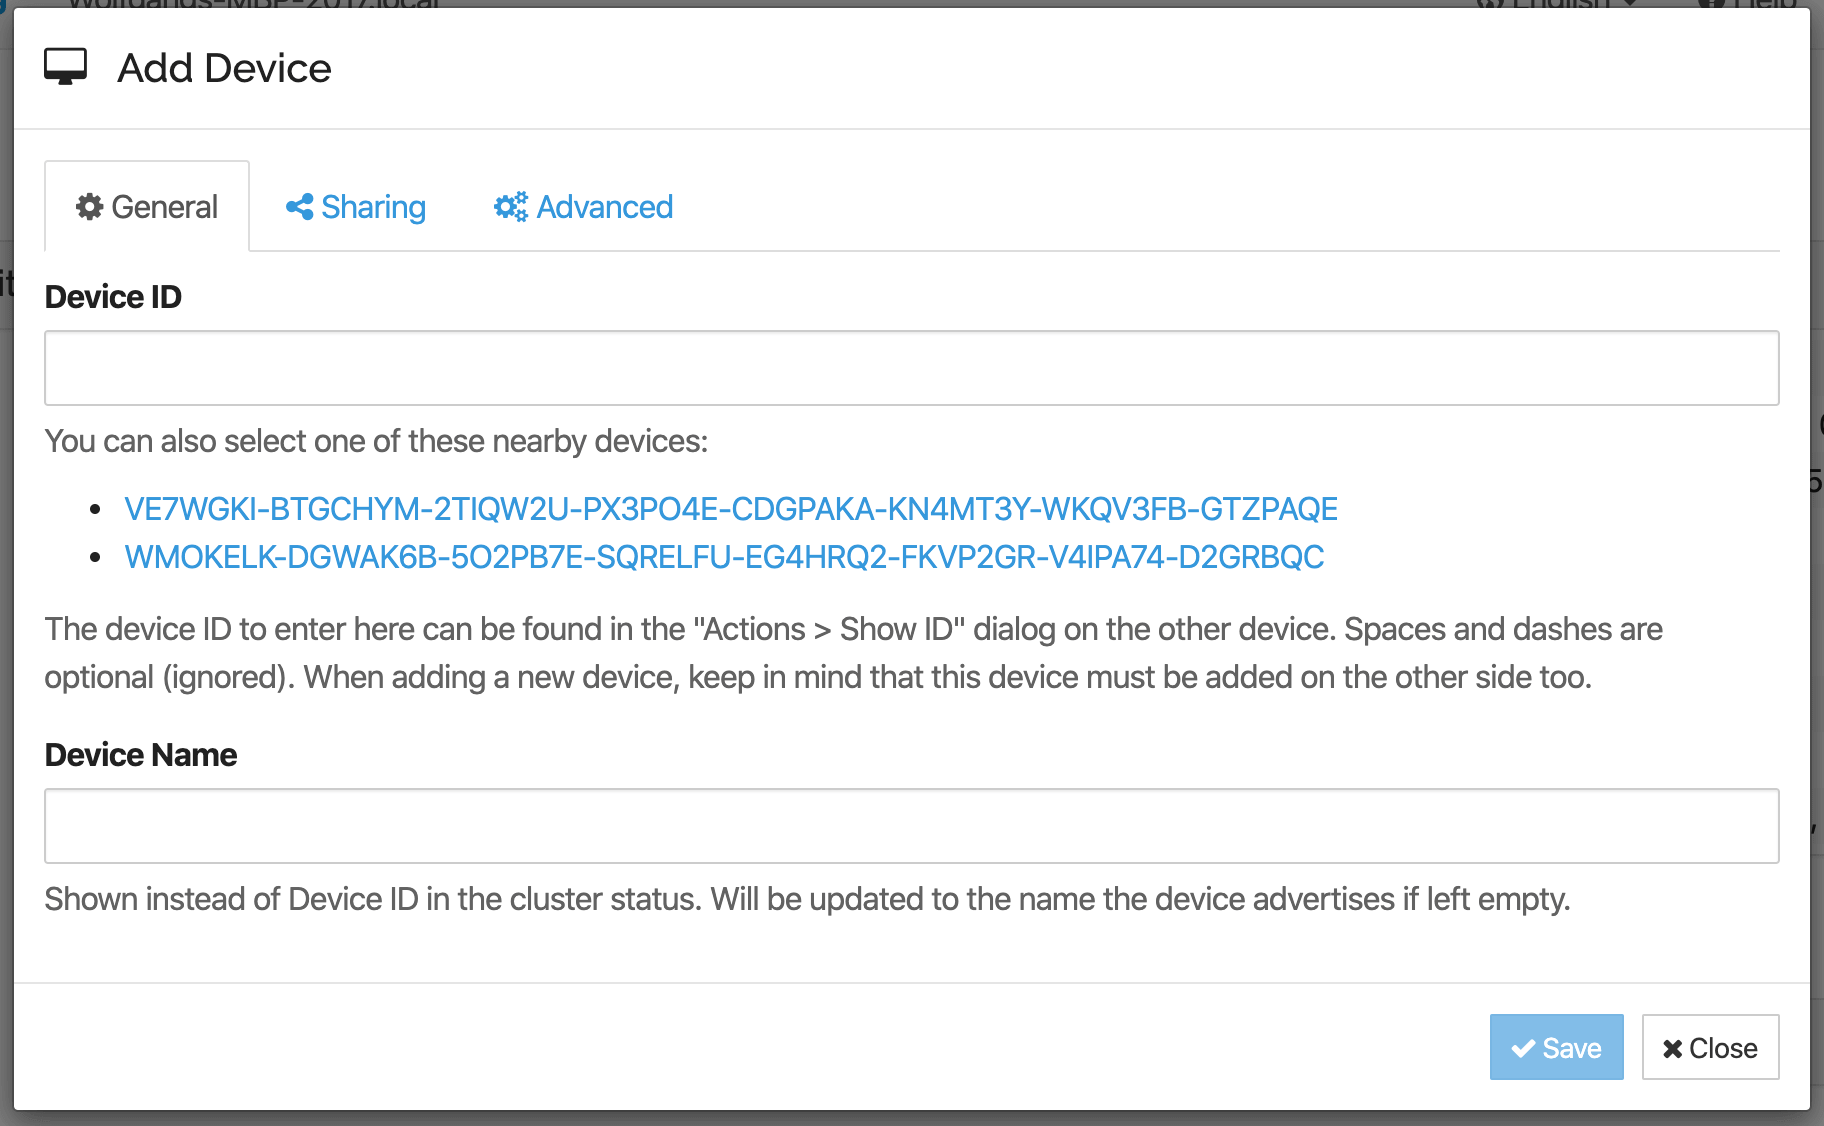
If you are in a local network, other computers will be suggested to you, if you are connecting over the Internet, you will need the Device ID which you will find in the “Actions > Show ID” dialog on the other device.

This may take a minute and you may have to refresh your browser tab. Patience!
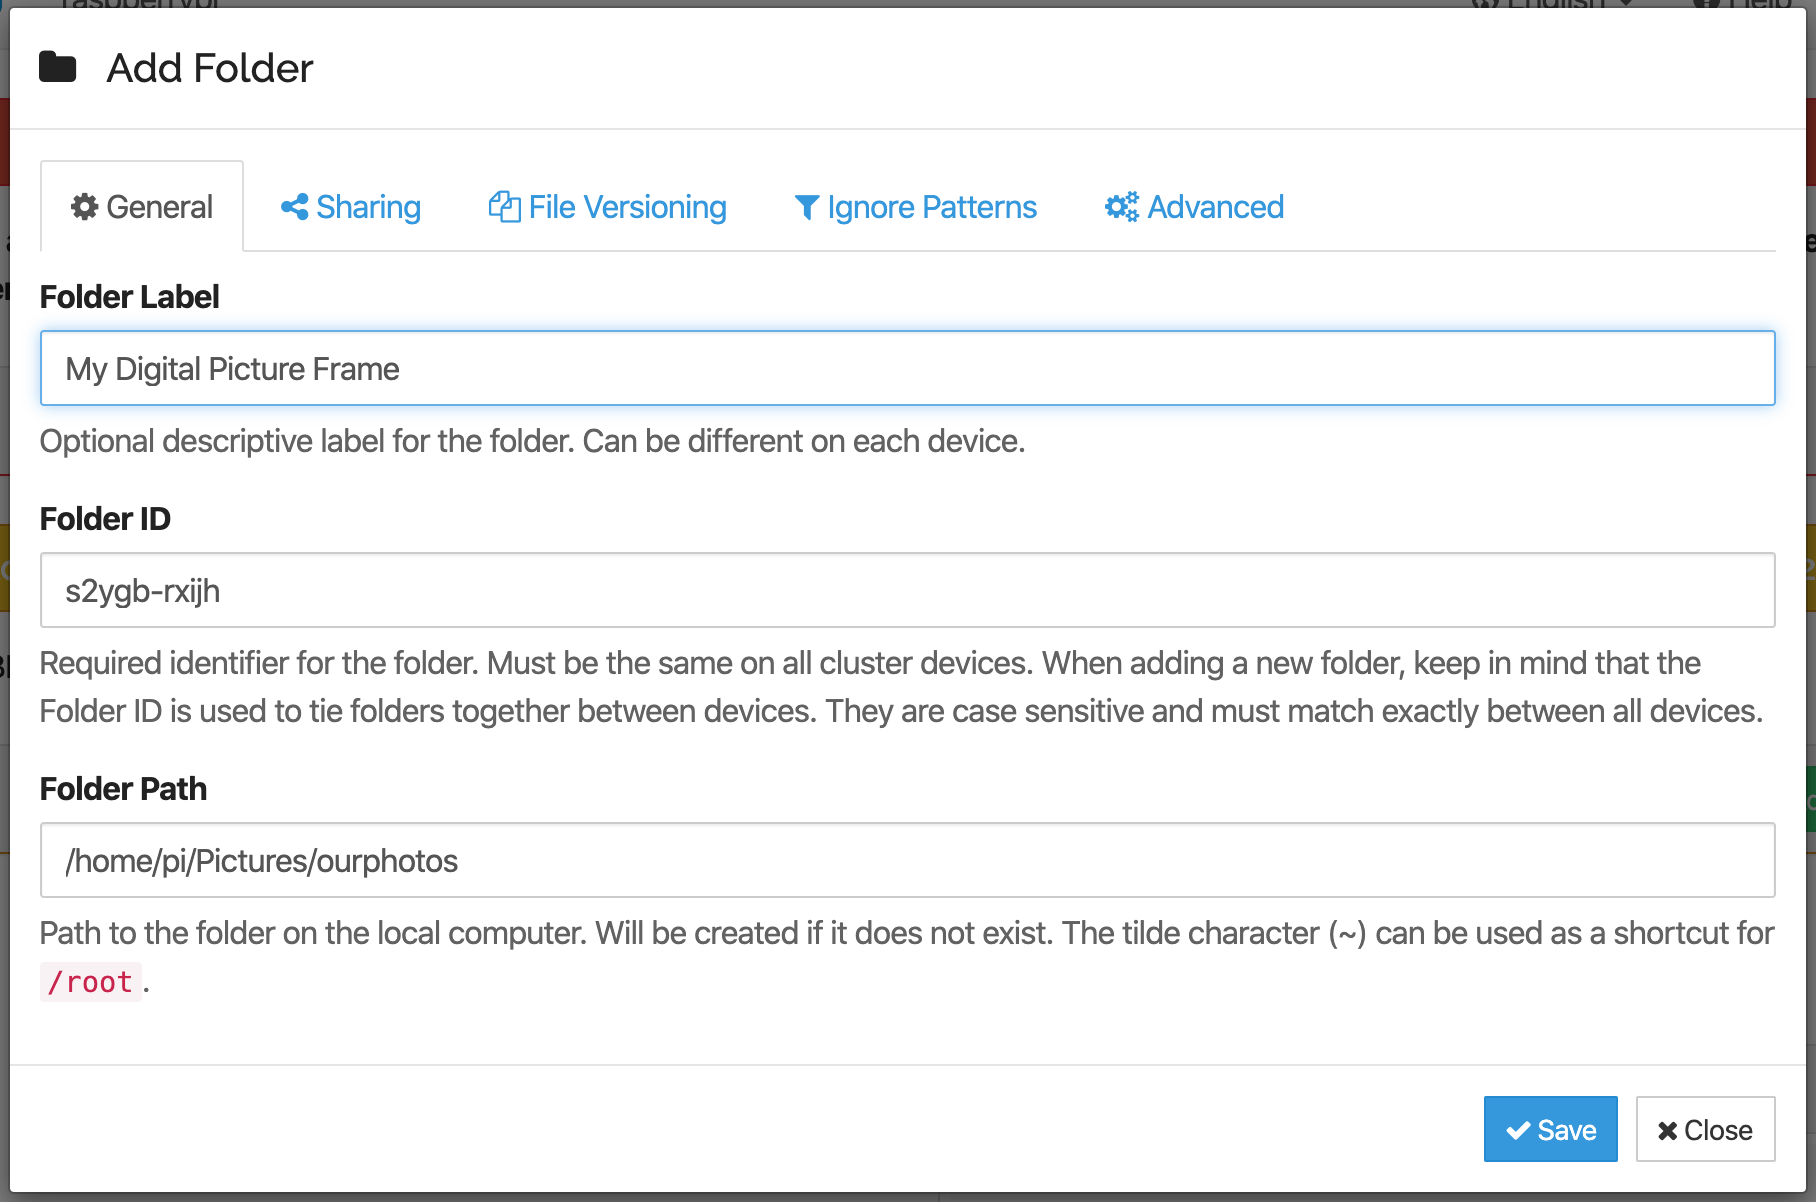
Second, click on “Add folder”. Specify the Folder Path and give your folder a label. Do not change the Folder ID, it is created by Syncthing.
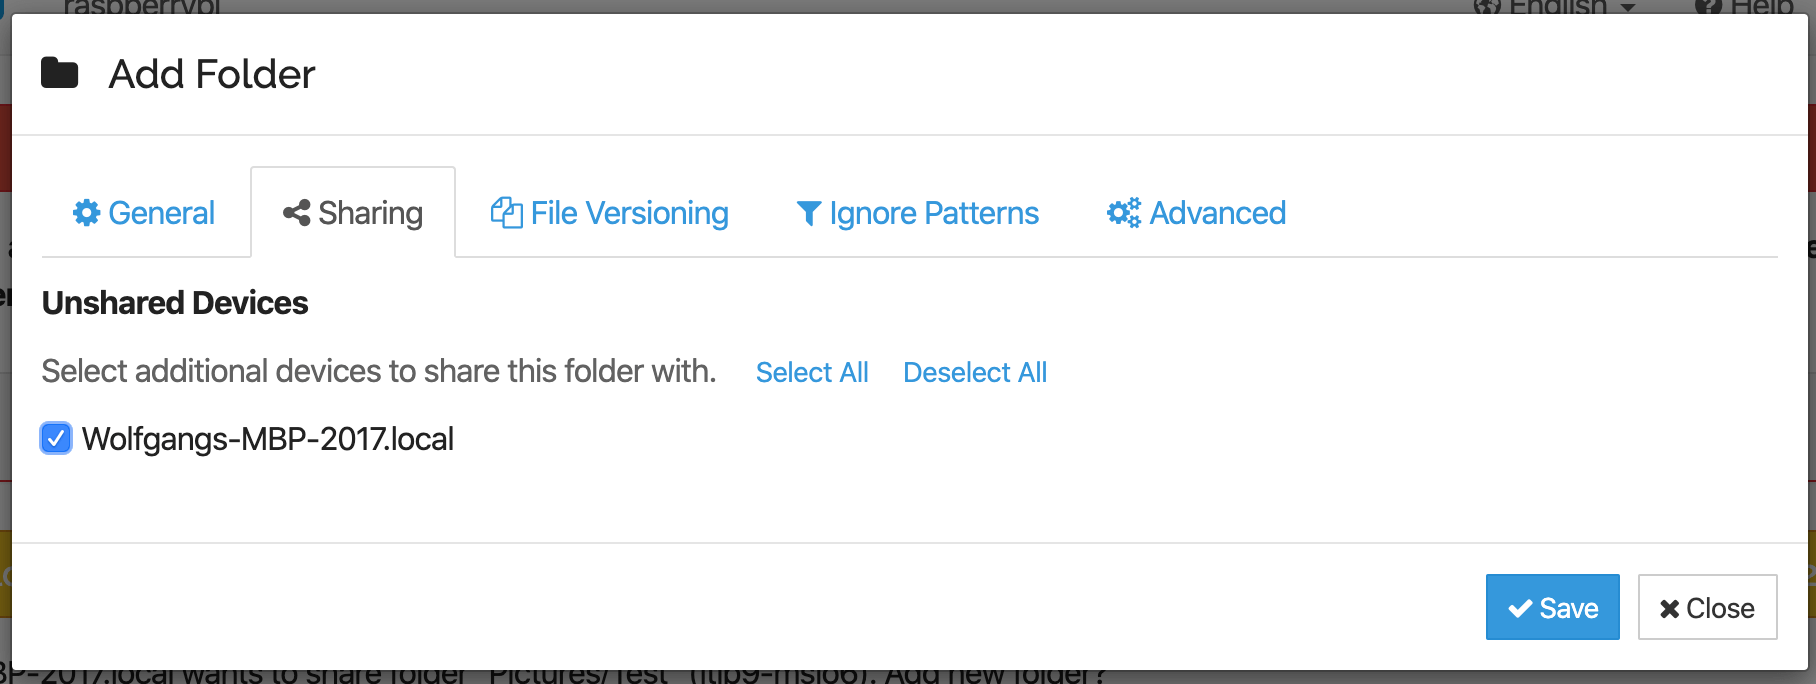
In “Sharing”, select your additional devices to share this folder on.
Now, go back to the browser GUI of your other computer (in my case a local MacBook). You will see a message like this:
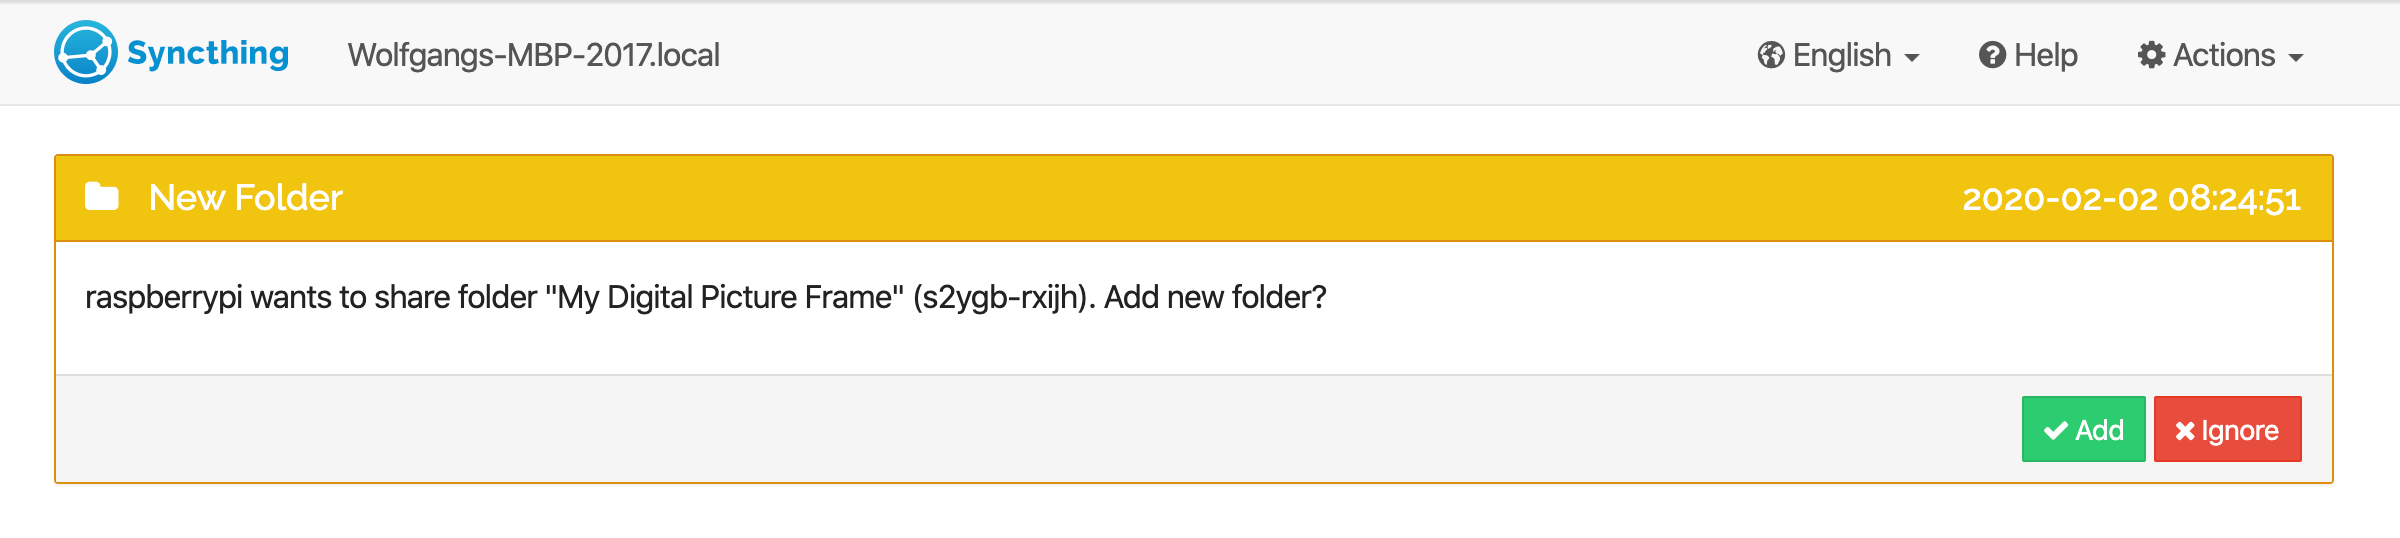
When you accept, this window comes up:
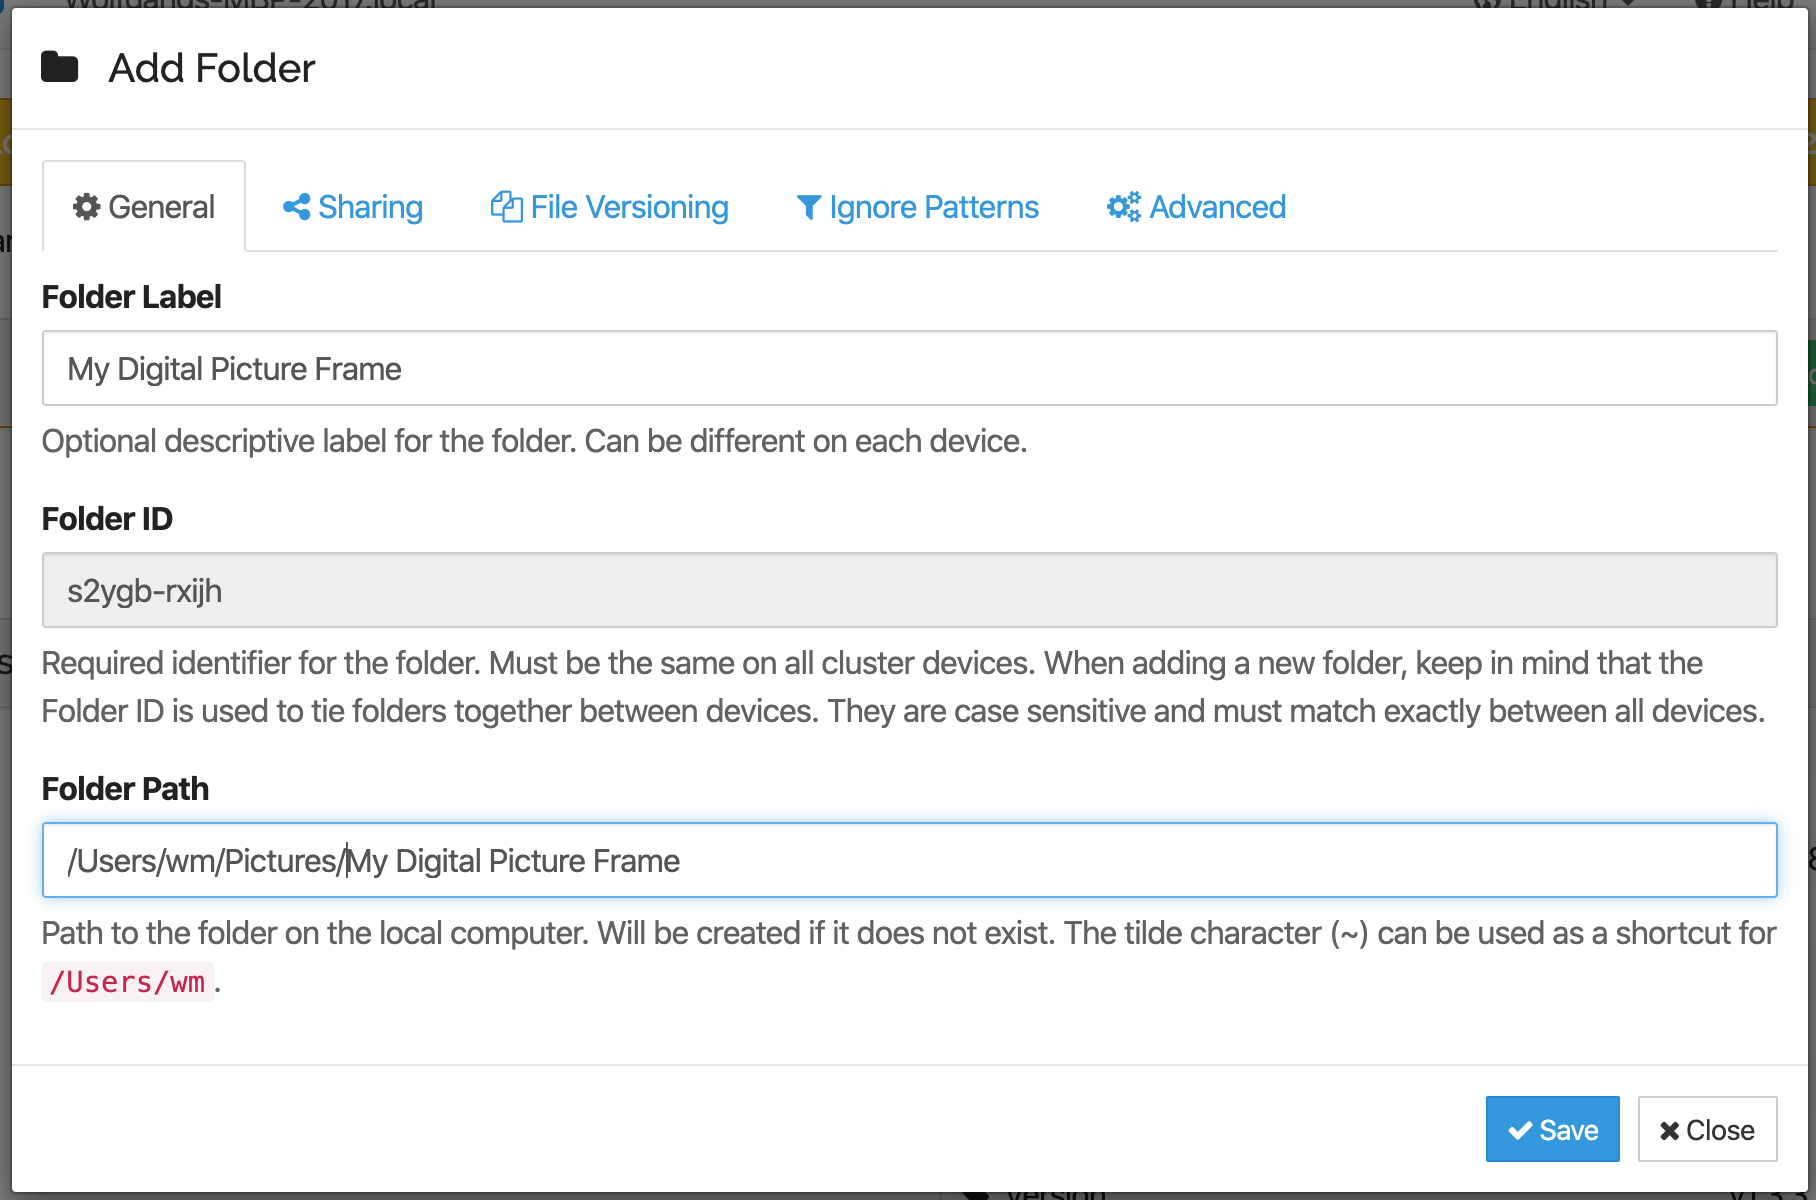
Specify the Folder Path on this computer. If it doesn’t exist yet, it will be created automatically. The name of this folder can be different than the folder on your Raspberry Pi. The only thing that is important is the Folder ID.
Note for macOS users: The Folder Path name always uses the English language. So for pictures, it is always “/Users/wm/Pictures” not any local translations like “/Users/wm/Bilder” although on your computer you may see your local language.
That’s it. Your folder is now shared between your Raspberry Pi and your local computer. You can add as many other computers as you want and share as many folders as you like among them.
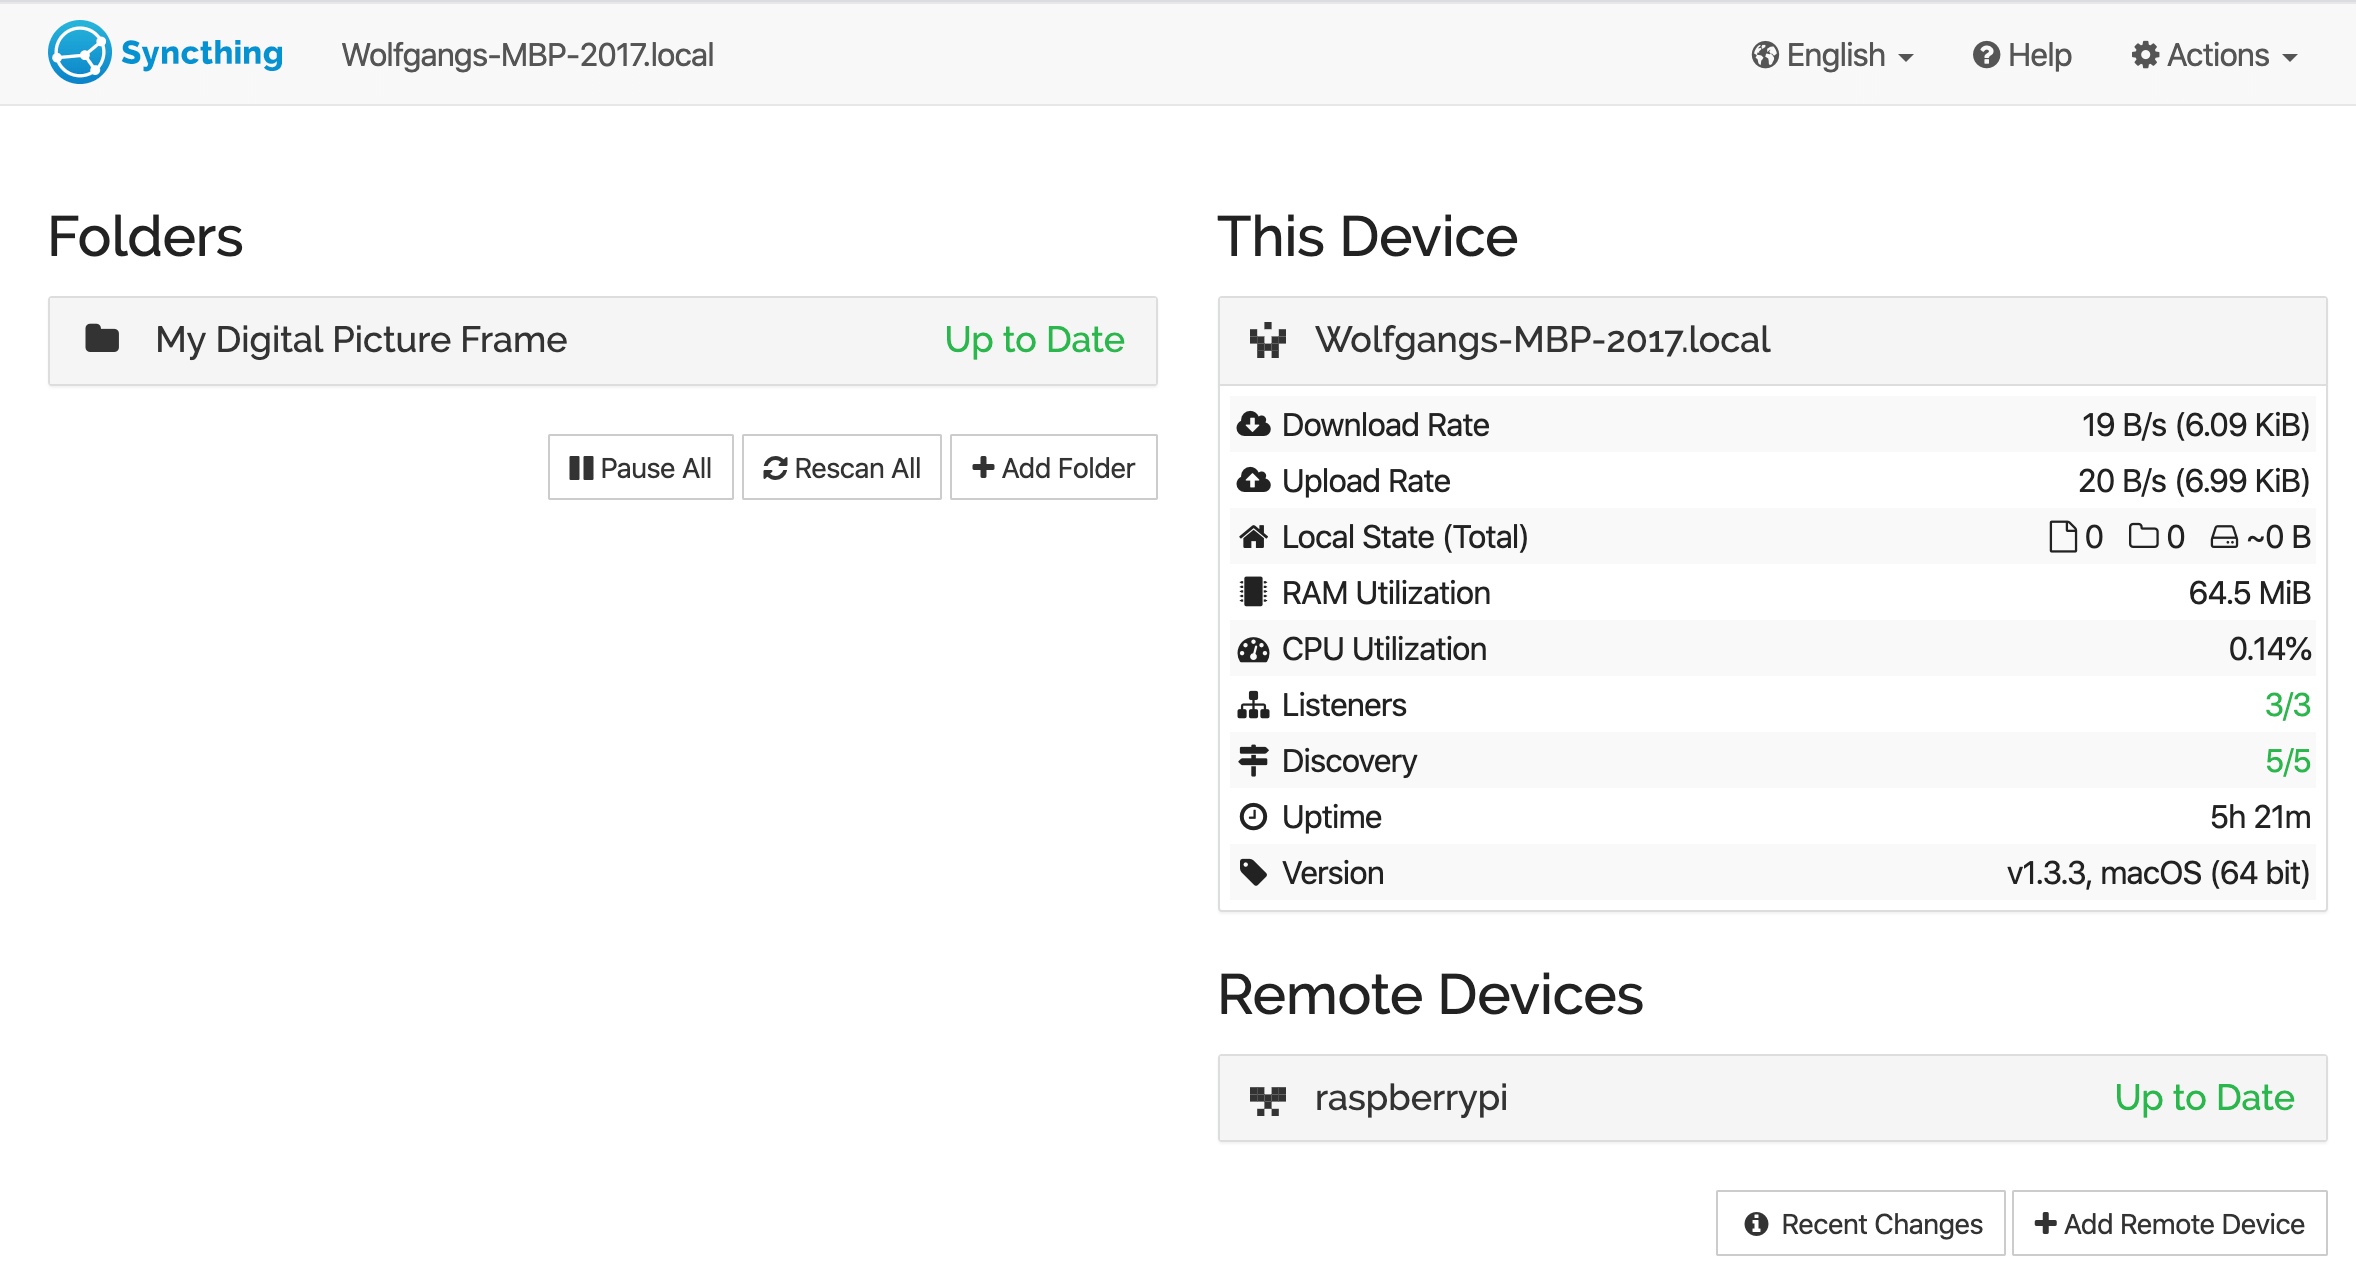
To test the folder sharing, add a few images to either your Raspberry Pi or your local computer. Give it a few minutes (depending on the content of your folder) and the files will be synchronized on both ends. Delete a file on one other computer, and it will be deleted on the other one.
Conclusion
There are several Syncthing options that you can explore in the browser GUI, like e.g., Versioning where you can specify what should happen with files that have been deleted or replaced.
The most common use case for a digital picture frame is to share the images folder on the frame with your family so that everybody can add images to it from where ever they happen to be. In this case, it is probably a good idea to add subdirectories for each family member to the main “ourphotos” folder to make photo housekeeping easier.
Enjoy, and as always, I’d be glad to hear how this works for you!
Was this article helpful?
Thank you for your support and motivation.