
This post is about how to sync your photos on your digital picture frame between one or several computers using Resilio Sync. In short, Resilio Sync is like Dropbox but for the Raspberry Pi. It is especially useful if you want to allow one or more persons to add or modify the pictures without access to the local wifi network to which the picture frame connects.
It is ideal for a family where, e.g., the photo frame is with the parents, and the children live outside of the family home or for companies wanting to administer an advertising frame in the reception area remotely.
Resilio Sync works like Dropbox with the difference that no copies of the files are being stored in the Cloud or on any other server. And unlike Dropbox, it works on the Raspberry Pi.
I’ll show you how to install it on every current Raspberry Pi model and how to share your image folder with anyone you like.
Two things have changed since I wrote this. First, if you are building a frame with picframe3 on a Pi 4 or Pi 5, you don’t need Resilio at all: the installer asks how photographs should get onto the frame and sets up Syncthing and a Samba share for you, and the frame notices new files within seconds. See the 2026 build guide. Second, Resilio’s Debian repository now publishes amd64 and arm64 packages only — I checked its Release file while updating this article, and the architecture list reads amd64 arm64. The 32-bit armhf and armel instructions further down therefore have no package left to install. I have rewritten the 64-bit steps below for current Raspberry Pi OS, but I have not re-run them end to end on a fresh install — treat them as needing a re-test.
Folder sharing among colleagues, family & friends
Imagine you have three children living all over the world who can all quickly add images to your digital picture frame at home. It can be a lot of fun.
When one of my nieces got pregnant, she didn’t immediately tell her mother. Instead, she uploaded an ultrasonic image with a little baby-peanut to her parents’ digital picture frame using Resilio Sync. So imagine the surprise when a few days later, this image randomly came up on the screen. Tears rolled, calls were made, bottles were uncorked.
To open up your digital photo frame to others is quite simple. You are undoubtedly familiar with Dropbox, the software that allows you to sync and share entire folders with business partners or friends, or to keep a copy in the cloud. Unfortunately, Dropbox does not work on ARM-based computers like the Raspberry Pi.
Resilio, however, does. It is a similar tool with one exciting advantage.
Resilio Sync – like Dropbox but more private
Resilio Sync doesn’t store the files on a cloud server but keeps them only synchronized between peers. This means that your data is never shared outside of the community that you define. This is great for managing your photos on your digital picture frame.
Resilio Sync used to be called BitTorrent Sync but was spun out of BitTorrent Inc. in 2016. The company claims to offer “for a wide array of applications such as large file collaboration, file sync, folder sync, automated backup, and sending large files faster and more securely, the industry-leading and fastest private cloud solution trusted by millions of consumers and thousands of business worldwide.”
For many years, I have come to appreciate the speed and stability of Resilio Sync. It works great for managing your images on your digital picture frame from wherever you are. And it’s free for home use.
Why Dropbox doesn’t work on the Raspberry Pi
It took me a while to figure this out. I tinkered with an app called Dropbox Uploader but wasn’t successful to make it sync bi-directionally.
Dropbox natively isn’t compiled for the ARM processor. Any solutions you can find are more or less complicated workarounds and emulate an x86 environment.
To my knowledge, Dropbox has not announced any plans to bring it to the Raspberry Pi.
The following instructions assume that you have access to your Raspberry Pi via Terminal and that you have file sharing activated. If you haven’t, please read the article “How to set up your Raspberry Pi for your digital picture frame” first.
There is one specific setting for the Raspberry Pi Zero that is why there is a separate section below.
This is a free version that has all the functionality that we need for our use case. If you have a corporate use case, you should check the licensing terms.
How to install Resilio Sync on 64-bit Raspberry Pi OS
This is for a Pi running the 64-bit image, which is what Raspberry Pi OS installs by default today.
Connect to your Raspberry Pi in Terminal through ssh and store Resilio’s signing key. The old apt-key add step no longer works — apt-key has been removed from current Raspberry Pi OS — so the key goes into its own keyring file instead:
wget -qO - https://linux-packages.resilio.com/resilio-sync/key.asc | gpg --dearmor | sudo tee /usr/share/keyrings/resilio-sync-archive-keyring.gpg > /dev/null
Then register the repository, naming both the architecture and the keyring in one line:
echo "deb [arch=arm64 signed-by=/usr/share/keyrings/resilio-sync-archive-keyring.gpg] http://linux-packages.resilio.com/resilio-sync/deb resilio-sync non-free" | sudo tee /etc/apt/sources.list.d/resilio-sync.list
There is no dpkg --add-architecture step any more. The repository is arm64, your Pi is arm64, and adding a foreign architecture only creates problems.
Install Resilio Sync
sudo apt update && sudo apt install resilio-sync
and make sure that Resilio is started automatically at boot:
sudo systemctl enable resilio-sync
What about the Raspberry Pi Zero and 32-bit Raspberry Pi OS?
This section used to give separate armel instructions for the original Pi Zero. It no longer works, and I want to be plain about why rather than leave a recipe that fails halfway.
Resilio’s Debian repository lists exactly two architectures today: amd64 and arm64. There is no armhf package and no armel package, so on a 32-bit Raspberry Pi OS install, or on the original single-core Pi Zero, apt install resilio-sync has nothing to fetch. If you are on that hardware, use Syncthing instead — it builds for 32-bit ARM and does the same job.
How to install the user and the sync directories
Resilio Sync is now up and running on your Raspberry Pi.
Go into the “Pictures” folder on your Raspberry Pi and create a new directory “ourphotos”.
Then, access the graphical interface by opening a browser window on your computer by typing
the-ip-address-of-your-raspbery-pi:8888/gui
For example:
192.168.1.2:8888/gui
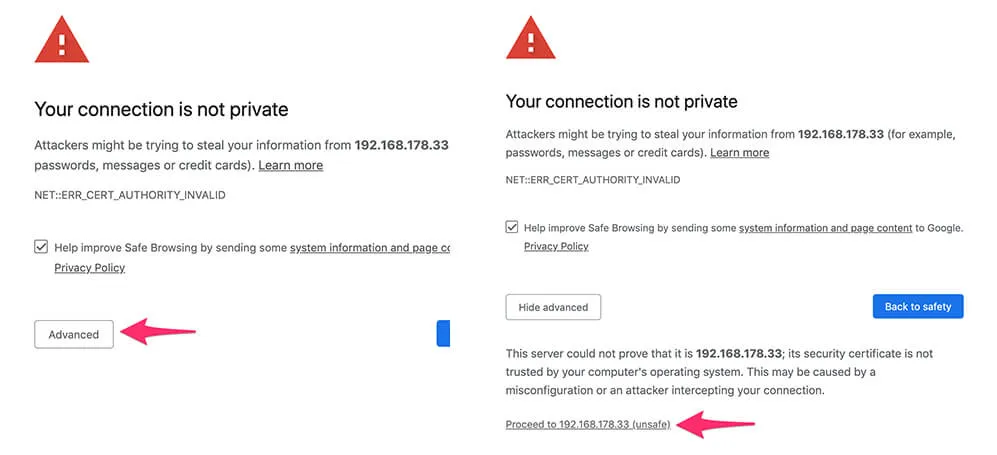
You may get the message below. Click “Advanced” and then “Proceed”.
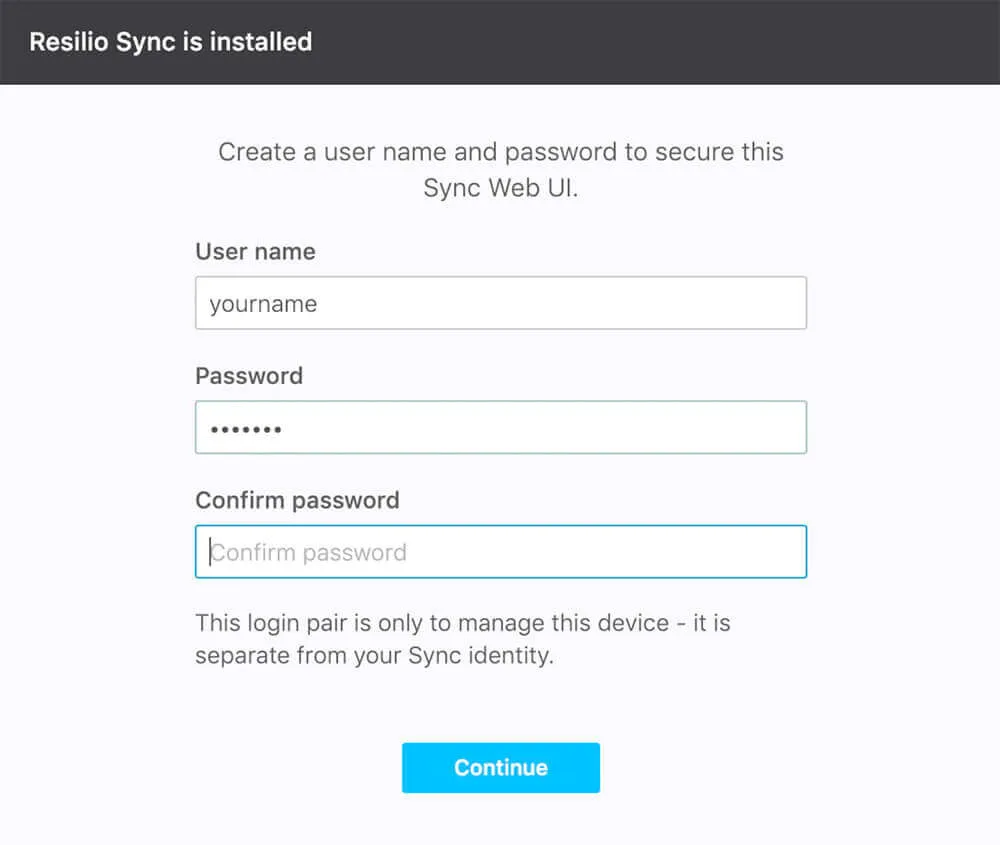
Enter your username and your password. Press “Continue”.
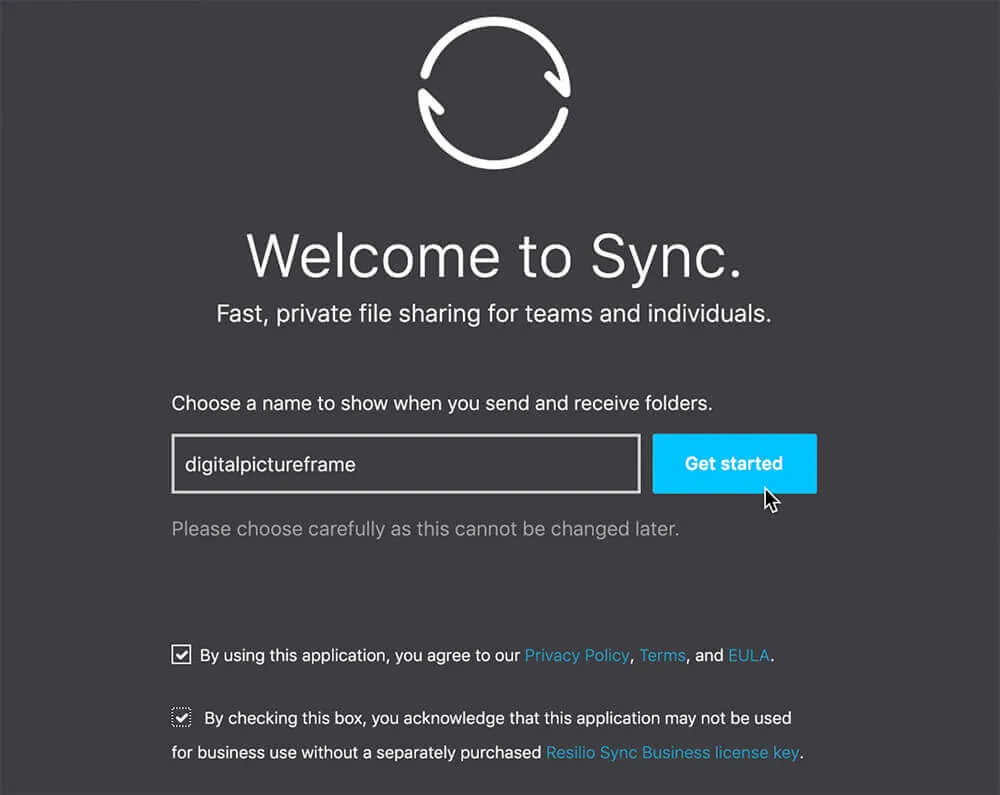
 Now enter the name how you want your digital picture frame to appear in Resilio, e.g., “digitalpictureframe”. Check the two boxes.
 Another window will come up and ask you for username and password, enter the same values as you just did.
Tell Resilio Sync which folder you want to designate for sharing by clicking on “+” in the upper left corner. Select a Standard Folder and navigate to the folder with your photos that you created earlier. Start by selecting “Home” and you will find your Pictures folder. Click “Open”.
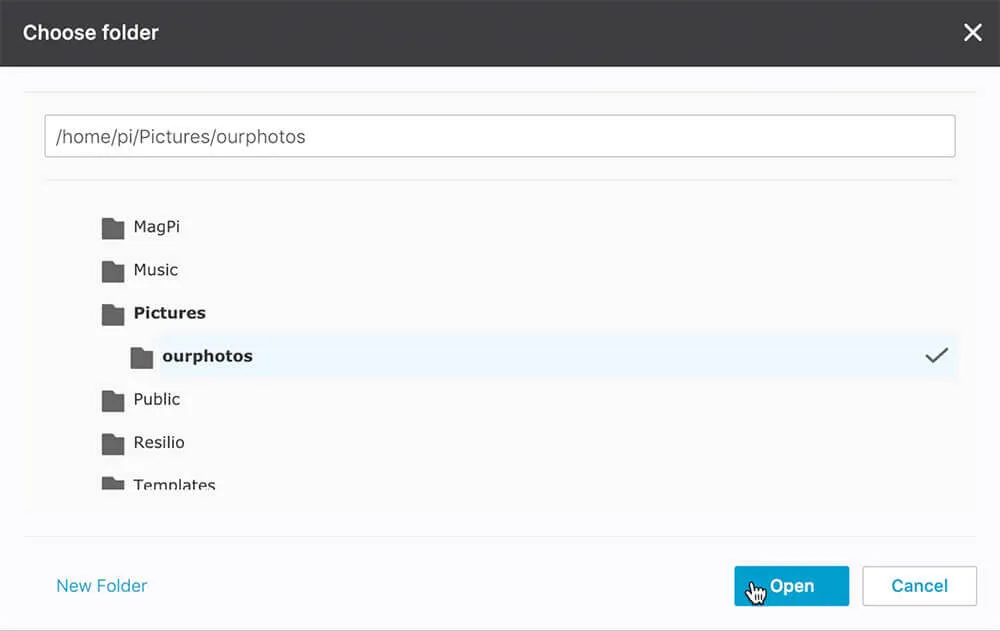
If you encounter this error message
Don’t have permissions to write to selected folder.
you need to grant permissions to the rslsync user that Resilio Sync is running as. To do this, enter the following commands:
sudo apt install acl && sudo setfacl -R -m "u:rslsync:rwx" /home/$USER
Raspberry Pi OS no longer creates a default pi account — you choose the user name when you write the card — so $USER is safer here than a hardcoded /home/pi.
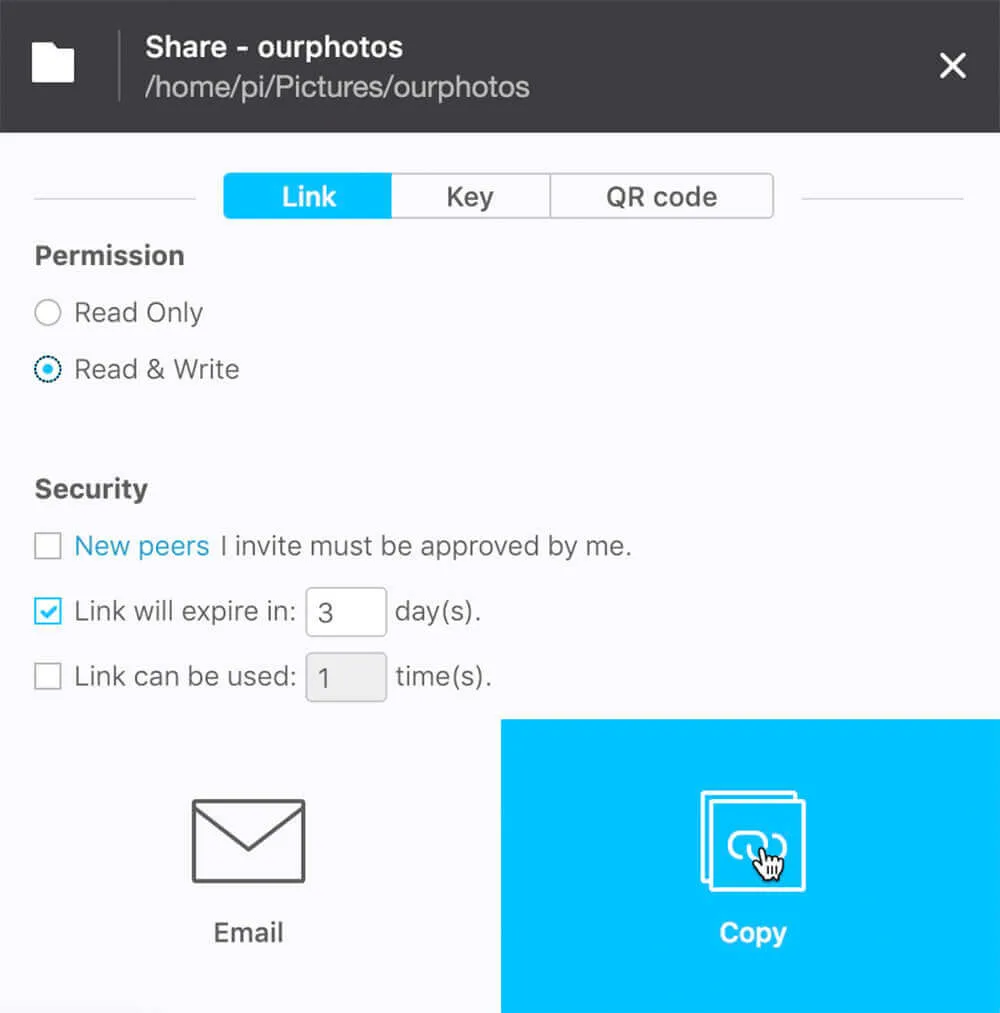
In the share window, change the permission to “Read & Write” and uncheck “New peers I invite must be approved by me”.
Click “Email” if you want to send someone the link to this folder, “Copy” to store the link in the clipboard.
If you want the link to be used several times because you are sending it to a group of people, you have to increase the value in “Link can be used .. time(s)”.
 On each computer that you designate for sharing your folder, Resilio Sync must be installed. This is also explained in the email that the recipient receives.
If you later want to add people to your shared folder, repeat the procedure.

Conclusion
Congratulations! You have now made it very easy to add images to your digital photo frame.
If you don’t want to install Resilio Sync on all shared computers, you can also use Dropbox by placing your shared Resilio Sync folder in your Dropbox directory. From there on, you can share your Dropbox folder.
Was this article helpful?
Thank you for your support and motivation.