
In this article, I will describe in detail how to set up your Raspberry Pi as a platform for your digital picture frame.
To follow my instructions, you do not need any knowledge of the Raspberry Pi or Linux.
At the end of this post, you will have Raspberry Pi OS installed, your file sharing and WiFi connection working, Pi3D PictureFrame as your image viewer installed, and everything automatically starts at boot. All the software you need for a digital picture frame.
Tested with: Raspberry Pi Imager v1.8.4, Raspberry Pi OS Buster 2020 Desktop, Raspberry 3 and 4, Pi3D 2.51, PictureFrame 2023.7.26, 1080p, and 4K displays.
Important note: This tutorial has been updated to the latest Raspberry Pi operating system, Bookworm. You will find a completely rewritten set of instructions here. I will leave this article online because there is a lot of useful information on this page that helps you understand the possibilities of Pi3D.
Required hardware
You need four parts at this stage:
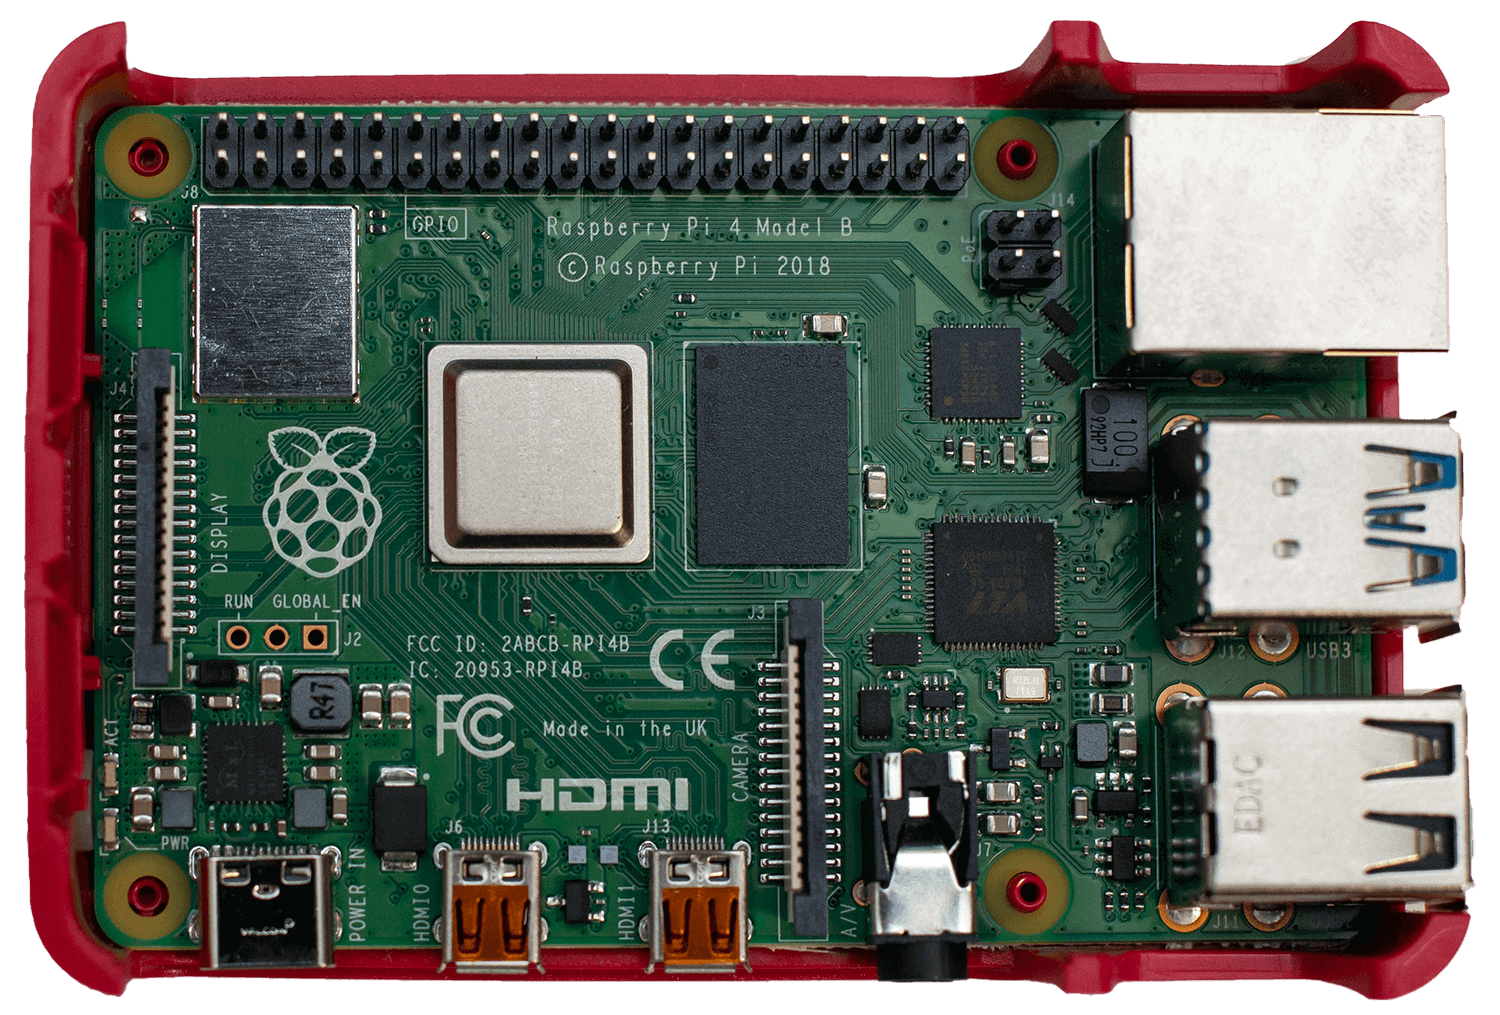
A Raspberry Pi 4 Model B minicomputer
This model was launched in June 2019 and is ideal for a digital picture frame.
The most significant advantage of the Pi 4 compared to previous models is that this board comes with 4K HDMI output, up to 8 GB in memory, and USB 3.0.
In the past, I have also built digital picture frames with the Raspberry Pi 3 Model B+, and it worked just as well. The difference I like about the Pi4 is the 4K HDMI output and the much faster overall speed.
The latest Raspberry Pi 4 Model B is affordable, so I recommend getting this model unless you have an older one lying around.
A case for your Raspberry Pi
When you shop for your Raspberry Pi, you will be no doubt prompted to a selection of cases.
Make sure that you get one that is compatible with the Raspberry Pi 4. Although the outer physical dimensions between Models 4 and 3 have not changed, USB and Ethernet ports have changed place.
You do not need a fancy case with a fan. Running the digital picture frame application will not cause your computer to become overly hot. Mine usually runs at 65 °C (149 °F), a perfectly fine operating temperature for the Raspberry Pi.
What you should watch out for is that you can easily take your Raspberry Pi out of its case even when you have glued the case to the back of the monitor; this is crucial should you need to change the SD card at one point.
My preferred choice is the Flirc case. It’s made of aluminum, looks great, improves WiFi performance, and keeps your Pi up to 20°C cooler than most other cases. There is even a version for the older Raspberry Pi 3.
A micro SD card
The critical thing to consider when shopping for a micro SD card is not necessarily speed but durability.
Speed is vital for an SD card in a high-performance camera where you want to write new images to the card quickly; it is not so crucial for a digital picture frame use case.
But unlike a camera, a digital picture frame is typically powered 24 hours a day. It will execute many read/write cycles, and this is what will determine the life expectancy. Special Endurance SD cards allow for many read/write cycles, making your card a lot more reliable.
Also, the GB size will help improve your SD card’s reliability. If your SD is always close to maximum capacity, there is a higher degree of wear on the memory sectors as less free space is available.
Although you only need about 1.5 GB of space for about 1,000 images (formatted at 1920 x 1200 px in the highest jpg quality) in your folder, plus about 4 GB for the operating system and other applications, I recommend picking a 32 GB microSD card.
They are only a little bit more expensive than a 16 GB card but will give you peace of mind over the lifetime of your digital picture frame.
I have had good experiences with High Endurance Cards made by Sandisk (32 GB High Endurance). Still, I am sure other quality manufacturers like Samsung (32 GB, PRO Endurance) and Transcend (32 GB, High Endurance) are just as good.
Make sure you buy a micro SD card, not the regular SD cards used for cameras. The micro SD card will come with an adapter so you can use it in a standard SD card reader, which is essential for installing the operating system. For the Raspberry Pi, you won’t need the adapter anymore.
A power supply
Two things are important here: Enough power and a slim form factor that fits nicely behind the screen.
Let’s start with power: The Raspberry Pi 4 Model B requires a power supply of 5 V and a minimum of 3A.
Don’t get a weaker one than 3A. You may end up with all kinds of issues that seem unexplainable, but in the end, it’s because of a power supply that is not up to the task.
The slim form factor is crucial because we must always remember that there isn’t too much space behind the monitor and the wall. So, pick one that has enough power but is still small.
This is all the hardware we need for the minicomputer powering your digital picture frame. I will assume you have access to a regular desktop or laptop computer with either Microsoft Windows, macOS, or Linux, including an SD card slot or external reader.
Software installation – The basic stuff
Installation of Raspberry Pi OS
Now that we have all the hardware components, let’s breathe some life into these electronics. You will need about one hour for these steps if you are doing it for the first time and not even 15 minutes if you have done it before.
Download the Raspberry Pi Imager for the operating system of your regular computer and install it.
The Raspberry Pi Imager is a software package with one purpose: To flash the Pi operating systems on an SD card.
Most of all, it allows you to specify your Pi’s name and password and set up the WiFi connection.
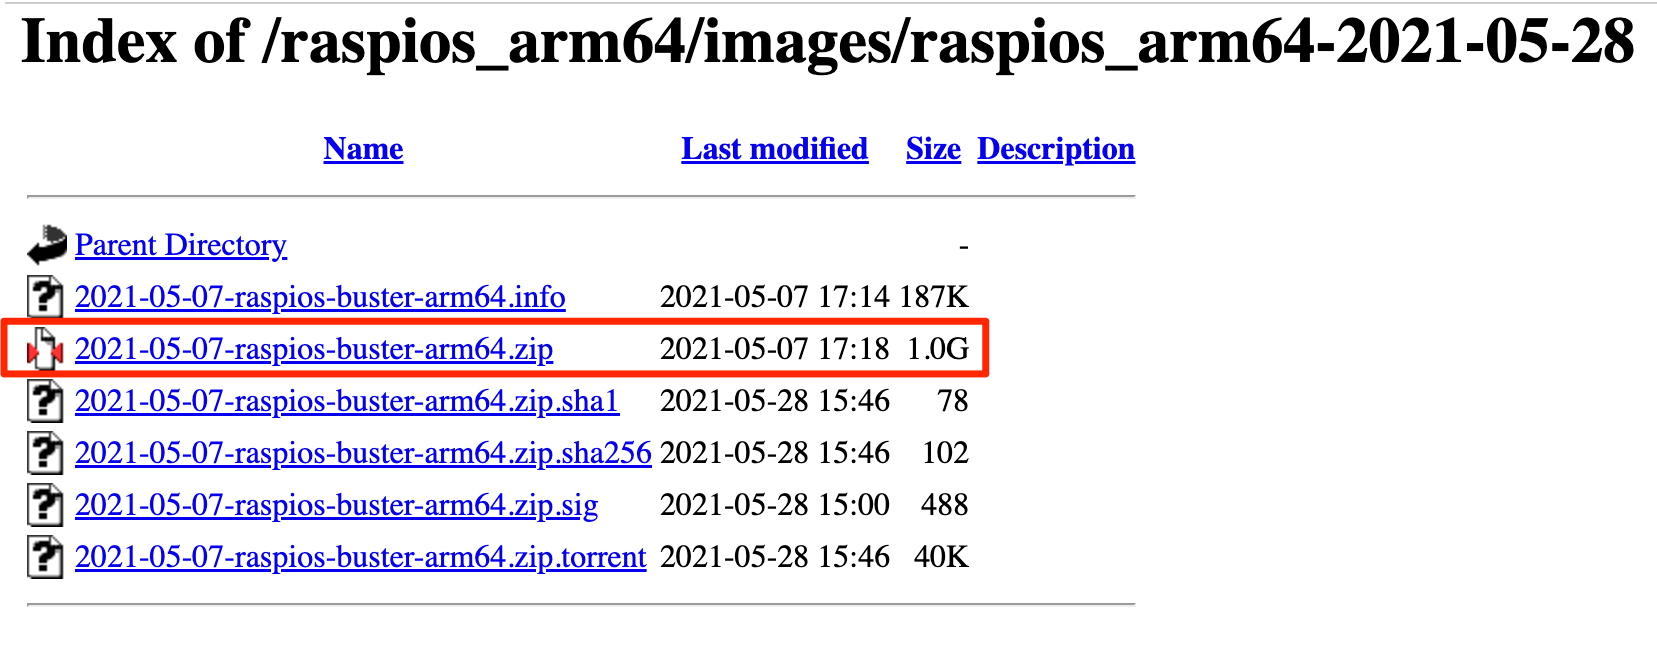
However, since the Raspberry Pi Installer only includes the two most recent Raspberry Pi operating systems, you must first download “OS Buster” from the Raspberry Pi Archive.
Click on “2021-05-07-raspian-buster-arm64.zip” and save the file.
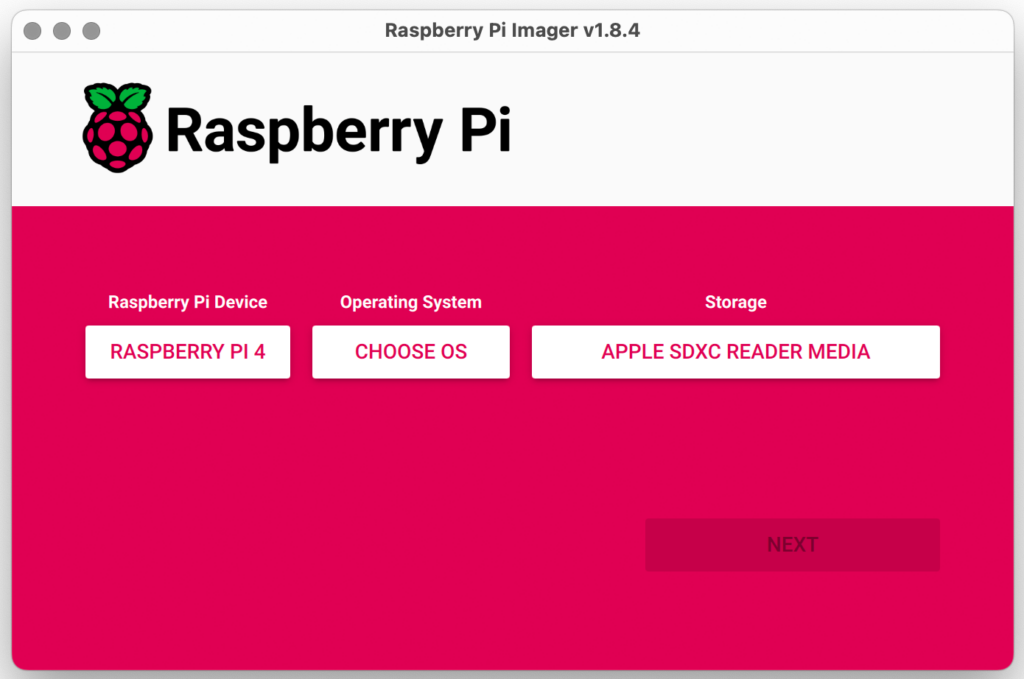
Now start the Raspberry Pi Imager and insert a micro SD card with the adapter into your card reader. Click on “Raspberry Pi Device” and choose your Model 3 or 4.
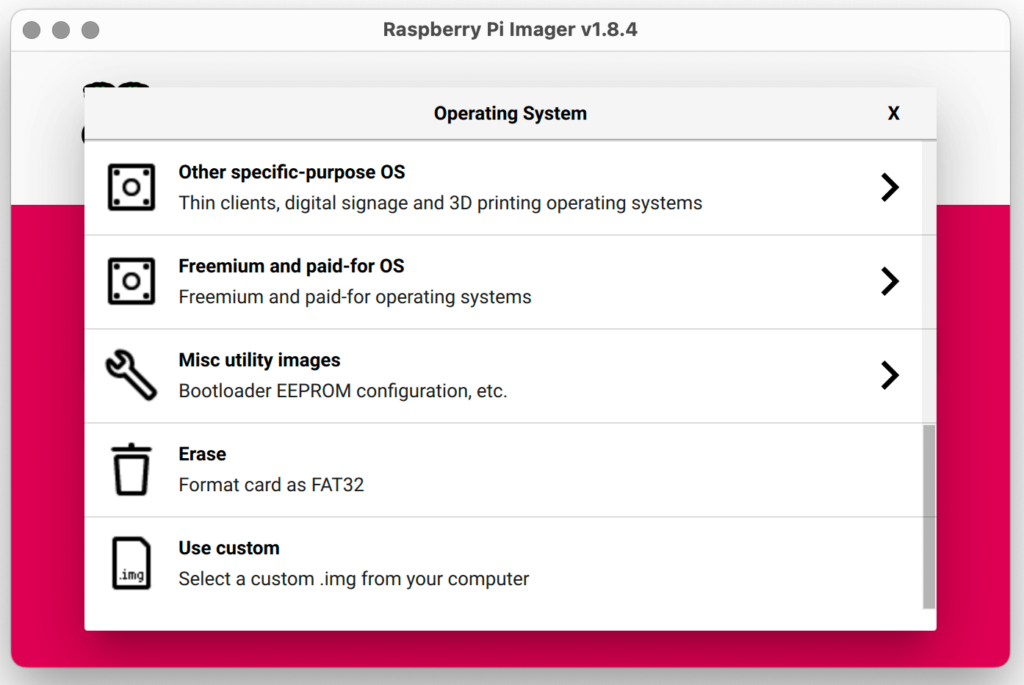
Then click on “Operating System” and scroll all the way down and select “Use custom”. Select the downloaded “Buster” image and click “Open”.
Then, choose your SD card and click “Next”.
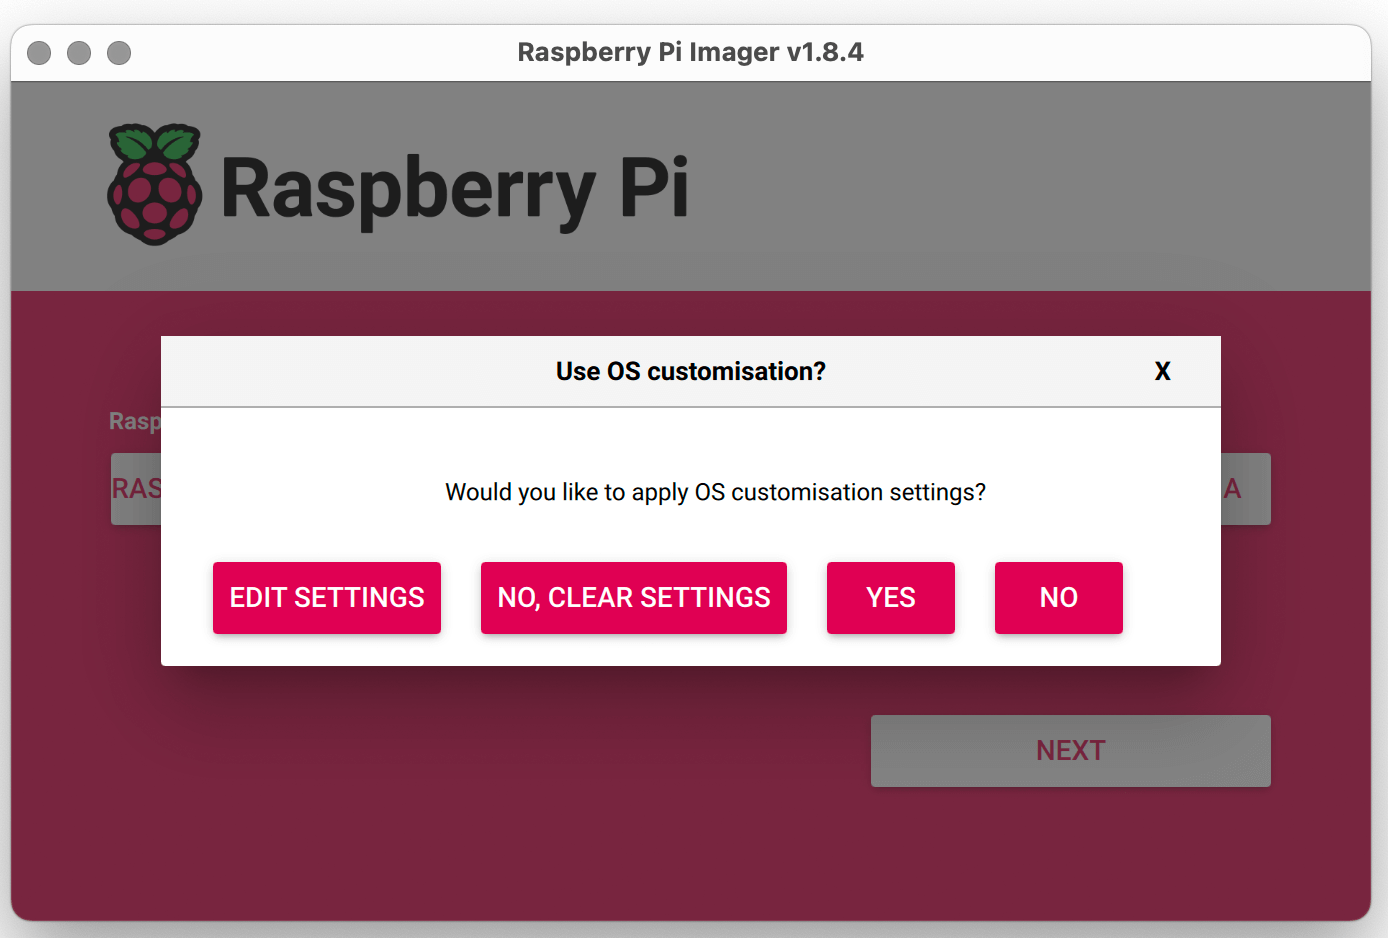
The OS customization will appear. Click “Edit Settings”. The options that you will need are all under “General”.
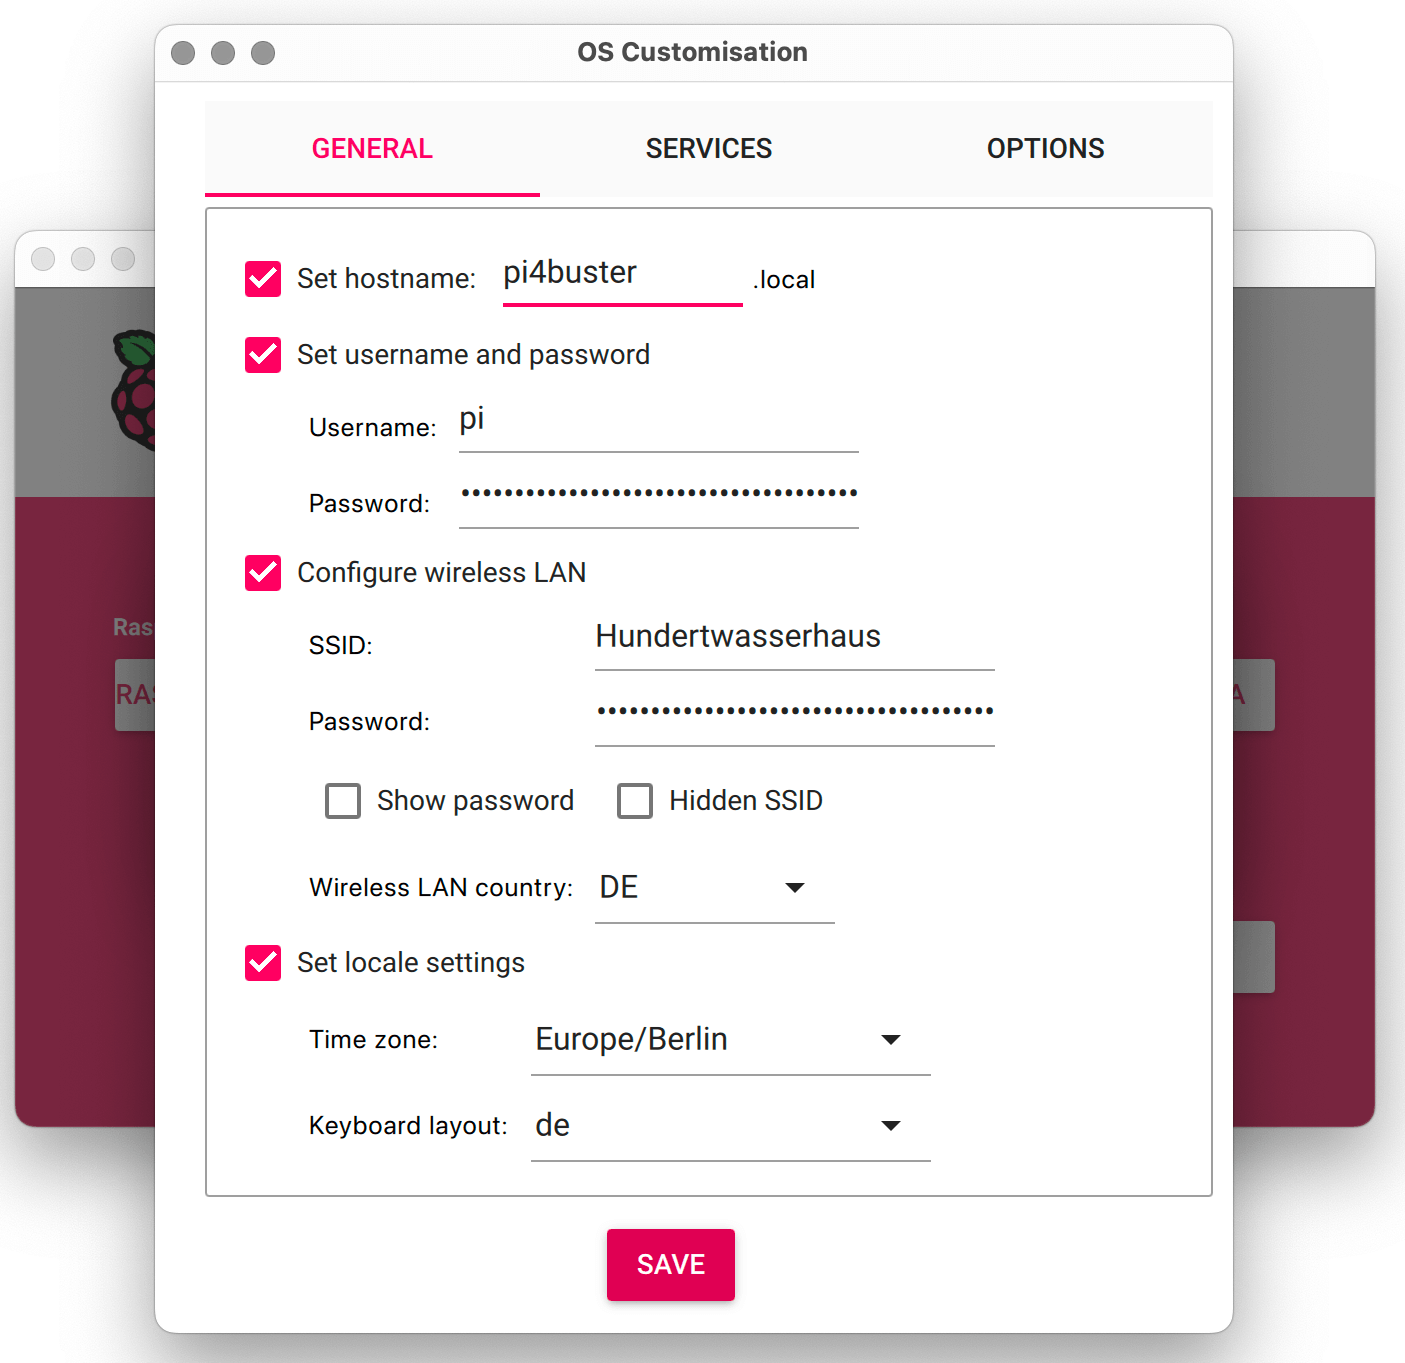
In “Set hostname”, define the name of your Raspberry Pi on the network.
Set username and password. I would recommend using user “pi” and password “pi” for the time being. You can always change it later.
Configure your WiFi SSID and password, and specify your WiFi country.
Last, adjust the local settings.
The big advantage of especially being able to enter the WiFi settings at this stage is that the Pi is immediately connected to your network when you boot it up.
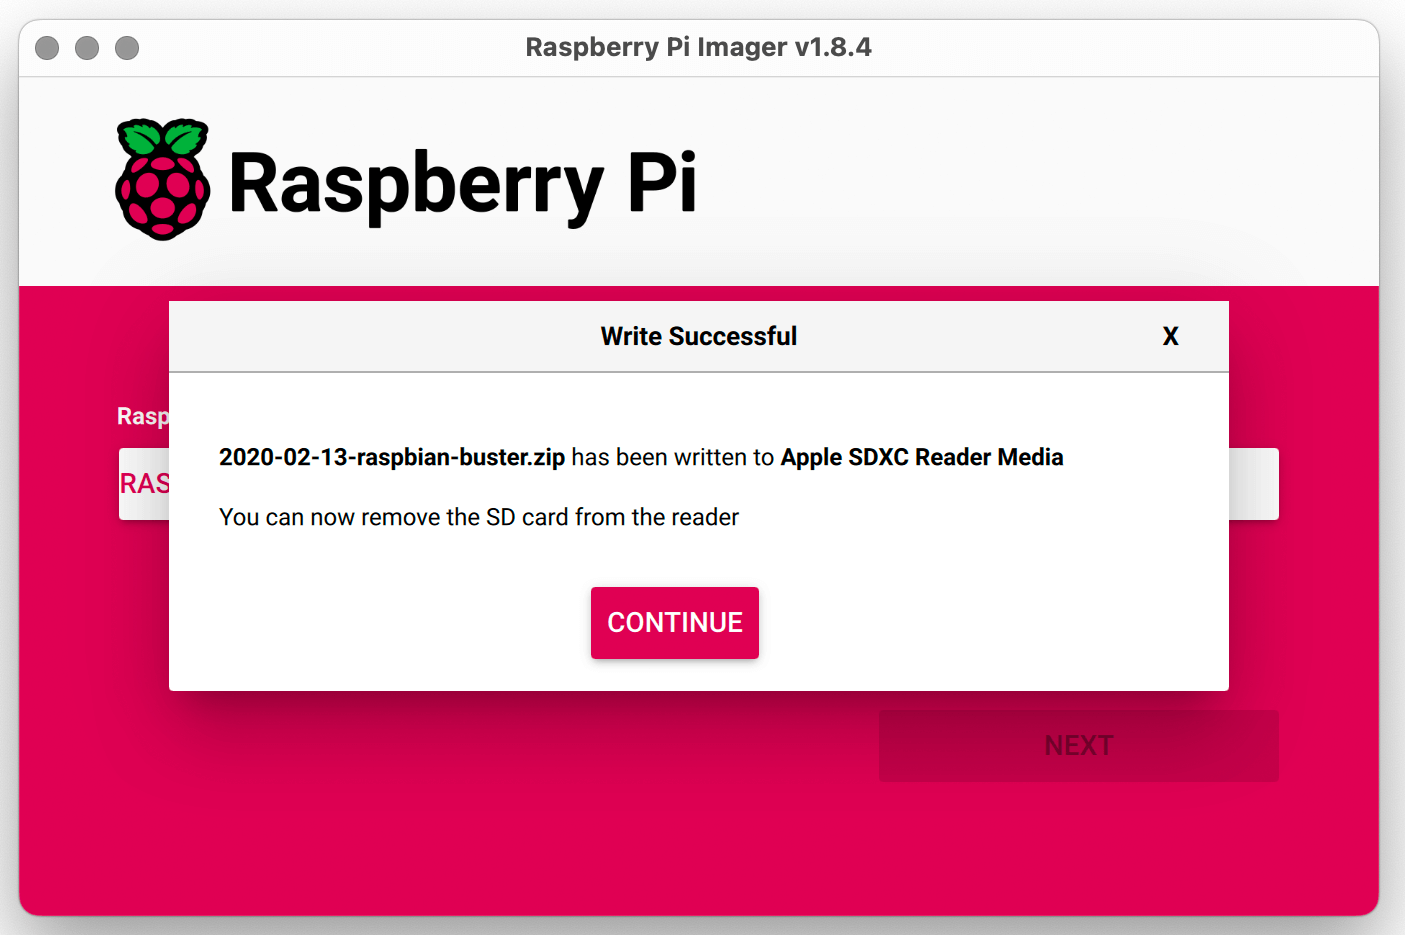
Click “SAVE” to close the settings and then “Yes” and again “Yes” to confirm the data being overwritten. Depending on your platform, you may also have to enter your computer password (not “pi”, your regular computer password)
It will now write first and then validate the image.
Starting up the Raspberry Pi for the first time
Once it’s done, take the microSD card out of the adapter and insert it into the Raspberry Pi like this:

Connect the power supply to the Raspberry Pi; it will boot up automatically.
Finding the IP address of your Raspberry Pi on your WiFi network
Note: If you are a Windows user and completely new to the idea of a Terminal app, look at this video.
Connect the Raspberry Pi to power, wait two minutes, and launch Angry IP scanner to find out your IP address. Alternatively, just find the device in your router.
Open the Terminal app on your Mac/PC/Linux computer and connect to your Raspberry Pi with the IP number that you found (example: pi@192.168.178.46):
ssh pi@your-ip-addressEnter your chosen password, most likely “pi”.
You have now connected to your Raspberry Pi. Next, let’s do some housework.
Note: I do recommend entering all commands through a Terminal connection from your main computer. It is the fastest way, and all my instructions have been written for using the Pi without a keyboard or mouse.
Installing system updates and basic configuration
It is always a good idea to run a system update on a fresh system.
In Terminal enter
sudo apt update -y && sudo apt upgrade -yThis will take a few minutes. Time for a coffee.
Once this is finished, open the configuration utility.
sudo raspi-configMake the following changes:
- Under 2 Display Options – choose D4 Screen Blanking and disable it.
- Under 5 Localisation Options: L1 Locale. Choose your country code. If several are available, pick the UTF-8 version. Select the default locale.
Go Back and finish. It will ask you to reboot.
Wait two minutes for the reboot and connect again to the Raspberry Pi with
ssh pi@your-ip-addressInstalling network settings
We are now installing file-sharing software that works for Microsoft Windows, Mac, and Linux machines using the SMB (SAMBA) network protocol. This allows you to access your Raspberry Pi on your network to add images and program files easily and remotely.
In Terminal enter
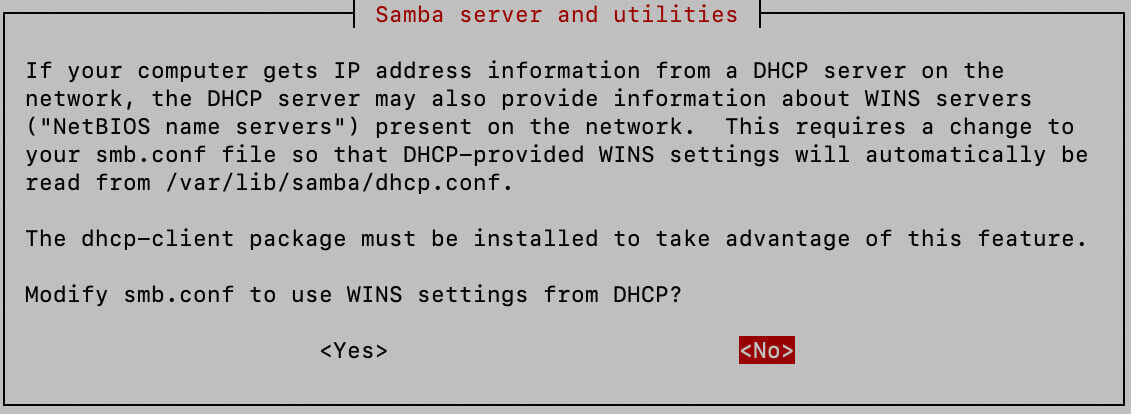
sudo apt install samba -yWhen this window comes up, choose “No”.
Now, install the Samba user
sudo smbpasswd -a pi(where “pi” is the username, feel free to change it to your username)
Set a password and confirm it. Don’t forget your password!
We need to make a change in the SAMBA config file.
sudo nano /etc/samba/smb.confThis file contains many options and can be very confusing.
I recommend deleting every line by typing CTRL + K. Just hold down the keys until all lines are deleted.
Then, copy and paste this text into the file:
[global]
security = user
workgroup = WORKGROUP
server role = standalone server
map to guest = never

#The following seven lines are for fine tuning for macOS users. I you are only using Windows, you don't need to include them. But they don't harm either.

vfs objects = catia fruit streams_xattr
fruit:metadata = stream
fruit:model = RackMac
fruit:posix_rename = yes
fruit:veto_appledouble = no
fruit:wipe_intentionally_left_blank_rfork = yes
fruit:delete_empty_adfiles = yes

[pi]
comment = Pi Directories
browseable = yes
path = /home/pi
read only = no
create mask = 0775
directory mask = 0775
Hit CTRL + O to write the file to disk, then CTRL + X to exit the editor.
If you have any troubles with the Samba configuration, please look at my more detailed article here.
Finally, restart SAMBA:
sudo /etc/init.d/smbd restartYou should now see the name of your Raspberry Pi in your network. Connect to it using your username “pi” (in our example) and your password.
Whenever you reboot your Raspberry Pi, file sharing will automatically start.
Note: If you have a problem editing the SAMBA config file, have a look at this article, which includes an entire, albeit minimum, config file that you can just copy and paste.
Disable Overscan
If you have not set this option in the Raspberry Pi Imager and the display on your screen is not completely filled but instead shows a black border, you will need to disable Overscan.
Enter
sudo raspi-config nonint do_overscan 1Installing the image viewer software
After having installed all the basic software packages on your Raspberry Pi, the only thing left to do is install the image viewer.
My favorite Raspberry Pi image viewer software, “Pi3D PictureFrame” was completely rewritten and enhanced in March 2021, and I have updated the installations for the Raspberry Pi models 3 and 4 accordingly.
Head over to “How I added smooth crossfading image transitions to my Raspberry Pi digital picture frame” to complete your installation.
Conclusion
Congratulations! You have successfully set up your Raspberry Pi as a platform for your digital picture frame.
There are many more additions that you can choose to install. Just browse the “Building a digital frame” menu item and discover image management solutions, integration options in your Home Automation settings, voice control, and many hacks & tweaks.
Are you missing something? Let me know!
Was this article helpful?
Thank you for your support and motivation.