
Most of the tutorials here on this blog involve the use of the terminal and it’s probably useful to have one blog post explaining some of the fundamentals that make it easy for novices to follow the home-brewing instructions.
If bash is your second language, you can safely skip this post and start building a 4K digital picture frame. For the rest of us, read on. Maybe there is a snippet of information in there, that you didn’t yet know about.
What is the Terminal and why should you know ho to use it
The Terminal, compared to the colored graphical user interface (GUI) of the desktop, is just a (typically) black or white screen. At first glance, it looks like a jump back in time to the beginning of the computer area when there weren’t any mouses (yes, that is the plural form) or trackpads and you had to remember all the commands.
Without any doubt, a GUI is a big step forward. But have you ever seen a hacker in a movie using his computer mouse? No, of course not. They know that they are a lot faster and that they can do more using a terminal window. Plus, it does look a lot cooler, doesn’t it?
But it’s not just being faster it’s also about having a lot more control over your Raspberry Pi. Using direct commands in the terminal is often much more efficient and if you are in programming or debugging mode, there is no alternative anyway.
The other advantage of the terminal is that you can easily work on other computers. This is achieved by establishing a secure connection to another computer on your (and also remote) networks. This process is called “ssh”.
So when I talk about “ssh into your Raspberry Pi”, it means to open a terminal window and enter something like
pi@192.168.178.99 or pi@pictureframe.localMost of us never work on the Raspberry Pi directly, which means that there is no keyboard or mouse connected. Instead, we do all our work through our regular computer via terminal.
Only when the display is needed, e.g. for the final photo frame, we connect it. This has the added advantage that you can work anywhere in your home or office with your laptop, regardless of where the Pi is plugged in.
You may need to have a small cheat sheet for some of the terminal commands, and I’ll summarise here most of what you are likely to need to complete the tutorials on this website.
Where is the Terminal?
I’ll start by explaining where to find the terminal app. Yes, the really basic stuff.
macOS
Open the Applications folder and go to the Utilities folder. Open “Terminal”.
You can choose several background colors but I find the default one best to read. But if you are working on three Raspberry Pis at the same time, then using different colors for each might be useful.
Linux
If you are using Linux, I probably won’t have to tell you about this. But in case, you wonder where it is: on a Raspberry Pi, you will find it under the name of LXTerminal on the Raspberry Pi desktop.
Microsoft Windows 10
Microsoft used to have a somewhat complicated relationship with the terminal and did not have a very useful solution. Many people used PuTTY as an SSH client.
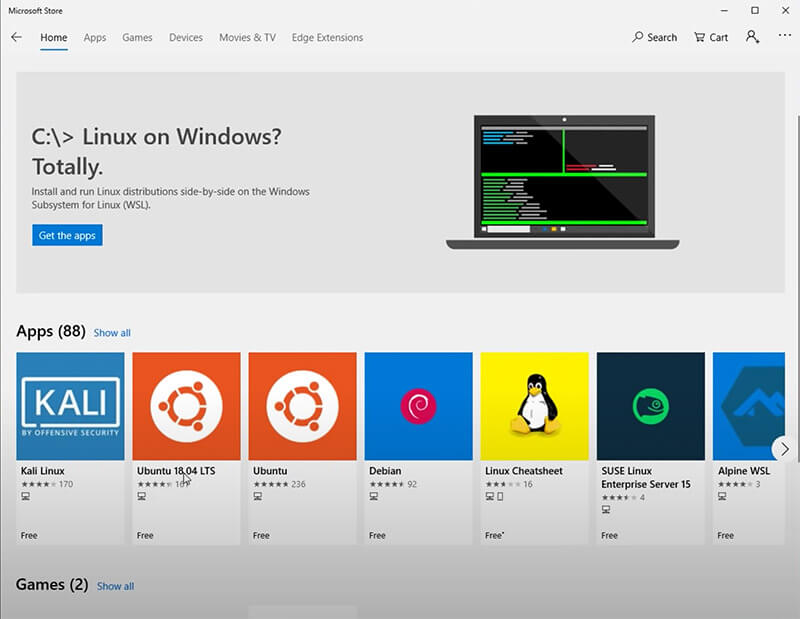
But all this changed late 2019 when Windows Terminal was made available via the Microsoft Store in Windows 10.
They even made an Apple-like video about it
A marketing video for a Terminal from Microsoft. Who would have thought.
So, all is good and forgotten. No more need for PuTTY.
However, it still is a bit more complicated with Windows. You also have to install the Windows Subsystem for Linux (WSL) and a Linux version, I recommend using Ubuntu. But both are quickly installed through the Windows Install System and the Microsoft Store.
Update: It seems that Microsoft now includes WSL2 with the regular Windows 10 updates.

iOS and Android mobile devices
Terminal applications are also available for iOS and Android devices (e.g. Termius, PiHelper) so that you can ssh to your Pi from an iPad of your phone.
Connecting via ssh
When you open a new Terminal window, you are logged into the computer that you are sitting in front of. So, if you are opening a terminal window on your Raspberry Pi with a display and keyboard connected and you want to work on that very Pi, then you don’t need to connect to anything.
However, if you are working from another computer, you first need to connect to your Pi.
This is done via the secure shell command (SSH). The syntax is very easy.
ssh username@IP-addressso for example
ssh pi@192.168.178.99You will be asked for your password, et voilà, you are controlling another computer just like Hugh Jackman as the hacker king in Swordfish.
By the way, should you have a screen connected to your Raspberry Pi that you are accessing remotely, you won’t see anything on that screen because the terminal window is a separate virtual display.
The ssh access on the Raspberry Pi is activated by default on a fresh Raspberry Pi OS installation. Should you want to change this, go into the raspi-config settings. Be aware, that you will need to connect a keyboard to your Pi to reverse this.
You can open as many terminal connections to your Raspberry Pi as you like. This is quite useful when one program is running and you can’t see the prompt. Just open a new window or tab and check some parameters or start another program.
The most often used commands
Installing and removing software using apt
Downloading and installing new software on the Raspberry Pi is one process: “sudo apt install [package-name]“
In many Raspberry Pi tutorials, you will see the command “sudo apt-get install” instead. However, this old command-line utility has been improved and replaced by just “sudo apt install” a few generations of Raspberry Pi operating systems ago. So, whenever you see “sudo apt-get” just use “sudo apt” instead.
Removing software is equally simple: “sudo apt remove [package-name]“.
Isn’t that a lot faster than first entering the URL of a website, downloading the software, extracting it, and going through a formal install process?
Updating software
To update all your software packages just enter “sudo apt update && sudo apt upgrade -y“.
This command does three things: “sudo apt update” will update the list of available software packages but it will not install the new versions. This is what “sudo apt upgrade” does but it needs this refreshed list beforehand. “-y” confirms the installation of the new packages without being asked again.
If you want a reboot after the update, use “sudo apt update && sudo apt upgrade -y && sudo reboot“.
There are a few more subtle variations but this line is very likely all you need.
Before you install a new software packages, always update your software first.
Creating a new file
To create new file type “touch [name-of-new-file]“, so e.g., “touch config.py“.
To create a new file and to immediately edit it with Nano use “touch ssh && nano [name-of-new-file]“.
Navigating in directories
The key command is “cd” (change directory).
To go up one level type “cd ..“
To go the your user directory use “cd ~“
Jumping to a nested directory works with “cd /home/pi/level1/level2/“
Note the “/” before “home”.
To see all files in a directory, use the “ls” command.
Creating, renaming and deleting directories
I typically make Raspberry Pi directories on my regular computer to which I am networked.
However, should the need arise to do this on the Raspberry Pi directly, you should know these commands:
To create a new nested directory type “mkdir -p /home/pi/frame/photos“. The “-p” will create a directory structure with the missing parent directories if applicable.
You can even create several directories with one command: “mkdir first_dir second_dir third_dir will create all three.
There is no direct rename command, instead, you move directories. The syntax is “mv source dest“, an example being “mv /path/to/source /path/to/dest“. The command works like cut & paste.
To rename a directory called “123” to “456” type “mv 123 456“.
To rename a file: “mv test.sh no_test.sh“
To delete a directory: “rmdir first_dir“. Here as well, you can delete several directories with one command. If you cannot delete the directory, you don’t have the right user permissions. If you still want to go ahead, use: “sudo rmdir first_dir“.
When attempting to remove a directory using the rmdir command, you may receive the message “Directory not empty” and you are unable to delete the directory. This is because the directory contains other files or directories. In that case, just use “rm -r mydir“.
Linux does not have the luxury of a trashcan with an undo command like Windows or macOS. When you delete a file, it’s gone.
Using a file editor
To open e.g. a config file many people use “nano”. To open the SAMBA config file, e.g., you type “sudo nano /etc/samba/smb.conf“.
Nano comes preinstalled with any version of Raspberry Pi OS and has been around for over twenty years. It is fairly outdated but everybody keeps using it for simple tasks. There are modern alternatives but none has really caught on so far to my knowledge.
For more complex editing, you would typically resort to an external file editor and open the file in Sublime Text on your regular computer. But if you only have a few small things to change, the hassle of locating the file through the Finder/Explorer on your regular computer with hidden or restricted directories might be more than the inconvenience of using the clumsy Nano.
Nano does not act on mouse commands. To move to another line, you have to use the cursor and the arrow keys.
The most often needed commands are CTRL+O (the letter not a zero) to save, and CTRL+X to exit. To delete an entire line, move the cursor to that line and hit CTRL+K.
Exiting the terminal
The clean way to exit an SSH connection is to type “exit“.
You can also just close the Terminal window which will close the remote connection and terminate all processes. However, some background processes may still be running if you cut the connection in this way. To be on the safe side use “exit” first.
Using sudo
All users are created equal. But some users are more equal than others.
Introducing the superuser. As a mortal user, you can do what you like with your home directory. But as soon as you start making changes to files that may impact other users as well, you need root privileges. The magic command that gives you this power is “sudo“.
You are typically logged in as a user, not as root. The command “sudo” temporarily gives you the ability to run these commands.
An example is the installation of software that will be available for all users and therefore requires sudo powers. When you append “sudo” to the start of a command, the command following “sudo” will be run using root privileges.
You will need the “sudo” command very often. But pay attention to no use it where you shouldn’t as this may lead to system-wide changes when in fact you wanted to change it only for the user. One example is “crontab -e” which works for both with sudo and without.
If a command doesn’t work, it’s often because “sudo” has not been used. In that case, just try it with “sudo“.
You can exclude users from having these superpowers but we will assume that for your digital picture frame you will be the only master of your Raspberry Pi anyway.
Executing scripts
Launching and stopping a bash script
If you have a bash script, which you can tell by its .sh file extension, you will need to type “./scriptname.sh“.
However, you need to make a bash script executable before you can execute it.
To make a bash file executable type “chmod +x scriptname“.
To stop the script hit CTRL-C.
Launching and stopping a Python script
For Python use “python3 [name of file.py]“. This assumes that your script is written in Python3. For Python2, just say “python [name of file.py]“. Note that you need to include the .py extension.
To start a Python script in the background use “python test.py &“.
To show all running Python processes (useful for debugging) type “ps -ef | grep python“.
To terminate all Python scripts use “killall python“. If you just have a single script in the foreground, then CTRL+C will do the job as well.
10 things that make you faster
Using the arrow keys to access the command history
Rather than typing every command, the terminal memorizes your previous commands by terminal window.
You retrieve them by hitting the arrow up and down keys.
The memory functionality is actually so clever that it starts with the ssh command should you not yet be connected via ssh. This makes reconnecting superfast.
Typing faster with auto-complete.
Auto-complete is a very popular notion in file-editors and mobile phones have increased the awareness for this kind of functionality.
In the terminal, all you have to do when you start typing is to hi the tab key, and the system will then attempt to complete your writing, or least make you a number of proposals how it could go on.
This can save a lot of time, especially with long file or directory names. Give it a try to see how accurate it can be!
Using more than one command in a line
You can use as many commands as you like in one command line if you combine them with ” && “.
This means that one command is being executed at one time and the second one starts once the first has been completed.
In my instructions, I have often combined commands to make it faster and more convenient for you. So when you see “&&” the next time, you’ll know what it means.
Conclusion
I hope this article has been useful for beginners to lose any fear of using the terminal. And maybe it has given a few ideas to intermediaries as well to accelerate their work. If you have any questions, please let me know.
Was this article helpful?
Thank you for your support and motivation.
Related Articles
- How to adjust the default time setting of PictureFrame in Home Assistant
- Create your own digital picture frame access point when WiFi is unavailable (2025 Bookworm Edition)
- Why Raspberry Pi Connect is the perfect screen sharing and remote shell tool for your digital photo frame maintenance
- Why the 2.4 GHz WiFi band is faster and more stable for your digital picture frame than 5 GHz