
Home Assistant is one of the most exciting developments in the home automation space. Founded by Dutchman Paulus Schoutsen only a few years ago, it has taken the world by storm and is driven by a worldwide community of tinkerers and DIY enthusiasts.
In this article, I will show you how to use Home Assistant’s WiFi-based presence detection system to turn your digital picture frame off when nobody is in the house – and back on again when somebody comes home – using the MQTT protocol to communicate between the devices.
It is also the basis for Amazon Echo or Google Voice control of your digital picture frame and a great deal of other smart home automation scripts.
Note: I wrote the original article back in February 2019. Since then, Home Assistant has been moving forward at warp speed, and many things that used to be a bit tricky are now as easy as 1-2-3. That is why I decided to update a large part of this article to reflect the recent changes. The Home Assistant version that I used was the 2020.12.7.
Home Alone
Presence detection is a significant subject in home automation and is very relevant for the owner of a digital picture frame.
The life expectancy of your frame will increase when you turn off the display when it’s not needed, and your energy costs will go down. And if both results can be achieved in a way that doesn’t compromise on convenience, then it’s a no brainer to do it.
At the center of it all is the smartphone. You can assume that everyone in your family will have at least one device and won’t leave home without it for a longer time.
There are three technologies that you can use with your smartphone: WiFi, Bluetooth, or geofencing. Geofencing is the use of GPS data of your phone to create a virtual geographic boundary to trigger a response when you enter or leave a pre-defined area.
I initially tested geofencing on my iPhone in combination with IFTTT, the service that aims to get all your apps and devices talking to each other.
I had it set up, so when somebody would leave the house, it would register on the digital picture frame. When nobody at home, it would turn off the frame display.
And when a person was getting near 50m of the house, the frame would lighten up again.
This sounded to me like a great approach because it works independently of a WiFi system. However, in practice, geofencing often didn’t work for me both for leaving and coming back. It was either too slow or completely unresponsive.
After a few months of testing, I concluded that it was too unreliable for my use case.
I haven’t given Bluetooth presence detection a thorough test yet, but given the limited range of Bluetooth, I am a bit skeptical if it would work well in a larger house. But out of curiosity, I may give it a try in the future.
Presence detection with WiFi, however, is something I have tested for over four months now, and I am delighted with its reliability and responsiveness.
It has become my favorite presence detection method, and I will show you how you can use it to turn your digital picture frame on or off automatically.
Feeling home
The summary of how this set up works is this:
The WiFi router knows which devices are connected at home even if they are asleep.g
It typically takes a minute to recognize a new device and about 10 minutes until a non-present device is being dropped from the network.
The device tracker feature in Home Assistant will act upon the change of a network state of one of the specified devices through an automation script and trigger a response.
The response, in my case, is a message broadcast via MQTT, which the digital picture frame picks up and, in turn, triggers a Python script to turn the frame on or off.
Home Assistant Presence Detection
The following instructions assume that you have installed the 2020.12 version of Home Assistant.
It also assumes that your WiFi router is on the list of devices compatible with the device tracker of Home Assistant. This list includes many devices, and it is getting longer with every new update release of Home Assistant, so the chances are good that your WiFi router is on it.
Our house WiFi is made up of three Ubiquity Unifi direct AP meshed together with a Unify controller. The Unify setup is so much better than everything we had before in terms of performance, stability, and seamless roaming between base stations. So I’ll base my instructions on the Ubiquity Unify direct Access Points, but on this page, you will find instructions for many WiFi router devices.
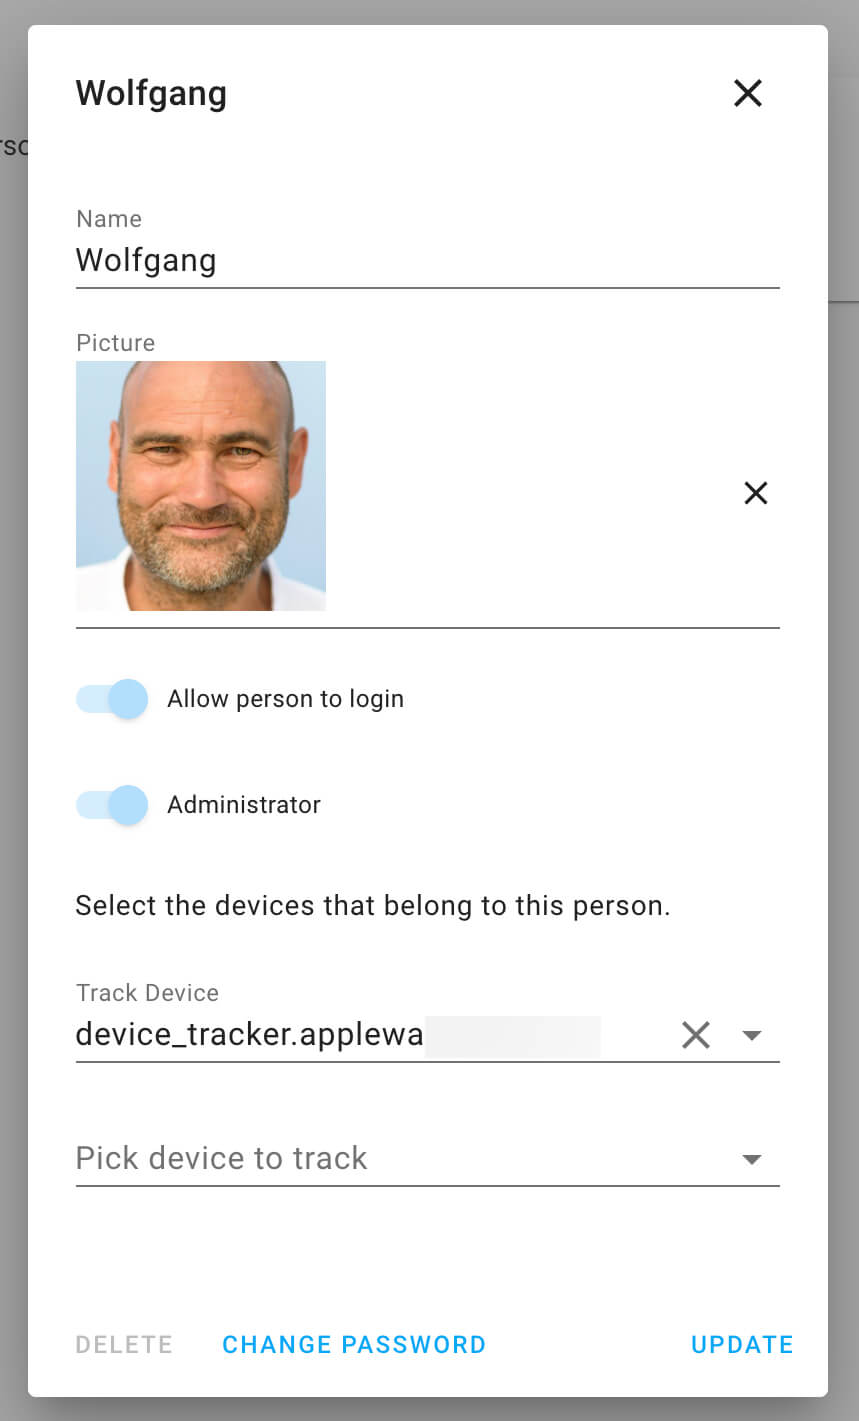
Presence Detection in Home Assistant is based on persons that are associated with one or several trackers. As long as a tracker is connected to the local WiFi network, the person is reported as “home”. Otherwise, the status is “away”.
As the tracker, you should choose the most likely device to go with you when you leave the house. In most cases, this will be either your phone or your smartwatch.
The first step is to install the integration of your WiFi router. In our case, it is Ubiquiti Unify.
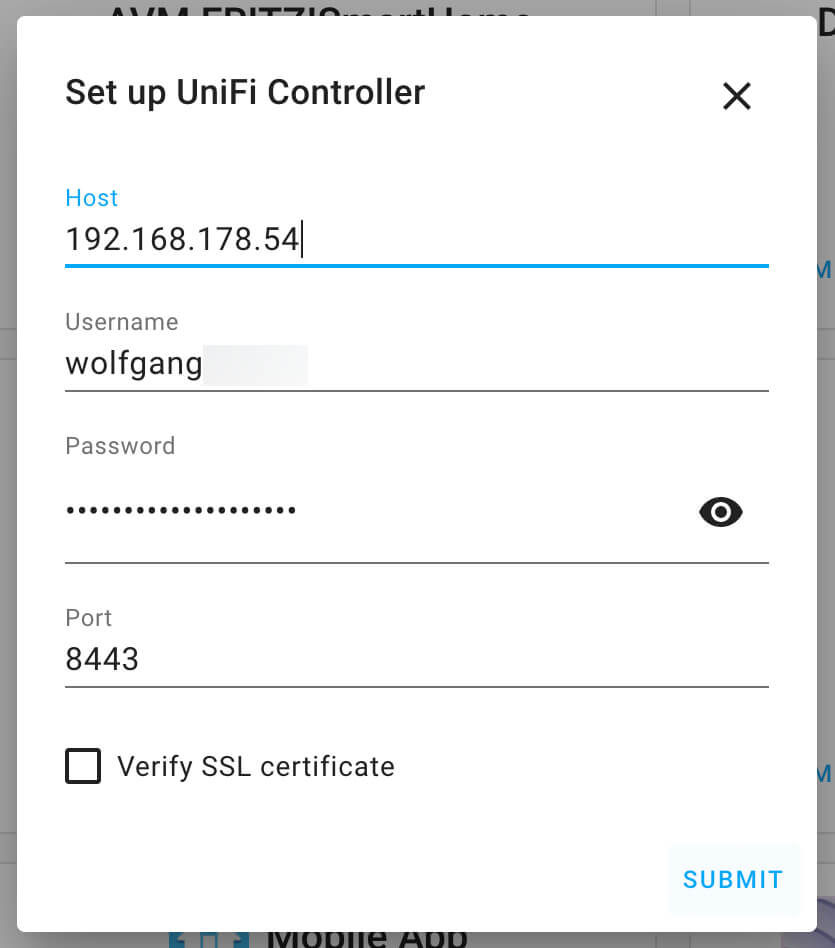

Setting up requires you only to enter the login data that you use to access your Ubiquiti controller from a browser window. Once submitted, the integration will show you all connected clients.
Note: In earlier Home Assistant releases, this information was entered in the configuration.yaml. This is no longer necessary.
The next step is to associate the persons to a trackers. In Configuration, go to “People”.
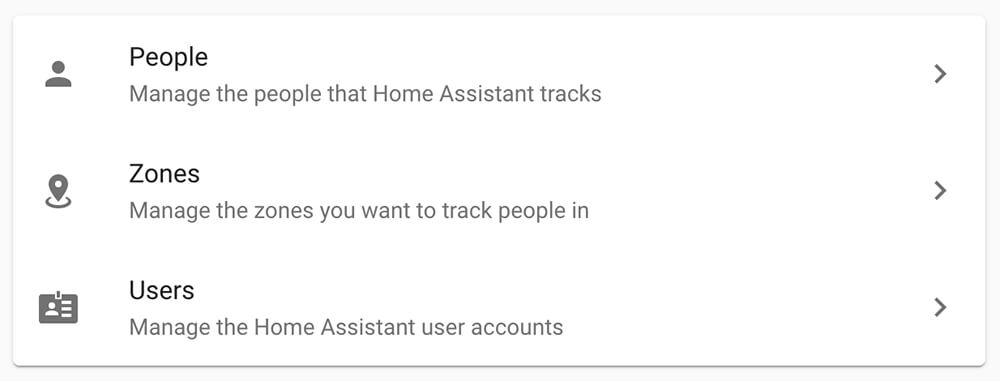
Either use existing or create new “People”. You can also add a profile photos here.
Create a card in your Home Assistant front-end and add your “People”. If you see something like this, it probably works already.
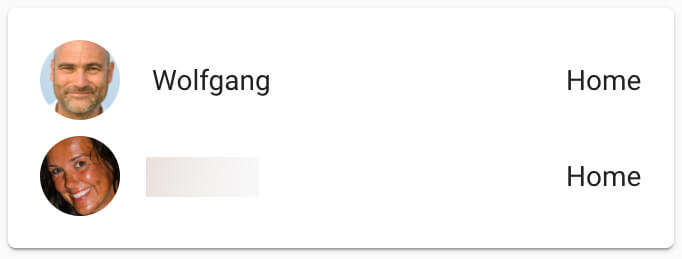
To test if it works, turn off your tracking device and wait a few minutes. Sometimes it can be swift; sometimes, it takes up to 10 minutes to drop a device from the network scan. Finding a new device is much faster, a question of a few seconds to a minute.
We have one last setting to do in Home Assistant, but before we can come to this, we must first install our MQTT setup.
The MQTT broker
Note: If you have followed my official instructions, then the MQTT software will be installed already.
MQTT stands for MQ Telemetry Transport and is an extremely simple and lightweight messaging protocol. Originally conceived to work with minimal network bandwidth, it is ideal for the Internet-of-Things world and the communication between many small and low-powered devices. This is why it has become so popular for Home Automation systems.
MQTT works, to put it very simply, like a post office. People are sending letters to each other, but they have to always get to the central post office where they are being distributed.
The key terms are “topic, message, publish and subscribe”. Topic is something you want to participate in, publish when you make a statement concerning a topic, and subscribe is when you want to receive all statements around a topic. The content of these communication activities is called “messages”. The post office in MQTT speak is the “broker”.
This is as far I will go in this article, there are lots of good tutorials on this subject on the internet. Although MQTT is a simple protocol, it can be a potent communication tool.
The first thing to install is the MQTT broker. If you have followed the Pi3D image viewer setup instructions, the local Mosquitto broker will have been installed already and you can skip the next chapter.
I worked with free hosted message brokers like CloudMQTT before but found them to be unreliable, so I recommend a local MQTT broker.
Installing MQTT on your digital picture frame
In Terminal, connect to your digital picture frame and type
sudo pip3 install paho-mqtt && sudo apt install -y mosquitto mosquitto-clientsThe display control script invoked by MQTT
We need to create a new Python script that turns the digital picture frame display on or off.
It listens to the topic “frame/monitor” and turns the monitor on when the message is “ON” and off when the message is “OFF”. Name the file “monitor_control.py” and put it in your main Pi directory.
#!/usr/bin/env python3

import paho.mqtt.client as mqtt
import subprocess

def hdmi_on():
    try:
        subprocess.call("wlr-randr --output HDMI-A-1 --on --mode 3840x2160", shell=True)
        print(f"Monitor turned on successfully.")
    except Exception as e:
        print(f"An error occurred: {e}")

def hdmi_off():
    try:
        subprocess.call("wlr-randr --output HDMI-A-1 --off", shell=True)
        print(f"Monitor turned off successfully.")
    except Exception as e:
        print(f"An error occurred: {e}")

def on_connect(client, userdata, flags, rc):
  print("Connected to MQTT broker")

def on_message(client, userdata, msg):
    print(msg.topic+" "+str(msg.qos)+" "+str(msg.payload))
    if msg.payload.decode() == "ON":
        hdmi_on()
        client.publish("frame/monitor", "ON", qos=0, retain=True) # This should keeo the former state active
    elif msg.payload.decode() == "OFF":
        hdmi_off()
        client.publish("frame/monitor", "OFF", qos=0, retain=True) # This should keeo the former state active
    else:
        pass

def on_subscribe(client, userdata, mid, granted_qos):
    print("Subscribed to topic : " + str(mid) +" with QoS" + str(granted_qos))

client = mqtt.Client()

client.connect("localhost", 1883, 60)

client.subscribe("frame/monitor/set" , qos=0)

client.on_connect = on_connect

client.on_message = on_message

client.loop_forever()
Should a network failure occur, we want the script to be launched at boot and restarted. Enter
sudo nano /etc/systemd/system/monitor_control.serviceIn the editor, paste this text
[Unit]
Description=Monitor Control
After=network.target

[Service]
ExecStart=/home/pi/venv_picframe/bin/python /home/pi/monitor_control.py
WorkingDirectory=/home/pi
Restart=always
User=pi

[Install]
WantedBy=multi-user.target
Save and exit. Then, enter in Terminal
sudo chmod 644 /etc/systemd/system/monitor_control.service
sudo systemctl daemon-reload
sudo systemctl enable monitor_control.service
Setting up MQTT in Home Assistant
Add the MQTT Integration under Configuration > Integrations.
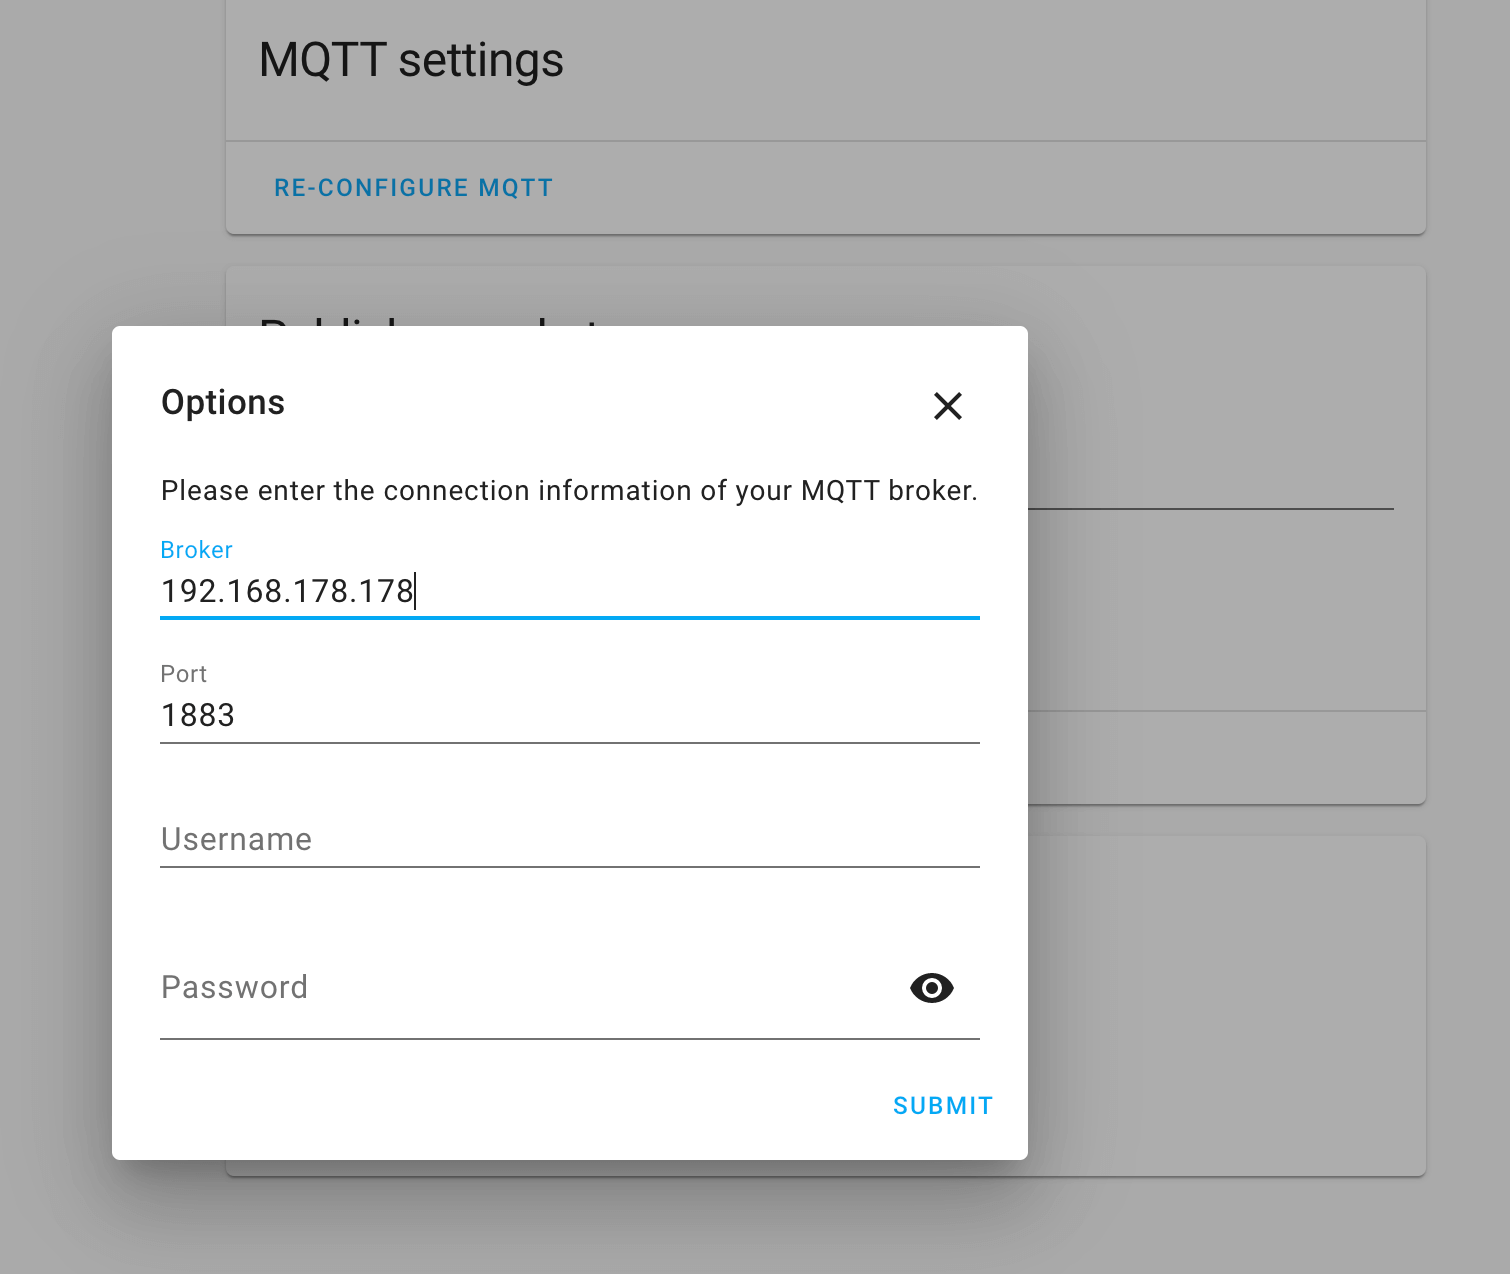
Add this paragraph in configuration.yaml:
# MQTT Switch
switch:
  - platform: mqtt
    name: "Digital Picture Frame"
    icon: mdi:panorama
    state_topic: "frame/monitor"
    command_topic: "frame/monitor/set"
    payload_on: "ON"
    payload_off: "OFF"
    state_on: "ON"
    state_off: "OFF"
    qos: 0
Finally, set up the entity switch for the digital picture frame in the front end.
entities:
  - entity: switch.pictureframe
    name: Living room
show_header_toggle: false
title: Digital Picture Frame
type: entities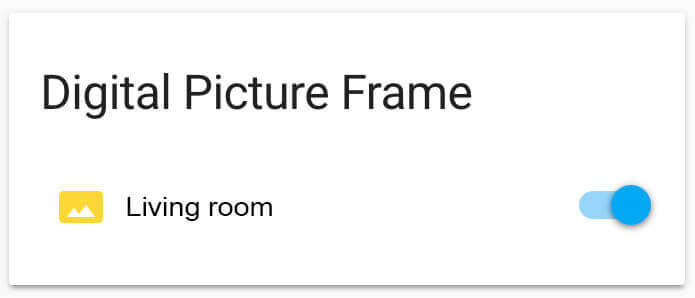
Adding the Automation to Home Assistant
We are going to create two automations. One to turn the frame on when at least one person is there, and another one to turn it off when nobody is in the house.
Create a new automation, click on the three dots in the upper right corner and “Edit as YAML”. Paste the following text in there to create the first automation. Add a condition. We only want this to happen before 22h.
alias: 'Turn on the picture frame if at least one person is home'
trigger:
  - entity_id: person.firstperson
    platform: state
    to: home
  - platform: state
    to: home
    entity_id: person.secondperson
condition:
  - before: '22:00'
    condition: time
  - after: sunrise
    condition: sun
action:
  - data:
      entity_id: switch.pictureframe
    service: switch.turn_on
mode: single
The second automation turns the frame off if nobody is home:
alias: 'Turn off the picture frame if nobody is home'
trigger:
  - platform: state
    to: not_home
    entity_id: person.firstperson
  - platform: state
    to: not_home
    entity_id: person.secondperson
condition:
  - condition: state
    state: not_home
    entity_id: person.secondperson
  - condition: state
    state: not_home
    entity_id: person.firstperson
action:
  - data:
      entity_id: switch.pictureframe
    service: switch.turn_off
mode: single
Restart Home Assistant and reboot your digital picture frame.
Conclusion
Congratulations, your esteemed presence will automatically be registered and will make your digital picture frame turn on or off.
This is a simple way to save energy and extend the lifetime of the display.
Was this article helpful?
Thank you for your support and motivation.
Related Articles
- Voice control your Raspberry Pi digital photo frame with Amazon Echo and Home Assistant
- Show the CPU temperature of your Raspberry Pi digital picture frame in Home Assistant via MQTT
- Voice control your Raspberry Pi digital photo frame with Amazon Echo, MQTT, and Node-RED
- Display the number of photos on your Raspberry Pi digital picture frame in Home Assistant