Hi, this is Dave. Wolfgang invited me to write this guest post after I told him about my photo frame project. He thought it would be very useful for the digital frame home brewing community to hear about my ideas and findings.
My wife and I have temporarily moved from our family home to an overseas posting living in a small apartment. We struggled with how many photos we could pack and hang in our temporary housing and decided to use a digital picture frame.
My first attempt was to buy an 11″ no-name frame on eBay. While that frame worked for a while, the viewing angle was terrible.
After that frame died, I started exploring options to build a high-quality picture frame based on a Raspberry Pi Model 3 I had lying around.
Here is what I did.
Editor’s note: Dave’s article is based on an older version of Pi3D PictureFrame. The software has been updated in March 2021 and provides many new features. It shouldn’t be very difficult for readers to translate the settings in this article to the lastest version.
Hardware
I started by looking for a reasonably priced monitor with an IPS display for good viewing angles and a minimal bulk and stumbled across Acer SB220Q bi for about US$90. This frame has a minimal sized screen housing and is available in three sizes. I chose the 21.5″ model.
The next part of my journey was to find a good software package. After a few false starts, I discovered Wolfgang’s blog, and the rest came together smoothly.
Used software and tweaks
The software I used is described in the following articles:
- Pi3D and the PictureFrame2020.py script in “How I added crossfading image transitions to my digital picture frame using Pi3D“.
- Install instructions are as described in Wolfgang’s article, “How to configure the software for your digital picture frame in 60 minutes“.
- MQTT to enable remote controls as described in “How to install the MQTT Mosquitto broker locally on your digital picture frame’s Raspberry Pi“.
- “How to add photos to your digital picture frame via email” to enable a simple way to add photos to the library. I love this option because after the initial load I tend to only load images as I take them. I can make minor edits in the field and have the pictures on display before I get home.
I made the following changes to the Pi3D code:
In PictureFrame2020.py, I inserted the following to enable a “skip” MQTT function to enable quick browsing for a particular image:
 ...
       elif message.topic == "frame/back":
        next_pic_num -= 2
        if next_pic_num < -1:
          next_pic_num = -1
        nexttm = time.time() - 86400.0
      elif message.topic == "frame/skip":
        nexttm = time.time() - 86400.0
      elif message.topic == "frame/subdirectory":
...
    client.subscribe("frame/back", qos=0)
    client.subscribe("frame/skip", qos=0)
    client.subscribe("frame/subdirectory", qos=0)
I can control my frame from my iPhone and Apple Watch using shortcut buttons or Siri.
Wolfgang describes the process in “How to use iOS Shortcuts to control your digital picture frame via iPhone, Siri, or your Apple Watch“.
I went a bit further and added “List” and “Choose from” Shortcut blocks to allow for preset input for some of the shortcuts.
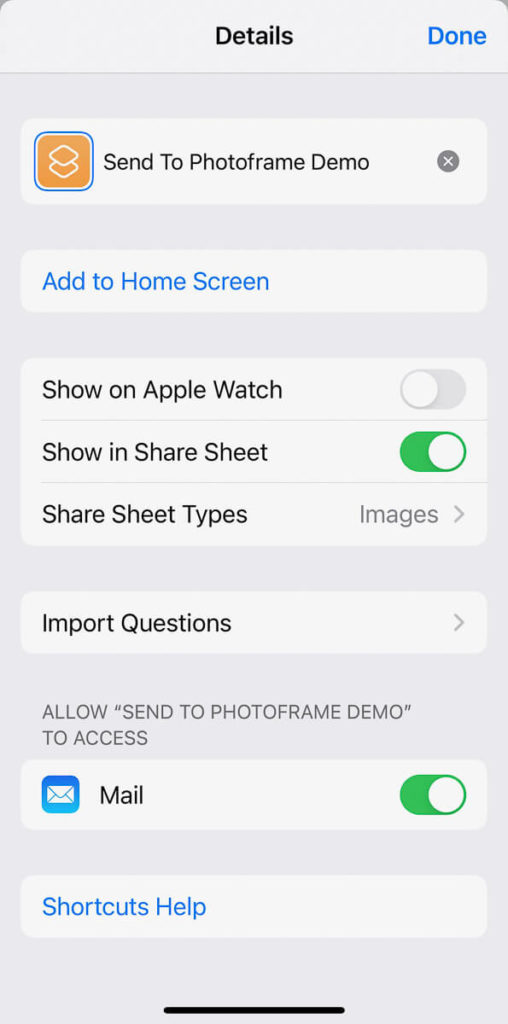
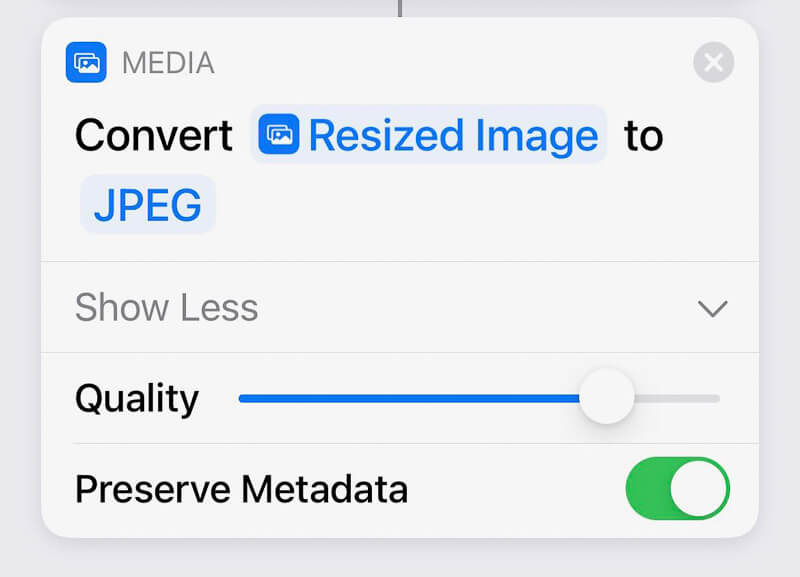
I also created a script to resize a photo and send it to the frame’s Gmail address using a share sheet.
Start by creating a new shortcut with the following details. Then add the following shortcut steps:
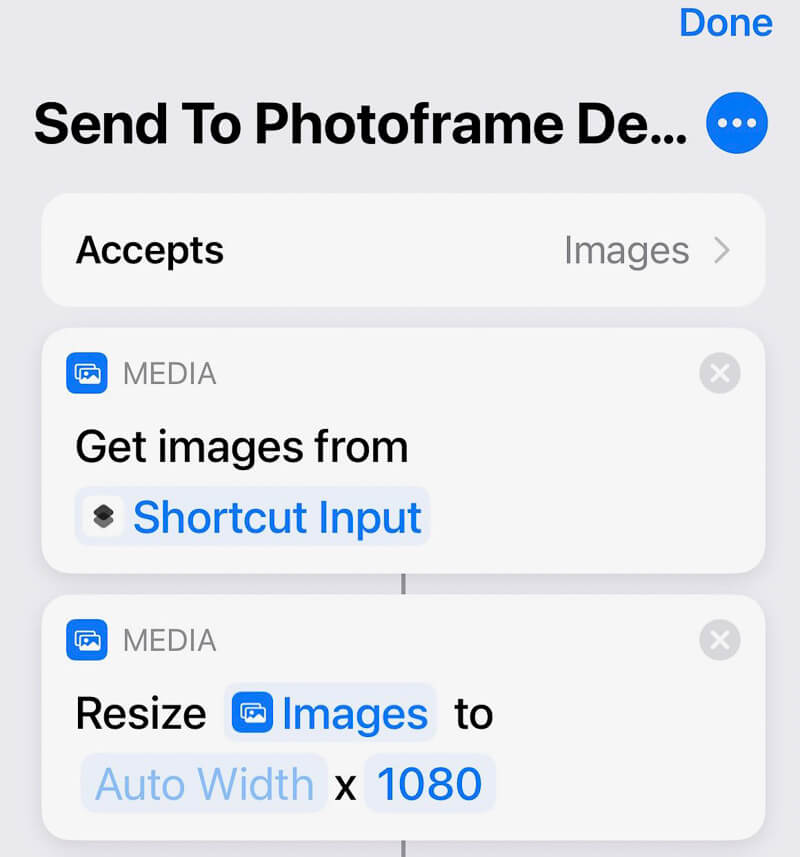
Keep on adding the other steps.

Once created, the script will be available as an Action in the Photos app.
Putting it all together
After getting the monitor and software settled, I measured the height of the monitor display area to order a frame.
I chose a mail-order custom frame shop that had a 1.25″ deep rabbet. The display height was 10.5″, so the 4:3 width came out to 14″. I found that the site offered lower prices on “stock” sizes, so I ordered a 16″x20″ and ordered a 10.5″x14″ mat, which meant it was 3″ wide on the ends and 2.75″ wide on the top and bottom.
This also allowed plenty of room to fit the monitor’s width in the frame. I sent the order off and waited for months because the company staff was hit hard with COVID.
When the frame finally showed up, I found that the company took it upon themselves to send me a custom size frame with a uniform 2.75″ mat. When I fit the monitor in the frame, it just fit, with no room to spare!
As customary, the opening of the mat was delivered with a small margin to allow for uncertainty in mounting the monitor. I will describe how I compensated for this below.
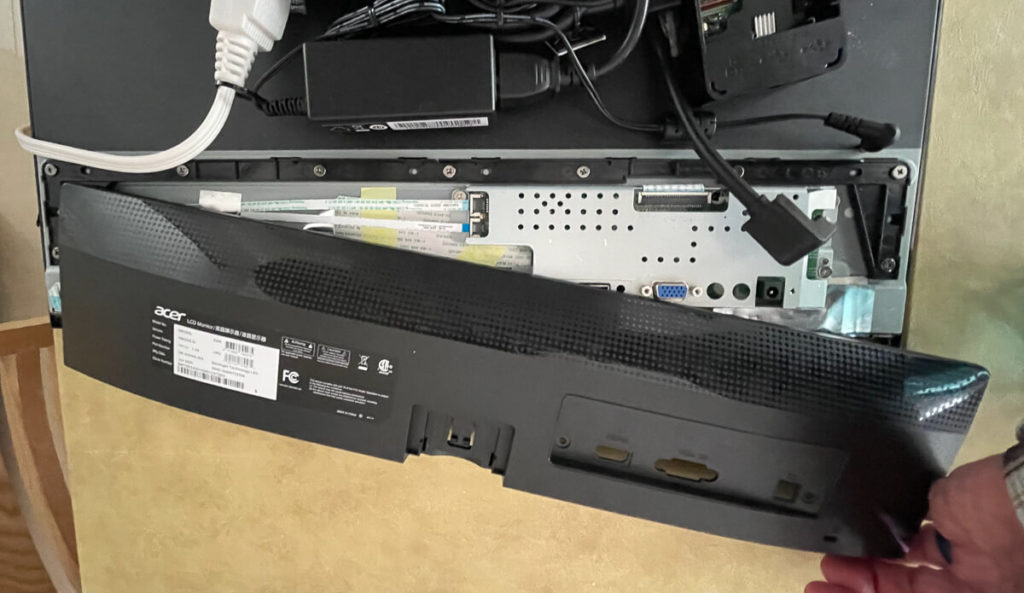
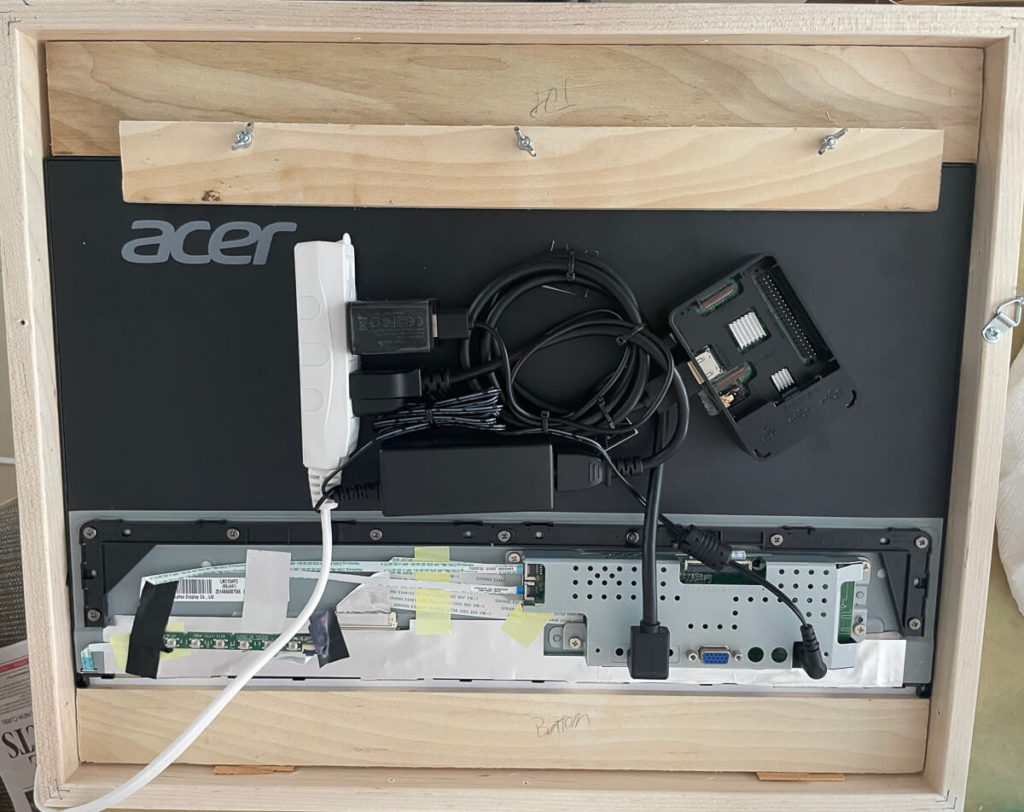
The monitor I selected has a 1/4″ thick frame with only a small bump-out in the rear. I easily removed a bezel on the bottom front of the screen and the plastic housing around the electronics frame without leaving any electrical components exposed.
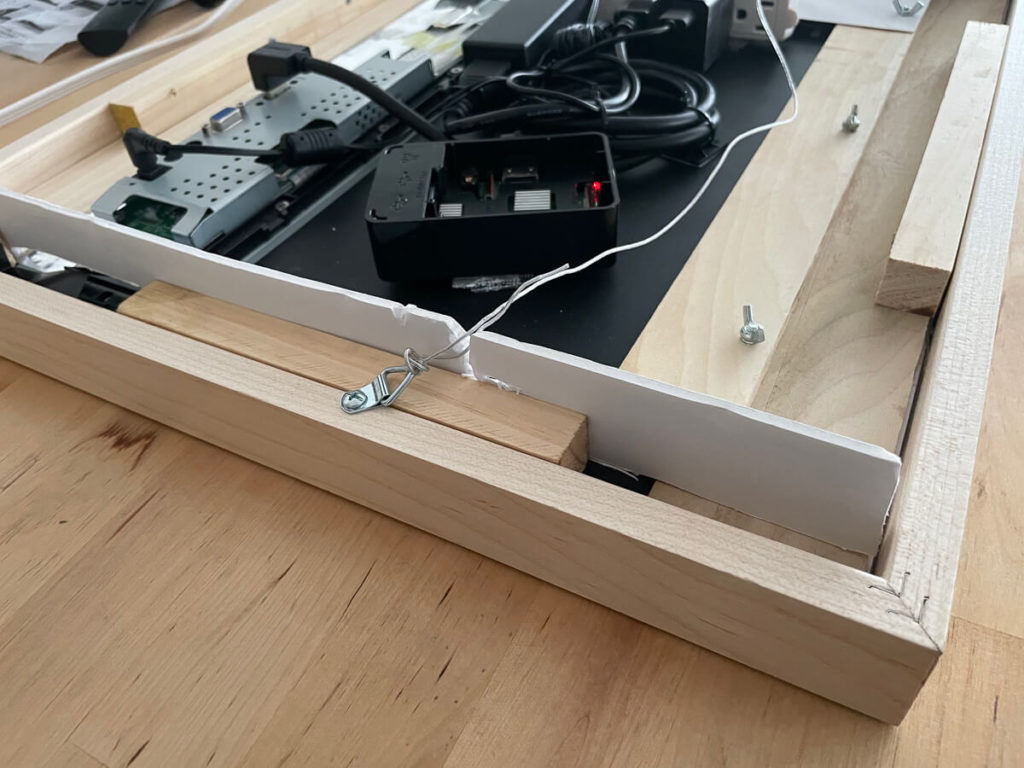
After removing the bezel, the monitor sat flush against the mat with a gap above and below the monitor. I filled these with 1/4″ trim boards and secured the trim and monitor with sections of 3/4″ square dowel screwed into the frame.
I used a multi-outlet grounded extension cord to power both the Raspberry Pi and the monitor. I was able to pack the power transformers, Pi case, and all cords away within the frame using cable ties and sticky velcro.
Unfortunately, the HDMI cable plugged into the monitor sticks out about an inch beyond the edge of the frame. I mitigated that by screwing two foam core strips on the frame’s vertical sides to act as standoffs for the frame.
They also allow for better air circulation to the RaspberryPi. I mounted the Pi in a case but in experimenting, leaving the top of the case results in a lower operating temperature.
Adjusting image size and position
Many of my photos were carefully cropped in 4:3 format, so when they were displayed through the smaller sized mat, they lost some of their impact.
I researched the Pi3D GitHub site and found an “issue” similar to mine. Paddy, the developer, provided the code change needed to change the image size and position. In my case, I changed the PictureFrame2020.py line 276:
 DISPLAY = pi3d.Display.create(x=0, y=0, frames_per_second=config.FPS,
              display_config=pi3d.DISPLAY_CONFIG_HIDE_CURSOR, background=config.BACKGROUND)
to:
DISPLAY = pi3d.Display.create(x=10, y=10, w=1892, h=1052, frames_per_second=config.FPS,
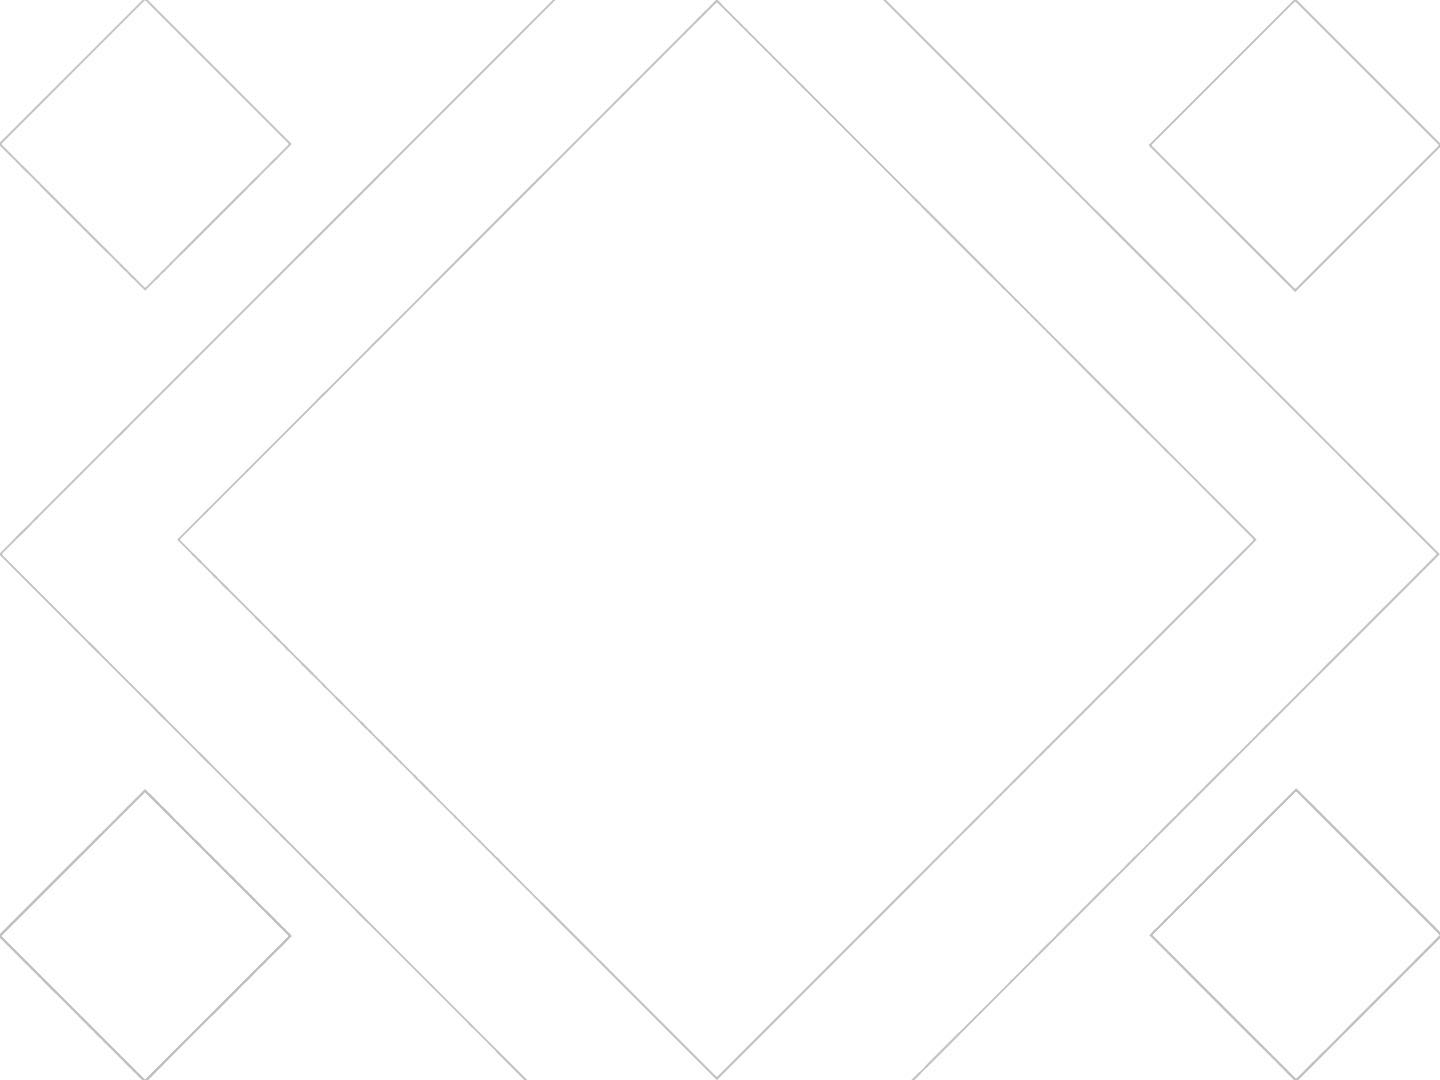
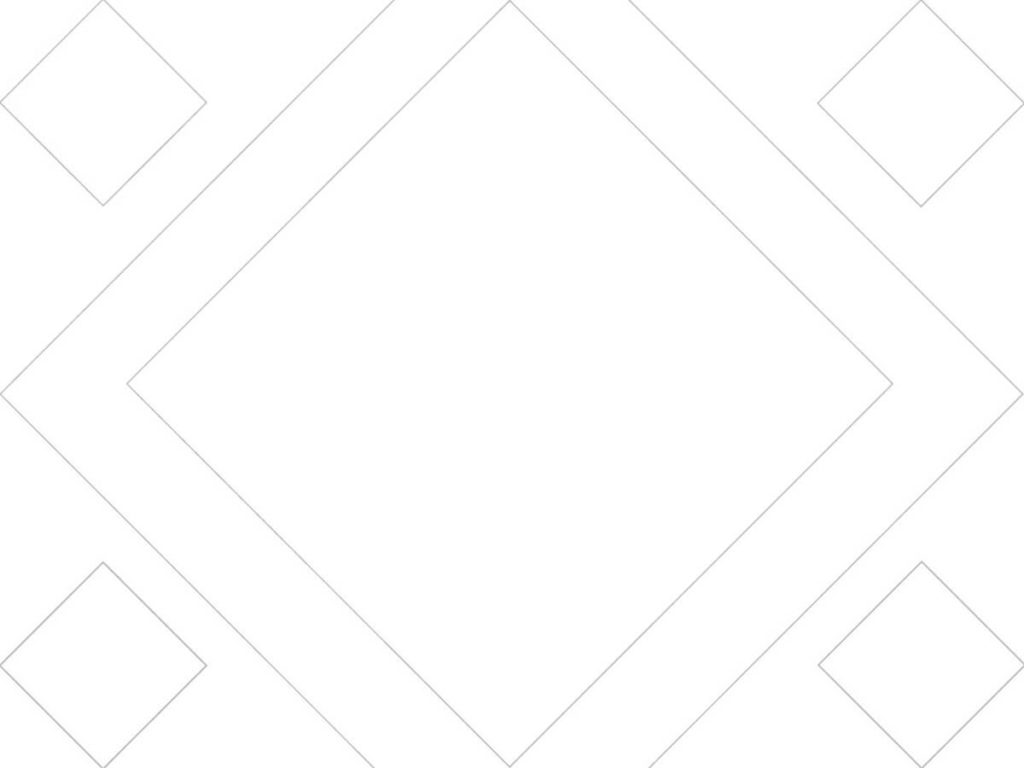
display_config=pi3d.DISPLAY_CONFIG_HIDE_CURSOR, background=config.BACKGROUND)I created a simple test target based on a 1440×1080 image with diamond boxes on the edges to guide my selection of offset and size. You can download the original file here.
Assembly photos
Remove the front bezel.
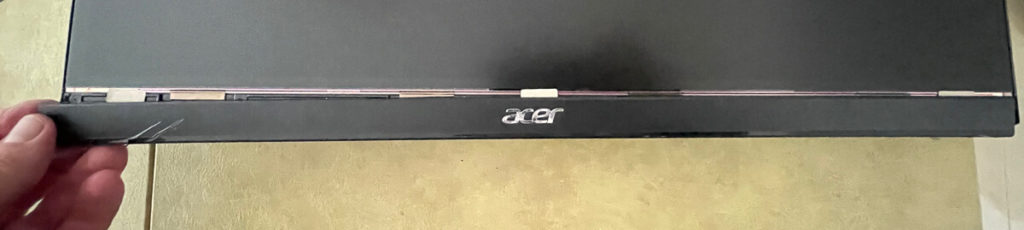
Attach cables, Pi, and power transformers to the back of the monitor. Remove the rear cover.
Align monitor in the frame and fill gaps with a trim board.
Secure trim and monitor with square dowel screwed into the frame. Install foam core standoffs.
I attached an envelope with a working backup SD-card in the event of failure, I have a card ready to reload just the images.

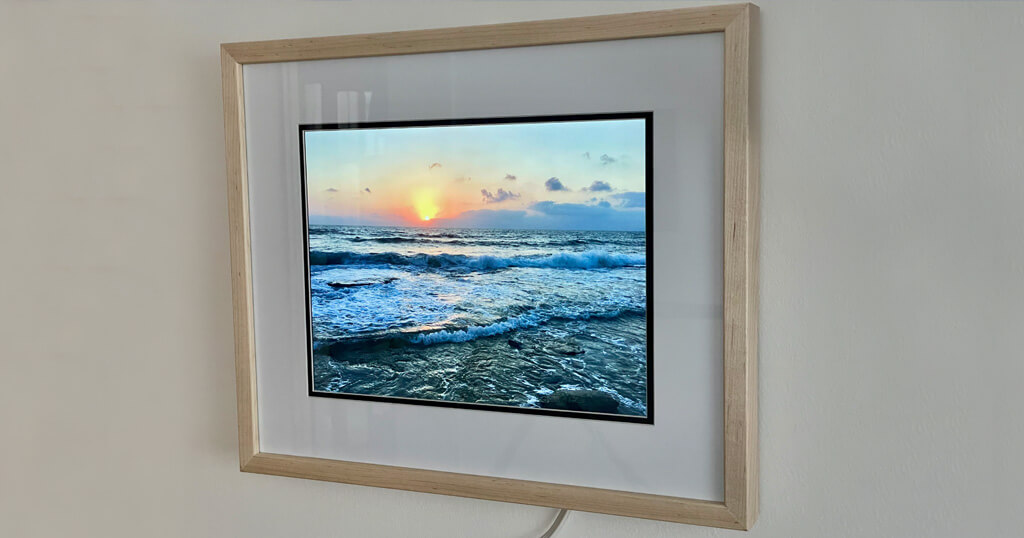
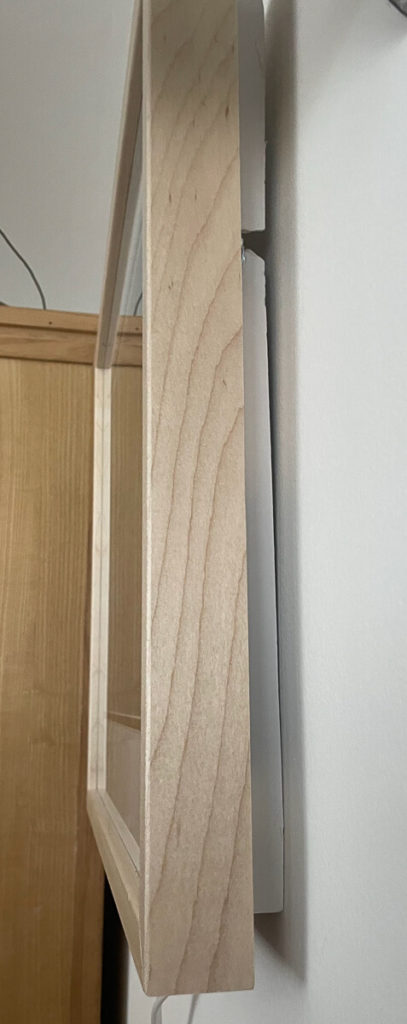
Final from the side.
View from the side when mounted.
Conclusion
I am delighted with the final result. My self-made digital picture frame is so much better than anything I can buy because it was exactly tailored to my wishes regarding size, aspect ratio, and software functionality.
Definitely worth it! We are reliving our memories every day!
Was this article helpful?
Thank you for your support and motivation.
Related Articles
- How Rob built a superslim 32-inch 4K digital picture frame based on the BenQ PD3200 and the Raspberry Pi 4
- Discover the complete hard- and software setup of my Raspberry Pi digital picture frame (December 2023)
- How I built a digital picture frame with a Raspberry Pi
- Which Raspberry Pi model should you get for your digital photo frame?