This is the story of my recent DIY project, which included building a large digital picture frame with a 3:2 aspect ratio, which is what every photographer wants. Oh, yes, and this also caused me a full renovation of our fireplace…
What do these two projects have in common? Read on to find out. Hint: It has something to with hiding the power cable to make the digital picture frame look very professional.
Hi, I am Josh from Flint in Michigan/USA, and I have been following this blog for a while. In this guest post, I will show you step-by-step what I did, the hard- and software I used, and how I hid the power cable in a brand new fireplace setup.
Editor’s note: Josh’s article is based on an older version of Pi3D PictureFrame. The software has been updated in March 2021 and provides many new features. It shouldn’t be very difficult for readers to translate the settings in this article to the lastest version.
Some background thoughts that every photographer will understand
When I talked about a digital picture frame with my wife, who is a photographer, she told me that as she takes her photos with a DSLR that is based on 35mm photography, she subsequently ends up with images in 3:2.
And yes, she would be very interested in a digital picture frame in our home but it would have to have an aspect ratio of 3:2. My wife is a firm believer that the shot should be composed while shooting and not during editing. I guess most professional photographers will agree with her.
Now, there was a problem. I wanted a large digital frame, at least 27 inches, if not a bit more. However, there isn’t a single screen in the world (read “on the Amazon website”) that has an aspect ratio of 3:2.
16:10 is the best you can get up until 24 inches. It’s 16:9 for larger screens.
I may have stood a slight chance arguing with my wife that 16:10 is fairly close to 3:2, but all the 27 inches monitors are produced in 16:9 which is even worse. Cropping 20% from a photo that was composed with a lot of care was a hopeless undertaking, and I wouldn’t stand a chance of getting approval to proceed. And justly so.
And don’t get me started about pillarboxes. They just don’t look so great to put it mildly.
While thinking about how the frame would be constructed I saw the blog post “How to build a stunning high-end 32 inches 4K digital photo frame with the Raspberry Pi 4“.
It included an autopsy picture of the long-discontinued Memento Frame which, to my knowledge, was the only digital picture frame that was ever sold in 3:2.
What Memento did rather cleverly, was to simply mat a large 40 inches 16:9 screen so that only a 3:2 format was visible. You would lose a few inches in screen real estate but any pillar boxes would be hidden to the viewer.
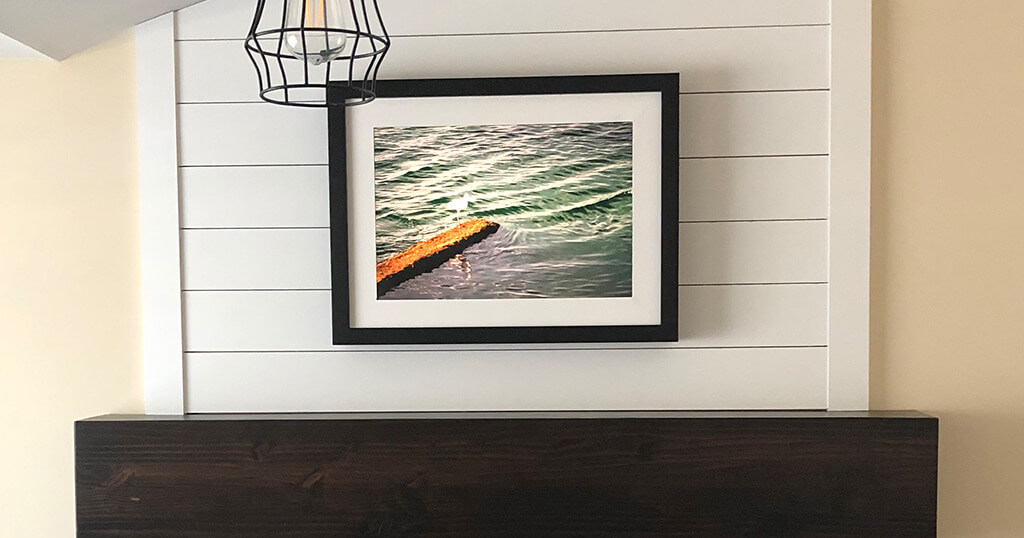
I decided that the Memento frame mentioned in the blog was basically the look I was trying to replicate.
And we had some ideas where to hang up the frame which would result in a major renovation of our fire place. More about it in a minute.
My hardware list
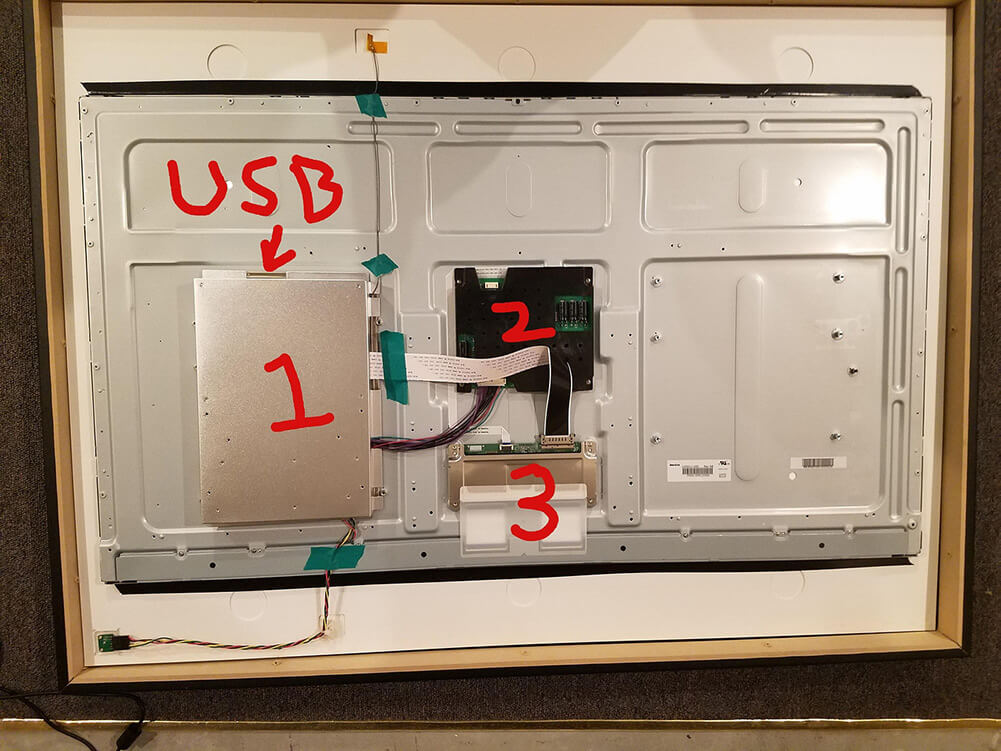
The digital picture frame is powered by a Raspberry Pi 3 B+, a standard 5V power supply, and a 64GB Sandisk MicroSD card for storage.
I wanted a larger photo display than any of the 16:10 monitors that I could find. So I chose a 32 inches monitor from ViewSonic VX3276-MHD, a 16:9 model which was the same price of a 16:10 that was smaller. As I was going to make a mat to fit 3:2 formatted images, I went for the larger 32 model.
The ViewSonic has a very thin frame and a high-quality IPS display with the HDMI input facing downwards. It’s a 1080p model with a resolution of 1920 x 1080 pixels. The monitor has a VESA mount which was important for the later mounting.
The monitor’s power supply was internal. This meant no additional power supply block to hide and less cable management needed.
Also, the top half of the monitor is very thin. I had plenty of room to hide the Raspberry Pi and cables.
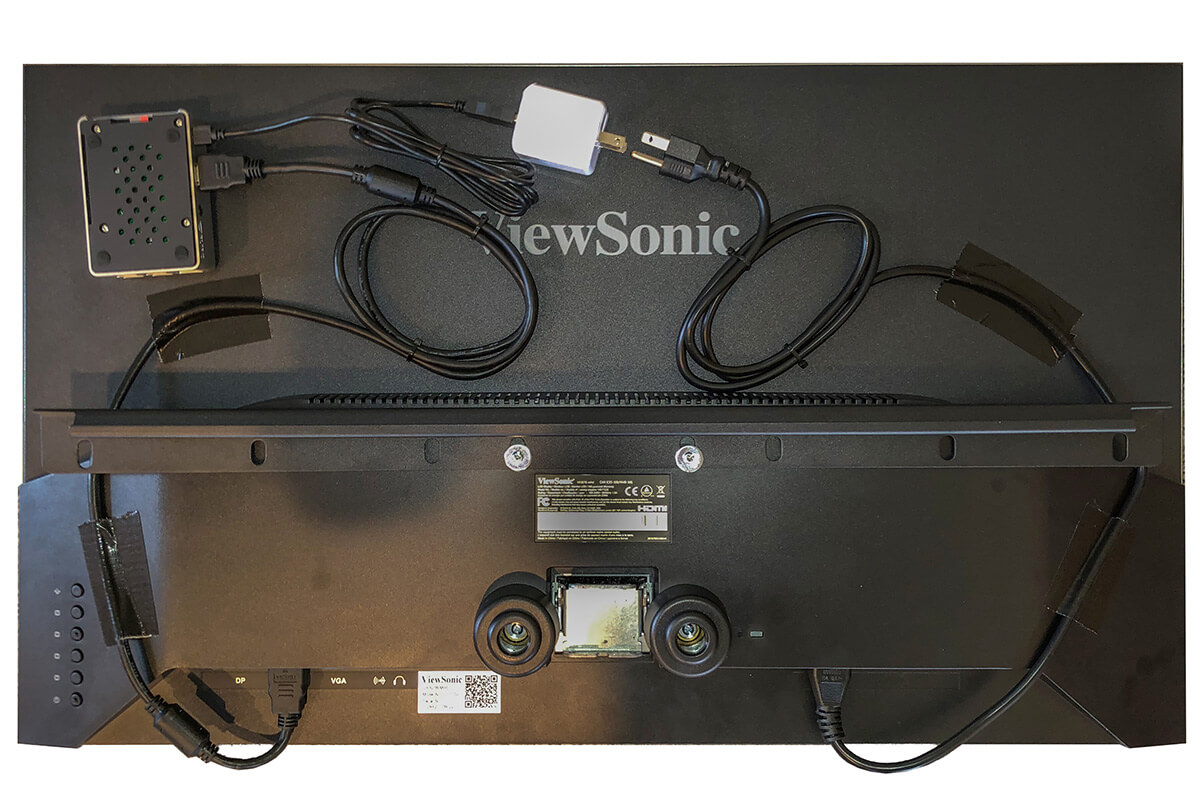

For the Raspberry Pi case, I used a Flirc Raspberry Pi 3 case. The company sells small form factor cases out of aluminum which makes the entire housing act as a heatsink and keeps the Pi cool.
I used velcro strips to attach the Raspberry Pi case upside down to the monitor to have easy access to the MicroSD card.
I did not modify the monitor at all as it is very thin and flat. The bottom bezel is almost flush with the glass. The sides and top are completely flat. I did add felt pieces on the inside of the frame to keep the frame from scratching the display. The back of the monitor worked well without removing the case.
The software I installed
My software setup was pretty straight forward. I followed Wolfgang’s general setup post of the Raspberry PI OS including Samba.
As the image viewer software, I used Pi3D and Syncthings to manage the file synchronization between the digital frame and my regular computer. I also used PiHelper to remote control the frame with my iPhone.
I had the software already running before I started building the frame. All of my photos on the display were already cropped to 3:2 with black borders on the sides of the display.
If you are running into any issues, you want to look at my PictureFrame2020config.py file below and compare it with yours:
""" This is the config file used by PictureFrame. It allows settings to be changed
on the command line when the program is run, or you can alter the default values
here
"""
import argparse

""" function needed to convert str representation of bool values
"""
def str_to_bool(x):
    if len(x) == 0:
        return True # i.e. just arg will set to true
    return not (x.lower()[0] in ('0', 'f', 'n')) # i.e. 0,False,false,No,n

def str_to_tuple(x):
    return tuple(float(v) for v in x.replace("(","").replace(")","").split(","))

# NB the reason that absolute paths are used here is because relative ones can lead
#  to abiguity if the program is started automatically on boot.
parse = argparse.ArgumentParser("start running a picture frame")
parse.add_argument("-a", "--blur_amount",   default=12, type=float, help="larger values than 12 will increase processing load quite a bit")
parse.add_argument("-b", "--blur_edges",    default=False, type=str_to_bool, help="use blurred version of image to fill edges - will override FIT = False")
parse.add_argument("-c", "--check_dir_tm",  default=60.0, type=float, help="time in seconds between checking if the image directory has changed")
parse.add_argument("-d", "--verbose",       default=False, type=str_to_bool, help="show try/exception messages")
parse.add_argument("-e", "--edge_alpha",    default=0.0, type=float, help="background colour at edge. 1.0 would show reflection of image")
parse.add_argument("-f", "--fps",           default=20.0, type=float)
parse.add_argument("-g", "--background",    default=(0.0, 0.0, 0.0, 1.0), type=str_to_tuple, help="RGBA to fill edges when fitting")
parse.add_argument("-i", "--no_files_img",  default="PictureFrame2020img.jpg", help="image to show if none selected")
parse.add_argument("-j", "--blend_type",    default="blend", choices=["blend", "burn", "bump"], help="type of blend the shader can do")
parse.add_argument("-k", "--keyboard",      default=False, type=str_to_bool, help="set to False when running headless to avoid curses error. True for debugging")
parse.add_argument("-m", "--use_mqtt",      default=False)
parse.add_argument(      "--mqtt_server",   default="mqtt.eclipse.org")
parse.add_argument(      "--mqtt_port",     default=1883, type=int)
parse.add_argument(      "--mqtt_login",    default="")
parse.add_argument(      "--mqtt_password", default="")
parse.add_argument("-n", "--recent_n",      default=10, type=int, help="when shuffling the keep n most recent ones to play before the rest")
parse.add_argument("-o", "--font_file",     default="/home/pi/pi3d_demos/fonts/NotoSans-Regular.ttf")
parse.add_argument("-p", "--pic_dir",       default="/home/pi/Pictures/OurPhotos/Live")
parse.add_argument("-q", "--shader",        default="/home/pi/pi3d_demos/shaders/blend_new")
parse.add_argument("-r", "--reshuffle_num", default=1, type=int, help="times through before reshuffling")
parse.add_argument("-s", "--show_names",    default=False, type=str_to_bool, help="text over image with file name")
parse.add_argument("-t", "--fit",           default=True, type=str_to_bool, help="shrink to fit screen i.e. don't crop")
parse.add_argument("-u", "--kenburns",      default=False, type=str_to_bool, help="will set FIT->False and BLUR_EDGES->False")
parse.add_argument("-v", "--time_delay",    default=200.0, type=float, help="time between consecutive slide starts - can be changed by MQTT")
parse.add_argument("-w", "--fade_time",     default=10.0, type=float, help="change time during which slides overlap - can be changed by MQTT")
parse.add_argument("-x", "--shuffle",       default=True, type=str_to_bool, help="shuffle on reloading image files - can be changed by MQTT")
parse.add_argument("-y", "--subdirectory",  default="/home/pi/Pictures/OurPhotos/Live/", help="subdir of pic_dir - can be changed by MQTT")
parse.add_argument("-z", "--blur_zoom",     default=1.0, type=float, help="must be >= 1.0 which expands the background to just fill the space around the image")
args = parse.parse_args()

BLEND_OPTIONS = {"blend":0.0, "burn":1.0, "bump":2.0} # that work with the blend_new fragment shader
## set uppercase CONST style variables that can be accessed from PictureFrame
BLUR_AMOUNT = args.blur_amount
BLUR_EDGES = args.blur_edges
CHECK_DIR_TM = args.check_dir_tm
VERBOSE = args.verbose
EDGE_ALPHA = args.edge_alpha
FPS = args.fps
BACKGROUND = args.background
NO_FILES_IMG = args.no_files_img
BLEND_TYPE = BLEND_OPTIONS[args.blend_type]
KEYBOARD = args.keyboard
USE_MQTT = args.use_mqtt
MQTT_SERVER = args.mqtt_server
MQTT_PORT = args.mqtt_port
MQTT_LOGIN = args.mqtt_login
MQTT_PASSWORD = args.mqtt_password
RECENT_N = args.recent_n
FONT_FILE = args.font_file
PIC_DIR = args.pic_dir
SHADER = args.shader
RESHUFFLE_NUM = args.reshuffle_num
SHOW_NAMES = args.show_names
FIT = args.fit
KENBURNS = args.kenburns
TIME_DELAY = args.time_delay
FADE_TIME = args.fade_time
SHUFFLE = args.shuffle
SUBDIRECTORY = args.subdirectory
BLUR_ZOOM = args.blur_zoom

CODEPOINTS = '1234567890ABCDEFGHIJKLMNOPQRSTUVWXYZ., _-/' # limit to 49 ie 7x7 grid_size
I still need to work on automating that process for the photos that aren’t from my wife’s camera and I think I’ll give this article “How to get a professional and automatic aspect ratio crop for your images on your digital picture frame” a try.
Building the wooden frame structure
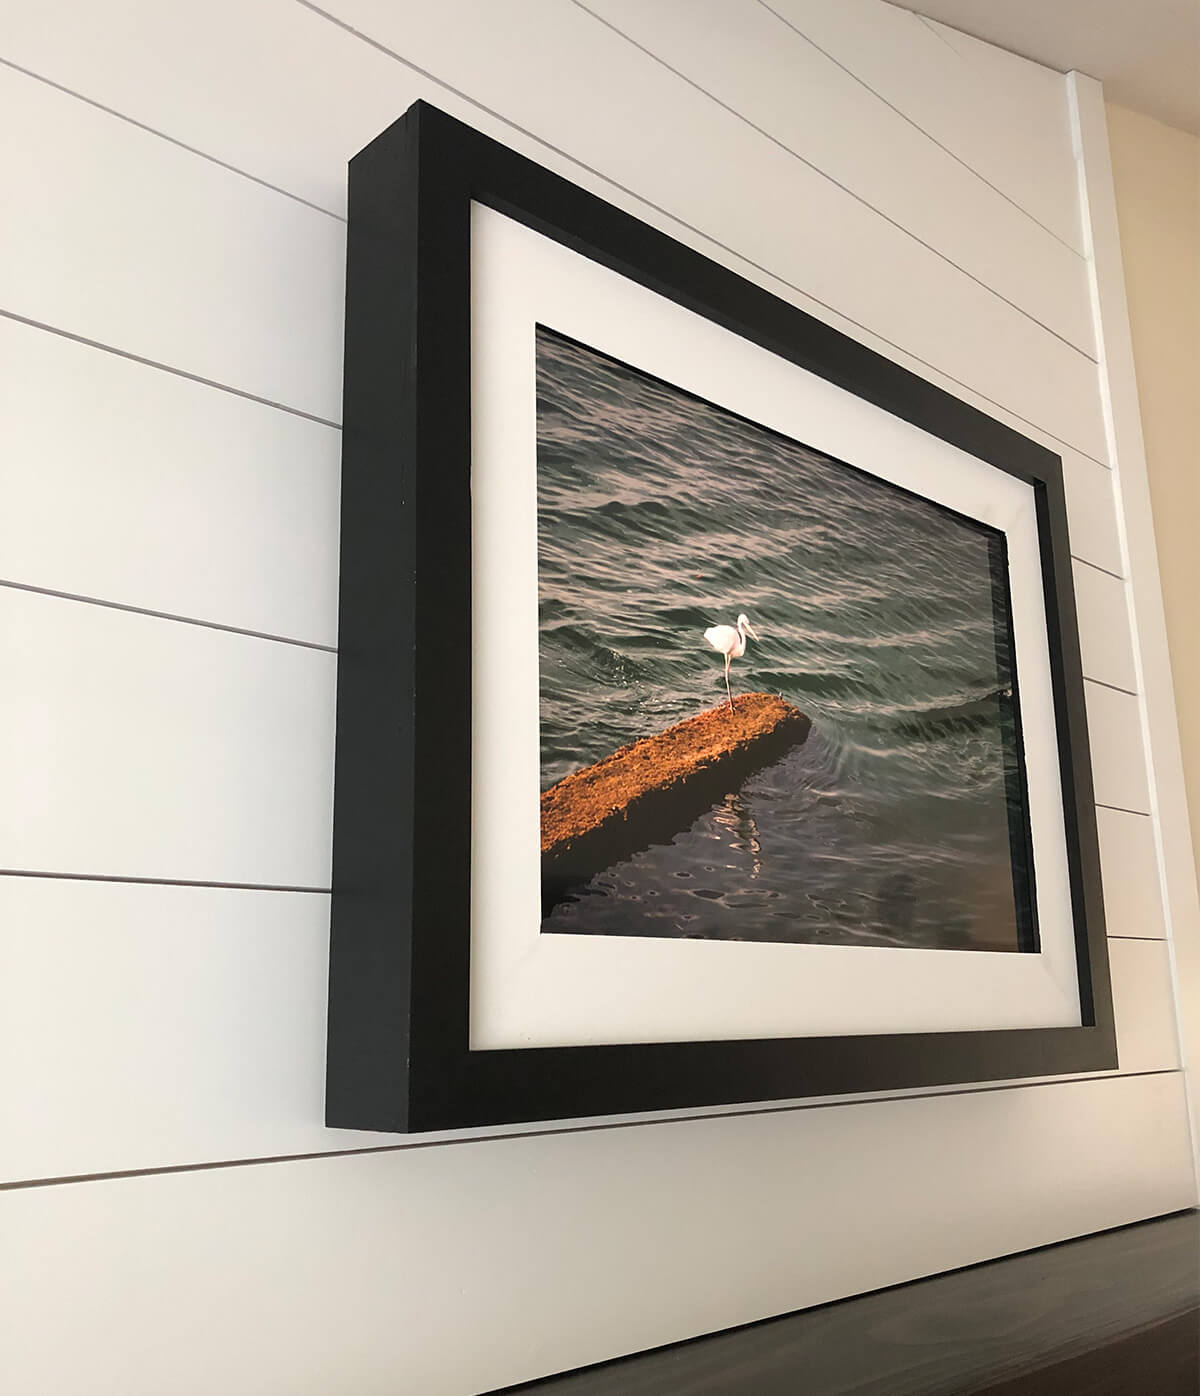
To build the frame, I made three separate boxes. I used pine trim pieces that were 1″ (2.54 cm) wide for the outer frame. I painted this box flat black.
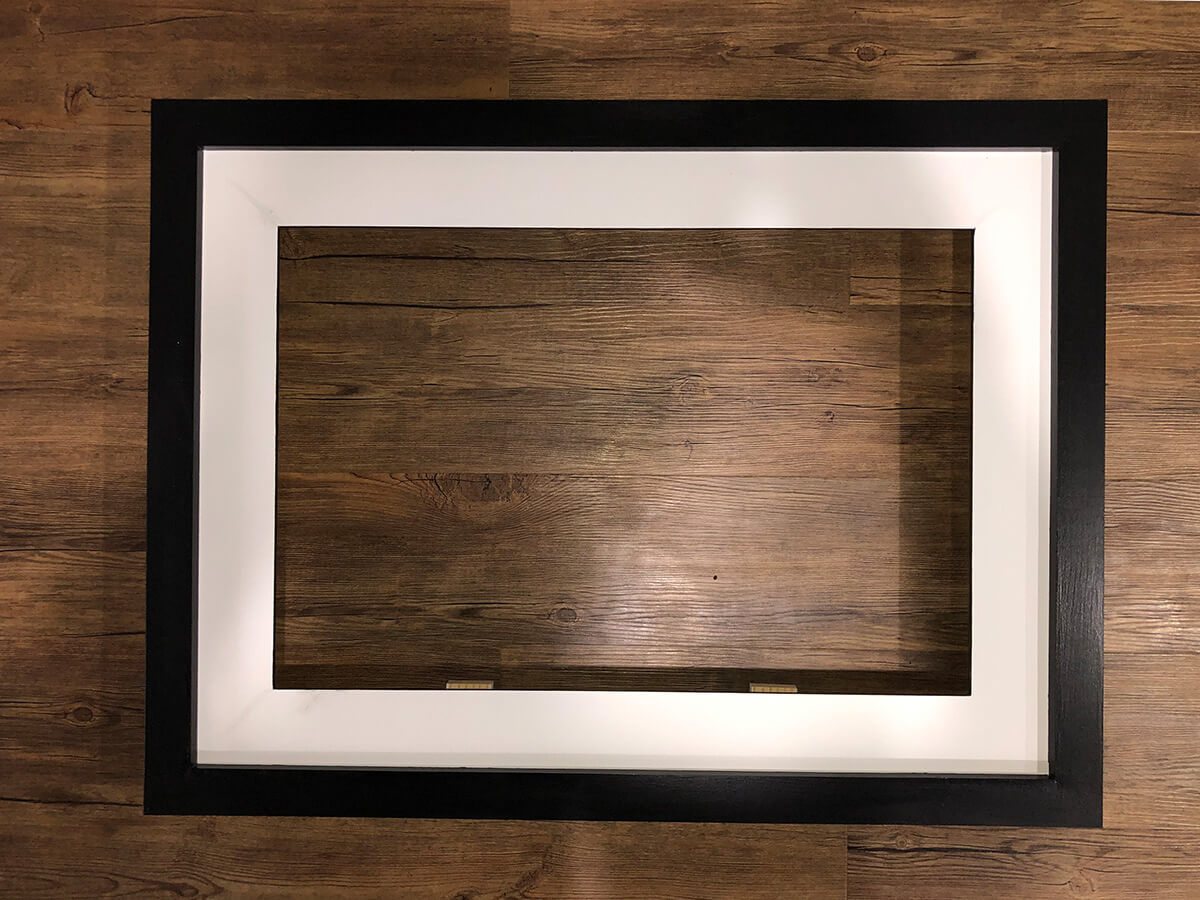

One critical measurement is figuring out how to properly mat the image.
With the display already showing my photos, I measured the size for my mat opening. I subtracted 1/4″ (6.35 mm) from the height and width of the image. These measurements were used for the inside edges of the mat. 1/4″ gave me a little wiggle room when aligning the frame to the display.

For the mat, I used 3 1/2″ (8.89 cm) poplar trim that is 1/4″ (6.35 mm) thick. I painted this box with a flat white. Also, I painted the inside edge flat black to create a smooth transition between the mat and the display.
For the build I used 5/8″ (1,59 cm) brad nails and wood glue for all joints.
Since I used mostly poplar wood for the frame, the frame is very lightweight. The display has a metal edge, and I felt comfortable with the display holding the weight of the frame. I attached a piece of the 1″ (2,54 cm) trim on the back of the frame that rests on the display. I also added two pieces of trim to the crosspiece to hold the frame against the display.
Now it was time for the third box.
I measured the distance from the frame to the wall. I built a box that was 2 1/2″ (6.35 cm) thick to fill the gap of the frame to the wall. Once the box was attached to the frame, I filled any gaps in the build with spackling before painting.
The final dimensions of the frame are width 30.5″ (77.5 cm), height 23″ (58.4 cm) and depth 3″ (7.6 cm)
How to hide the power cable? Let’s remodel our fireplace!
Now, the only “little detail” I needed to solve was how to hide the power cable. There was no way that we would hang up a digital photo frame with a dangling power cord!
So why not include a little home renovation project in the larger context of building a digital picture frame?
We have lived in our home for over ten years now. My wife and I had never been a fan of the look of the fireplace. We wanted to lighten up the tile and a more modern look for the mantle. My wife also liked the idea of shiplap above the mantle.

This got me thinking.
Adding a shiplap would have a huge benefit. I would be able to hide wires to the frame. I was inspired by the article “6 tricks on how to best hide the power cord when hanging a digital picture frame on the wall“. The article showed one method of hiding the cable in grooves in the wall. Instead, I decided to made grooves in the backside of the shiplap and trim.
So after some trips to the DIY store and some tiny amounts of dust in our living room, this is how it ended up looking:
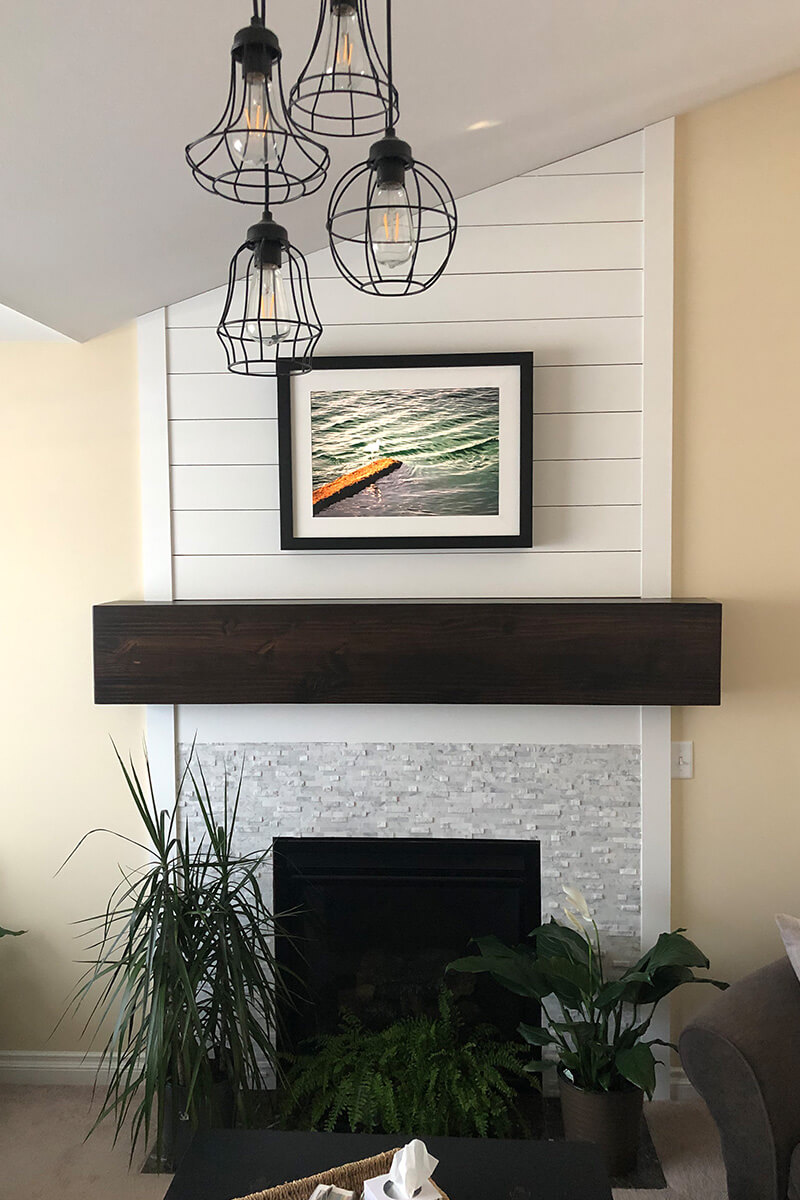
The monitor itself is affixed to the wall with a standard AmazonBasics TV mount.
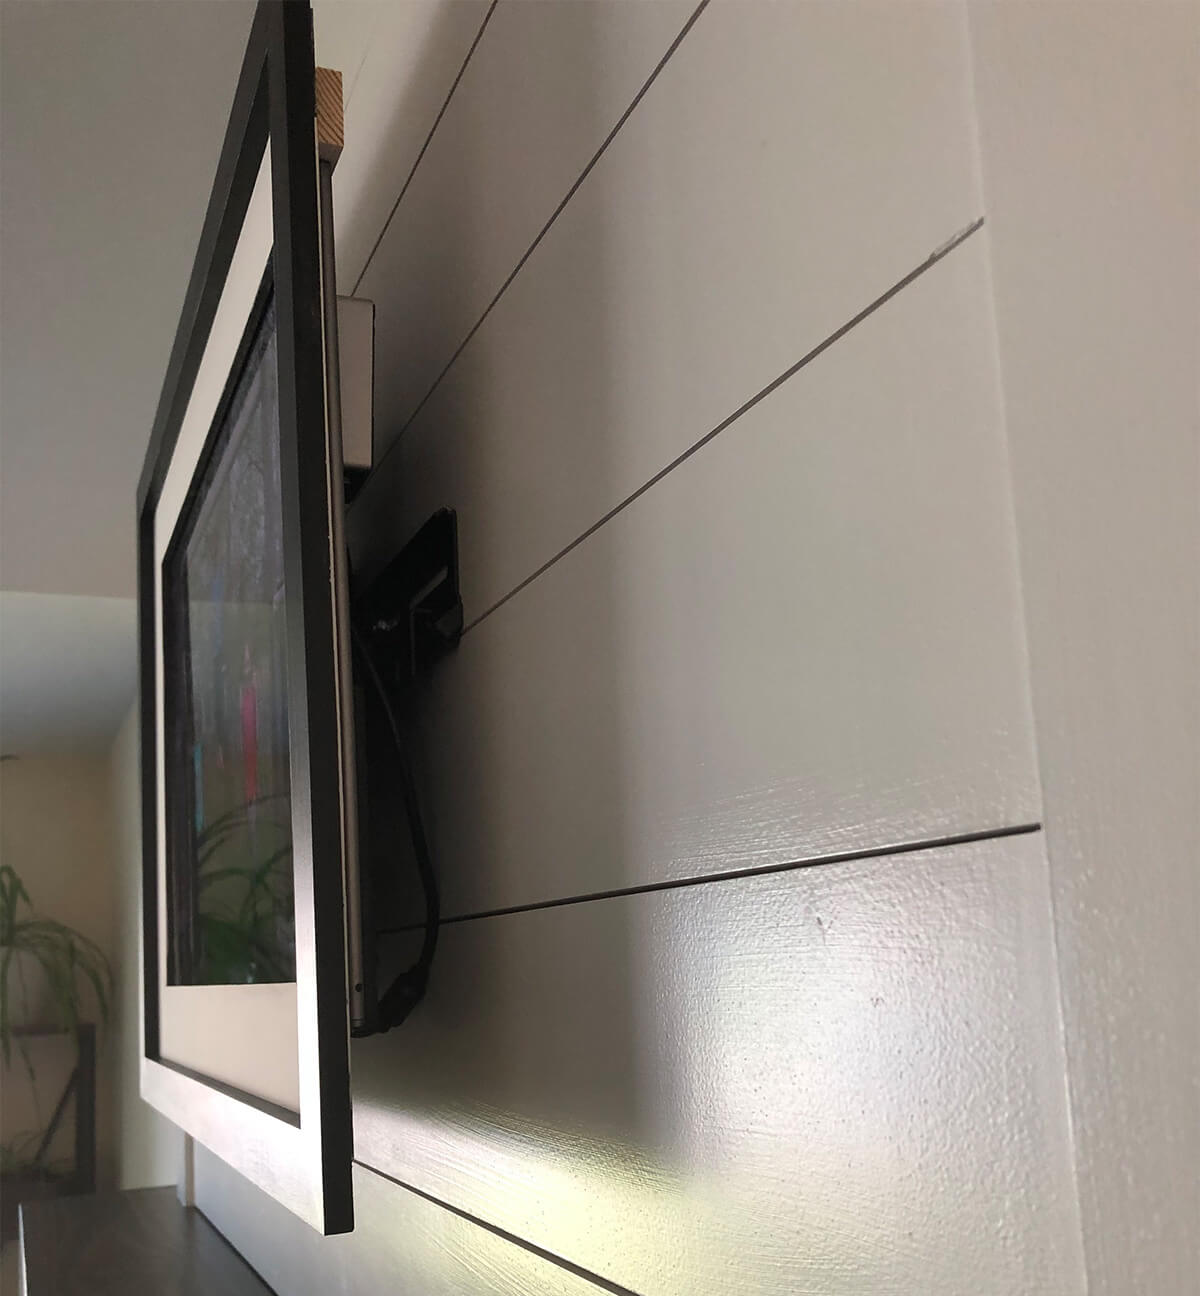
With the monitor parallel to the wall, the frame sits on the top edge of the monitor. The small trim pieces hold the frame from falling forward. This allows me to easily remove the frame by lifting up if I need to access the monitor or Raspberry Pi for any reason.
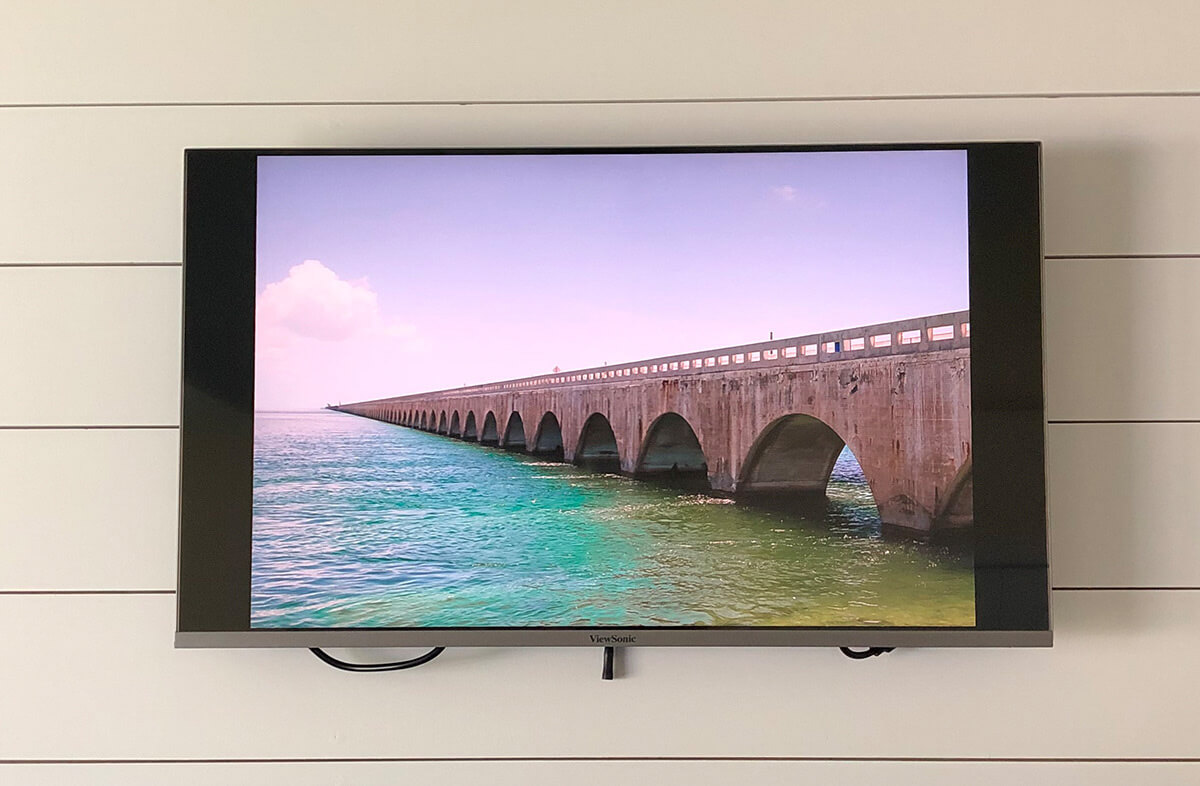
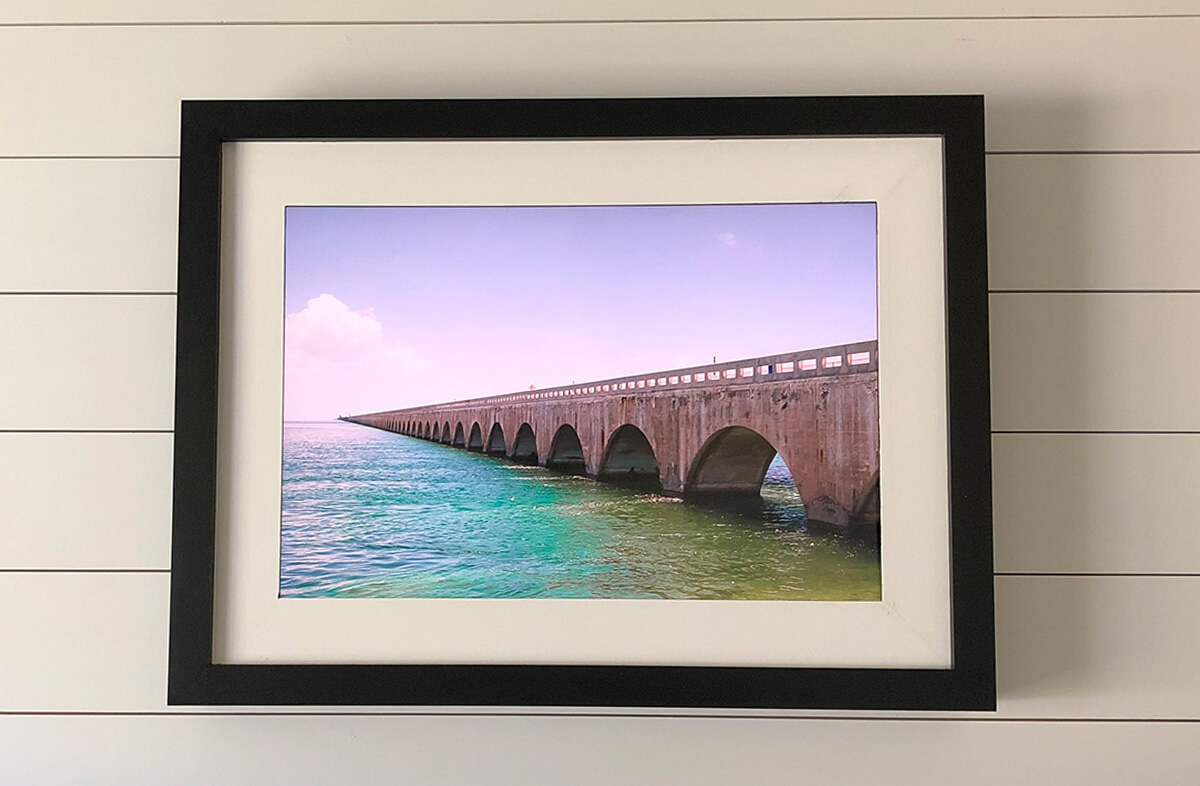
The frame is working flawlessly and I’m in love with the results.
One more word of wisdom
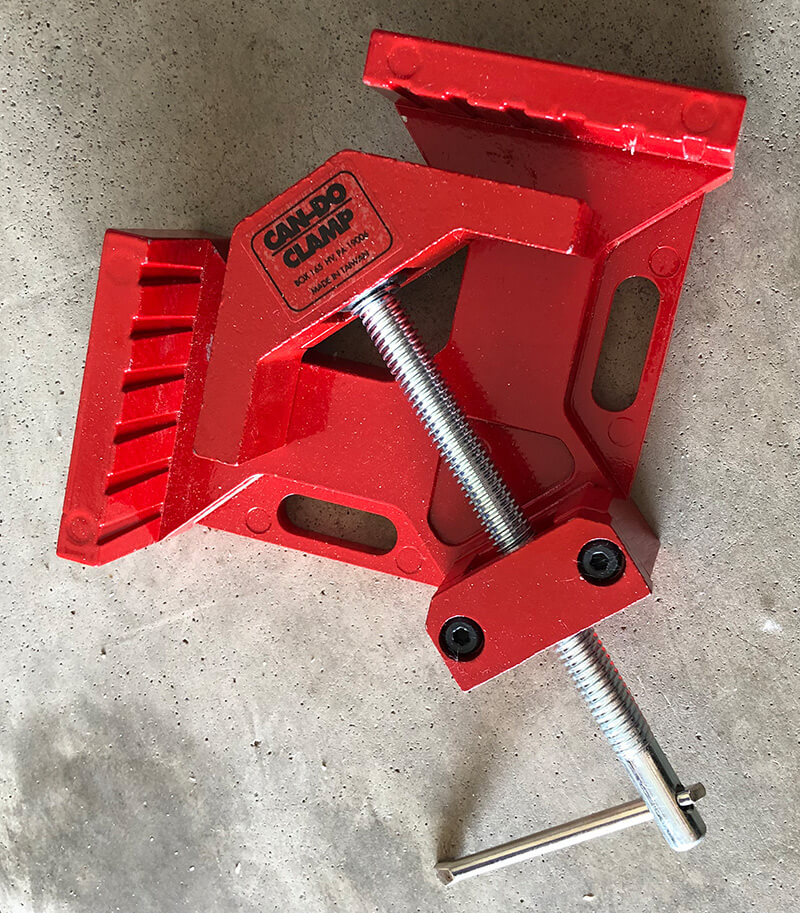
If making a custom frame, a frame clamp is a huge help.
Critically, everything must be as square as possible to make the frame easier to attach the multiple boxes.
Conclusion
I love the look of how it turned out. I can easily remove the frame if I need to do any work to the Raspberry Pi or change settings on the monitor.
Originally, I planned on a 36 or 40 inches display. Going larger would have pushed me towards a 4K monitor. That would have increased the price of the monitor quite a bit. Also, I already had a Raspberry Pi 3B+. I would have needed a Pi 4 to push a 4K image.
Most importantly, I have learned through the years to trust my wife’s judgment. She thought once the display was matted and framed, 32 inches would look perfect. After finishing the project, I think she is right.
(Photos: Josh Block, Memento, Kerry Givens)
Was this article helpful?
Thank you for your support and motivation.
Related Articles
- How I built a stunning 32-inch 4K digital picture frame with a Raspberry Pi 4 featuring smooth image crossfading transitions
- The two main reasons why Raspberry Pi digital picture frames break – and how to avoid them
- The story of Dave’s Raspberry Pi digital picture frame project with a 4:3 screen ratio and a few handy tricks
- How Rob built a superslim 32-inch 4K digital picture frame based on the BenQ PD3200 and the Raspberry Pi 4