
Here is a real treat for all fans of do-it-yourself Raspberry Pi picture frames.
You can now use the free iOS/Android App FRAMEN Photo in combination with your home-brewed digital photo frame.
This means that you can use the advantages of the ingenious FRAMEN Photo App for your Raspberry Pi project, without having to buy a digital picture frame from FRAMEN.
The app makes it very easy to manage and playback your pictures and gives you a remote control for your photo frame. Above all, you don’t have to set up different software packages in Linux anymore; instead, you can get started within 30 minutes.
The FRAMEN Photo App is available for iOS and Android and is free of charge in its basic package, which should be plenty for most people.
Update April 2022: It seems like Framen has discontinued this app.
Here is a short video summary (For English subtitles click on “CC”):
Tell me about FRAMEN
FRAMEN is a young company that has set itself the goal of making streaming technology for images just as popular as we know it from Netflix for videos and Spotify for music.
The company was founded after a successful Kickstarter campaign in 2018 and calls Frankfurt am Main/Germany home.
I recently spoke with founder and managing director Dimitri Gärtner about the future of the so far rather sleepy market for digital picture frames and what FRAMEN’s approach is to bring a breath of fresh air to this market.
Although the company also offers its own line of picture frames, FRAMEN Streaming Technology is browser-based and therefore platform-independent.
Since I appreciate the Raspberry Pi as a basis for homemade digital picture frames, we discussed how to enthuse and sensitize the large Raspberry Pi community about image streaming.
The idea came up to write an easy-to-follow manual, which allows configuring a digital picture frame with FRAMEN streaming technology.
FRAMEN allows the free use of the Photo App up to a cloud storage volume of 2 gigabytes, which corresponds to about 1000 images. This should be adequate for most of us.
How will FRAMEN benefit from non-paying users? Well, the advantage is in the potential increase of awareness for the young company and its products. It’s the same strategy pursued by, e.g., Teamviewer or Dropbox which offer free services for private users within a defined scope.
The only thing you need for a free account is an email, and according to the managing director Dimitri Gärtner, this will not be shared.
I am very curious how the FRAMEN software and the image streaming will be received by Raspberry Pi hobbyists and would be happy to hear your feedback.
Who is this guide meant for?
For everyone who wants to build a digital picture frame with a Raspberry Pi and is looking for an integrated and straightforward software solution.
For everyone who wants to manage and operate more than one picture frame with ease.
For everyone who needs to control a digital frame from a distance.
For everyone who has already built a digital picture frame, but is intrigued by the possibilities of the FRAMEN Photo Software and wants to test it with little adaptation effort.
I tested the setup with a Raspberry Pi 4, but it should work fine with the older models 3 or 2.
Current limitations of the FRAMEN software
The FRAMEN app has fascinated me because it allows very versatile image management, supports multiple platforms and is very robust.
But I don’t want to hide current shortcomings here.
For one thing, there is only a hard cut between images and no smooth crossfading or other image transition effects. This is much more elegant with Pi3D.
And second, playlists cannot be played in random order at present, and not more than one playlist can be selected at a time.
This may be a little boring over time.
I have addressed these restrictions with Dimitri Gärtner. He told me that he would be looking into how this can be enhanced in future updates.
But you have to keep in mind that this is version 1.0 of the software. And even the Apple iPhone didn’t have all the features at launch that we wouldn’t do without today.
So it could be that these issues will soon disappear. Should that be the case, I will be reporting here.
Aside from that, there is little that speaks against the FRAMEN App.
How to do it
How to build the physical frame you can read in much more detail in my article “How I built a professional digital picture frame with a Raspberry Pi.”
Here is a summary.
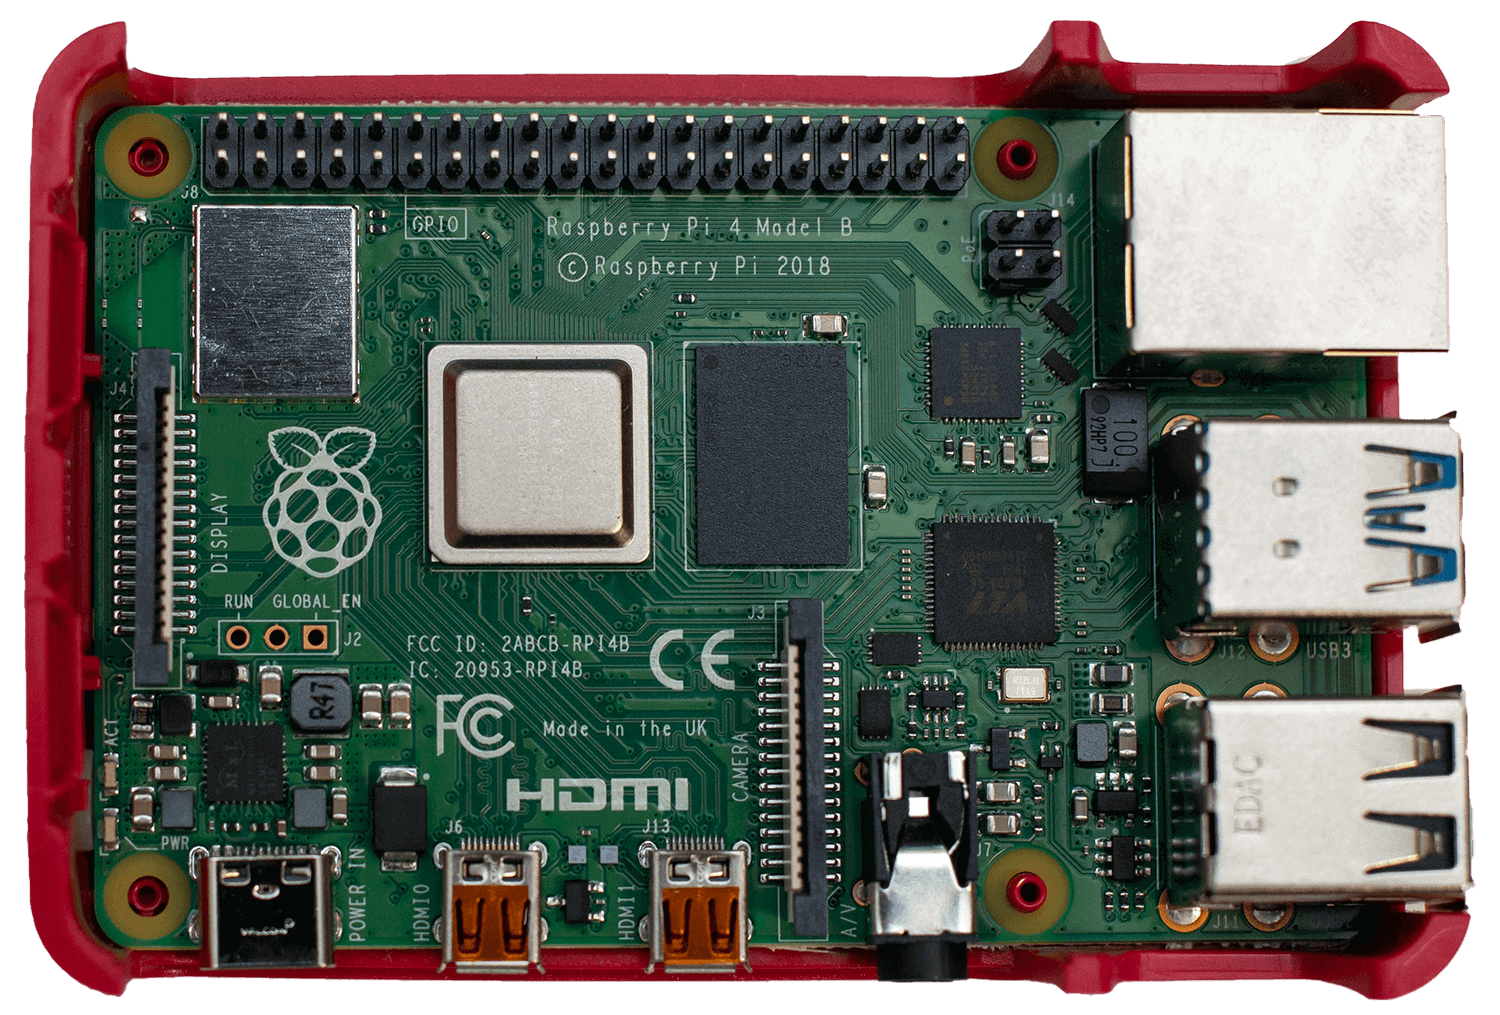
Raspberry Pi Hardware
You will need four components and a monitor:
If you still have an older Model 3, or a Model 2 with a WiFi dongle, you can also use this.
A case for the Raspberry Pi 4 Model B
Note: Raspberry Pi 3 cases are not suitable for the RPi 4 because the location of the USB and the ethernet ports have been swapped.
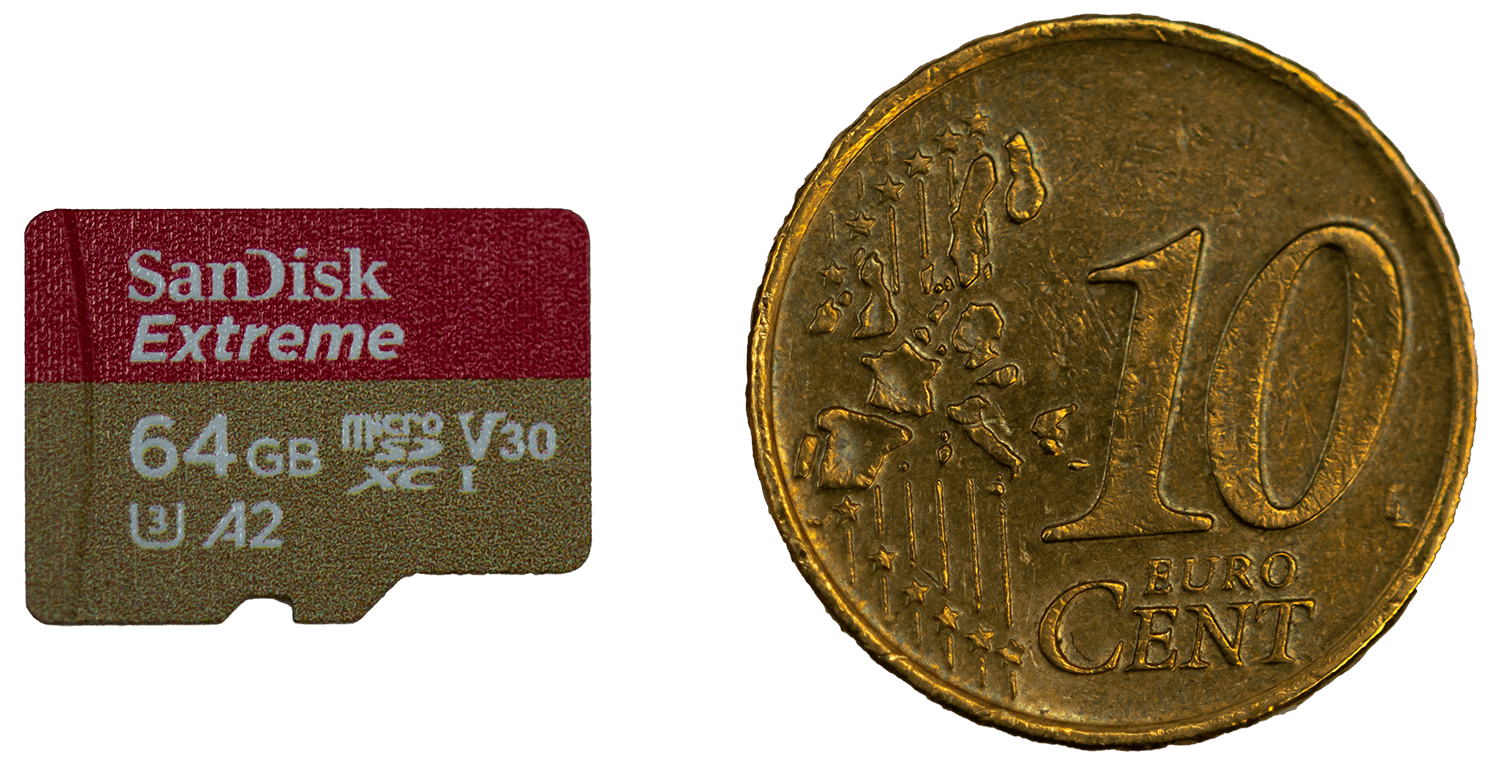
32 or 16GB is enough, but the smaller capacities are hard to find and not cheaper.
Pick a good one here, or you’ll end up with this.
And if you don’t have a monitor yet, make sure it has an HDMI input.
Examples:
Monitors as of 21 inches
Monitors as of 24 inches
For a lot more information on screens for digital photo frames, see my article “10 essential tips for picking the right monitor for a digital picture frame“.
You won’t need a keyboard or a mouse; the picture frame will be set up as a headless system.
Setting up the Raspberry Pi operating system
Tested with: RASPBERRY PI OS (DECEMBER 2020)
Now on to the necessary steps of installing the operating system and a few adjustments to transform the Raspberry Pi into a maintenance-free digital photo frame.
Anyone who wants to read about the steps in more detail is invited to take a look at this article.
Download the Raspberry Pi Imager from the official Raspberry Pi homepage.
The Raspberry Pi Imager is a little software package that has one purpose: To flash a number of possible operating systems to an SD-card. We want the Raspberry Pi OS in the “32 bit with desktop” version.
Start the app and insert the micro SD card with the adapter into your card reader. Click on “Choose OS” and select the first option “Raspberry Pi OS (32-bit)”. Choose your SD card, and click on “WRITE”. It will now write first and then validate it.
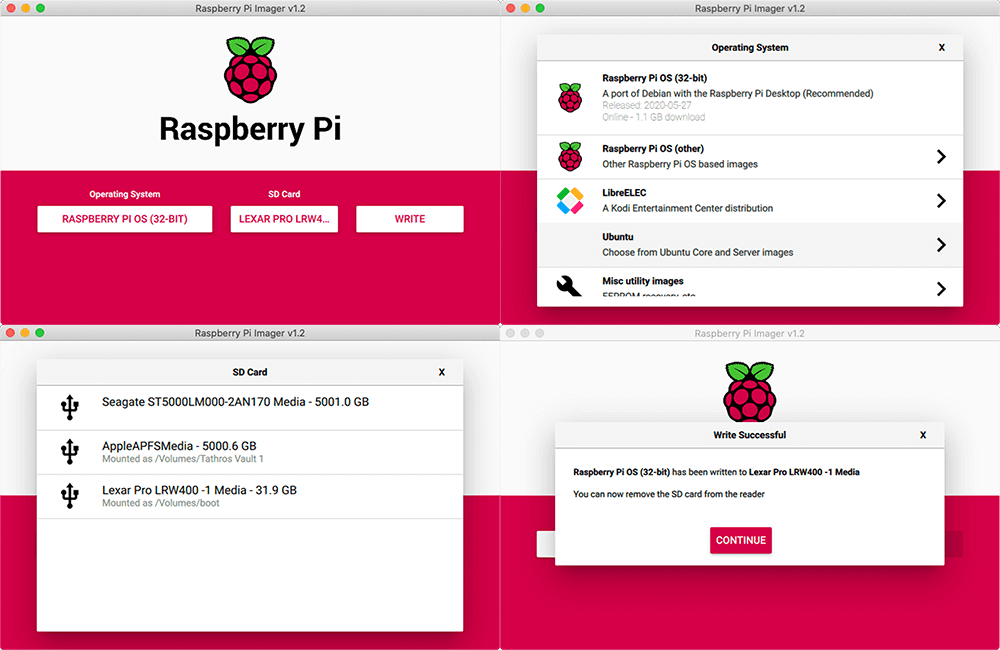
When Raspberry Pi Imager finishes, your SD card will be unmounted (“soft eject”). Take out your SD adapter from your card reader and reinsert it again. This way, it will be mounted again.
By the way, the Raspberry Pi Imager always loads the most up to date version of the Raspberry Pi OS without having the update the app.
Enter WiFi settings
Launch the Terminal app and enter:
cd /Volumes/boot && touch ssh && nano wpa_supplicant.confAfter the editor opens, copy and paste the code below.
ctrl_interface=DIR=/var/run/wpa_supplicant GROUP=netdev
update_config=1
country=US
network={
ssid="your-SSID"
psk="your-password"
key_mgmt=WPA-PSK
}
Adjust your country code if necessary, and enter your SSID (WiFi station name) and your password.
If you access your Raspberry Pi from a Windows machine, look here.
Remove the micro SD card from the adapter, insert it into the Raspberry Pi, and plug in the power supply.
The initial boot of the system
Your Raspberry Pi is now booting up for the first time and will connect to your WiFi. Look for the IP of “raspberrypi” in your router.
With this, you go back to the terminal and connect to the Raspberry Pi.
ssh pi@your-ip-addressThe default password is “raspberry” (without quotes).
You are now connected to your Raspberry Pi.
In case you can’t find your Raspberry Pi in your router, you may have entered an incorrect password. Please go back a few steps and check your WiFi settings.
Basic Setup
In the Terminal enter
sudo apt update && sudo apt upgrade -yAllow the system update to complete. Then run the system configuration.
sudo raspi-config
Make the following changes:
- Under 1: S3 Change User Password.
- Under 1: S4 Hostname: Change to the name that you want to for Raspberry Pi on the network.
- Under 1: S5 Boot Auto Login – Choose B4 Desktop Autologin
- Under 1: S6 Network at Boot – Set to “Yes”.
- Under 2: Display Options D2 – Underscan – Yes
- Under 5: Localisation Options: Choose L2 and set your timezone.
Go back, click “Finish” and reboot.
Configuring the automatic browser launch in FRAMEN Play
Now for the settings that automatically
- open a browser window in full-screen mode when you boot your Raspberry Pi,
- open FRAMEN.TV, and
- hide annoying mouse pointers or annoying system notifications.
Stay in the terminal and enter:
sudo apt install unclutter
sudo rm /etc/xdg/autostart/piwiz.desktop
Now we create a start file.
sudo nano /home/pi/start_script.shCopy and paste the following text into the editor:
#!/bin/bash
export DISPLAY=:0
unclutter -idle 0.5 -root &
sed -i 's/"exited_cleanly":false/"exited_cleanly":true/' /home/pi/.config/chromium/Default/Preferences
sed -i 's/"exit_type":"Crashed"/"exit_type":"Normal"/' /home/pi/.config/chromium/Default/Preferences
chromium-browser --noerrdialogs --disable-infobars --kiosk https://framen.tv/register & #<<< The & is important
sleep 8 # Allow time for booting and starting browser. Adjust as necessary
xset s reset # Force screen on
xset s 0 # Disable blanking until next boot
xset -dpms # Turn off dpms blanking until next boot
Save and exit the editor.
Then enter
sudo nano /etc/xdg/lxsession/LXDE-pi/autostartIn the editor, you can delete the whole thing and copy this text into it.
@lxpanel --profile LXDE-pi
@pcmanfm --desktop --profile LXDE-pi
bash start_script.sh
Save and exit the editor. Reboot.
Now connect the monitor/digital picture frame to your Raspberry Pi.
If you haven’t already done so, download the FRAMEN Photo App from the App Store or Google Play onto your smartphone.
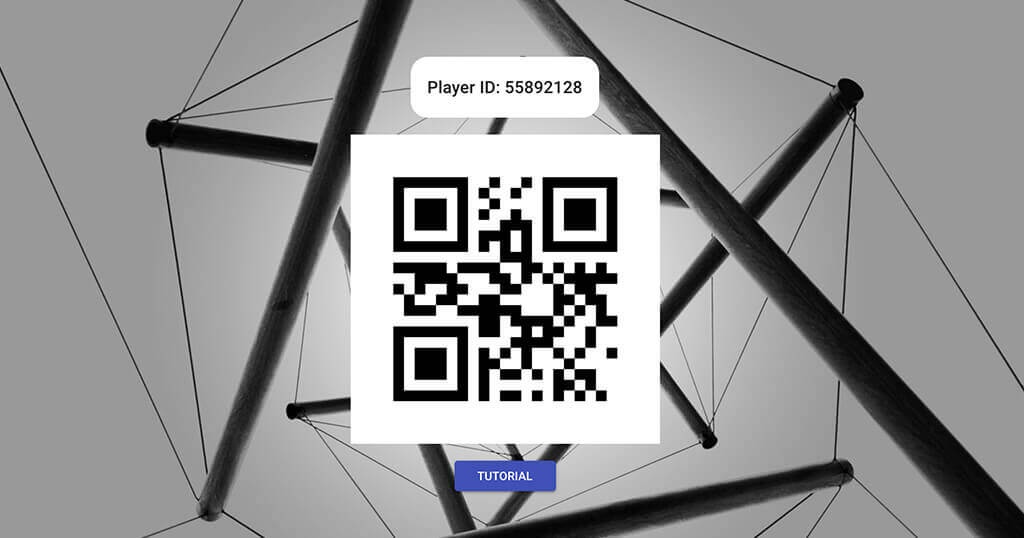
The first time you launch it, a QR Code is shown.In the FRAMEN Photo App, go to the fourth icon in the bottom row (the monitor with the plus sign) and scan the QR code.
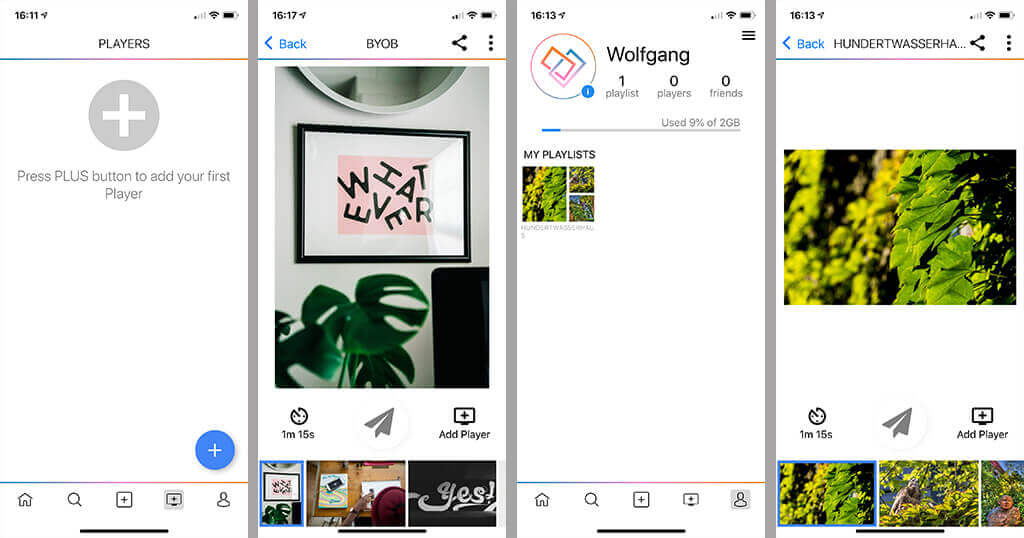
If you don’t have a camera, you can also enter the number manually.
After connecting, go to the Home icon on the app, tap an existing playlist, and tap the paper flyer icon in the middle. Now the pictures should come up on your picture frame.
You can now upload your photos either via the mobile phone’s camera roll or via app.framen.io on any browser.
The free version allows you to upload 20 images at a time and up to 2GB in altogether. This equals about 1000 images. Videos are currently not supported. The pictures can have any aspect ratio. You can choose in the app how you want to display them, depending on the orientation of your monitor.
Three picture frames can be controlled as part of the free package. You can run a different playlist on each of them, or let them all run in sync.
The pictures are stored on Amazon servers and are only accessible to you. You can also delete them from there at any time. The logic is similar to that of Dropbox. No one from the outside will look at it unless you explicitly allow it.
How to turn the monitor on and off
What you can’t yet remote control with the FRAMEN Photo App is the monitor itself.
Here is a solution:
- If you want to automatically turn your picture frame on and off according to a schedule, then take a look at “A simple way to automatically turn your digital picture frame on and off at fixed times.”
- And if you want to turn the frame on and off with your iPhone, I recommend reading “Use your iPhone to turn your digital picture frame on and off.”
Conclusion
The FRAMEN software for digital picture frames is impressive. It does not only run on FRAMEN’s picture frames but also with every smartTV, smartphone, tablet, and now with this manual even on the Raspberry Pi.
Whether you just want to sniff into this application area or would like to show family photos in the house with several picture frames, with FRAMEN Photo and a Raspberry Pi, this is very straightforward.
Was this article helpful?
Thank you for your support and motivation.
Related Articles
- Spotify for visual content – Meet FRAMEN in Frankfurt am Main
- How I added smooth crossfading image transitions to my Raspberry Pi digital picture frame (OS Buster Edition)
- Why the Raspberry Pi is the best choice for your digital picture frame project
- Which Raspberry Pi model should you get for your digital photo frame?