For years, I have been preaching that I would never use a 16:9 aspect ratio formatted display for my digital picture frame. Being a 3:2 DSLR photographer, 16:10 was as far as I would go, I would tell everybody.
But the constant nudging from my flatmate, aka wife, if it wasn’t time for a larger frame than our tiny (!) 24-inch model, coupled with my long-held wish for a 4K screen, eventually drove me over the cliff.
So a few weeks ago, I ordered a brand new BenQ PD3200 monitor. As you probably guessed: The BenQ comes in a 16:9 aspect ratio. A Faustian bargain I had entered into.
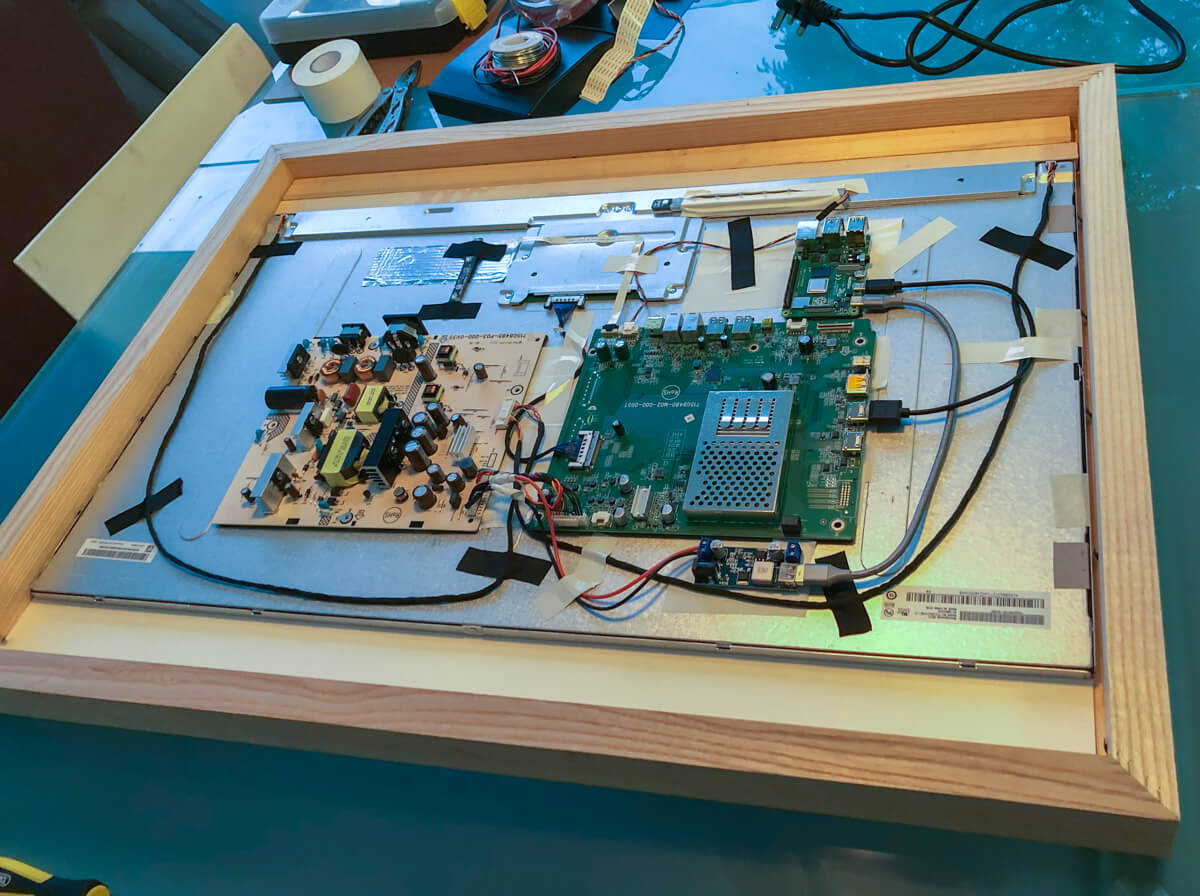
I removed the case, sold the monitor stand via eBay, and took it to my favorite frame builder to add a black anodized aluminum frame.
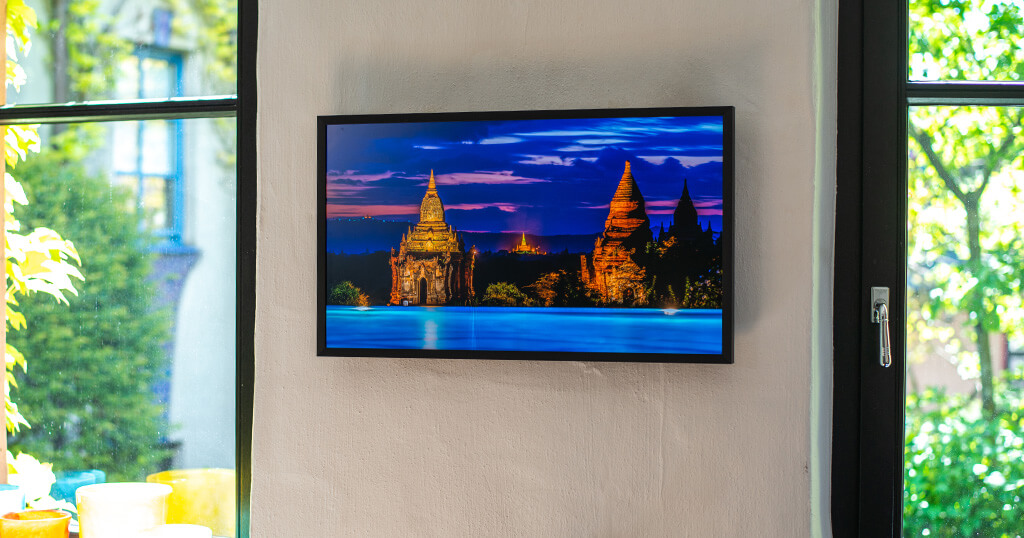
Three weeks later, I picked up the display back with a beautiful frame. I added the Raspberry Pi 4 in a passively cooled Flirc case, plugged in the wires, and configured the Pi3D PictureFrame software.

If you have been toying with the idea of building a larger digital picture frame, read on.
What’s the deal with the aspect ratio anyway?
I wrote a long article here for you to read, but to give you the TLDR version:
Modern displays are made for movie consumption and come with a 16:9 aspect ratio. Photos are typically made in 3:2 (DSLR) or 4:3 (mobile phones).
If you want to fill the entire screen of your display and avoid any pillar boxing (the black gaps), you need to stretch the image until it fills the screen. In this process, up to 30% of an image has to be cut.
Unfortunately, there is no 16:10 formatted, 4K monitor that I have heard of. And it would seem that the market is too small, so manufacturers have decided only to offer 16:9 and wider models.
This is sad for us digital picture frame lovers, but a fact that we won’t be able to change.
Ways around the aspect ratio dilemma
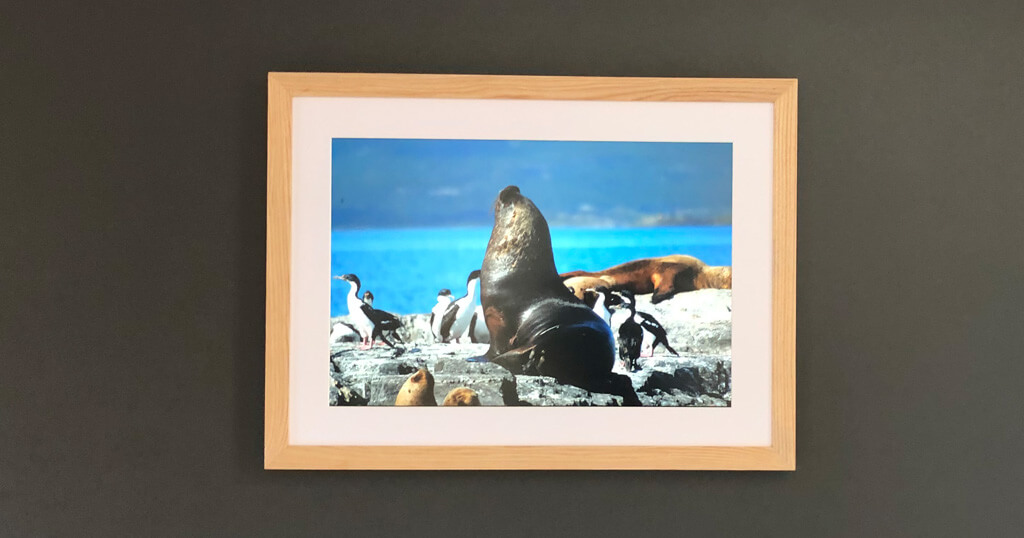
In early 2021, my favorite image viewer Pi3D PictureFrame received a major re-write from its UK-US-German prominent authors. Jeff came up with a clever matting function, which creates a color-matching mat for images that have a different aspect ratio than the screen. You can even adjust the value when matting kicks in, so images with only a marginally different aspect ratio will not be matted.
This matting feature is so cleverly done that I started seriously thinking about going with a 16:9 display to finally have a 32-inch 4k monitor.
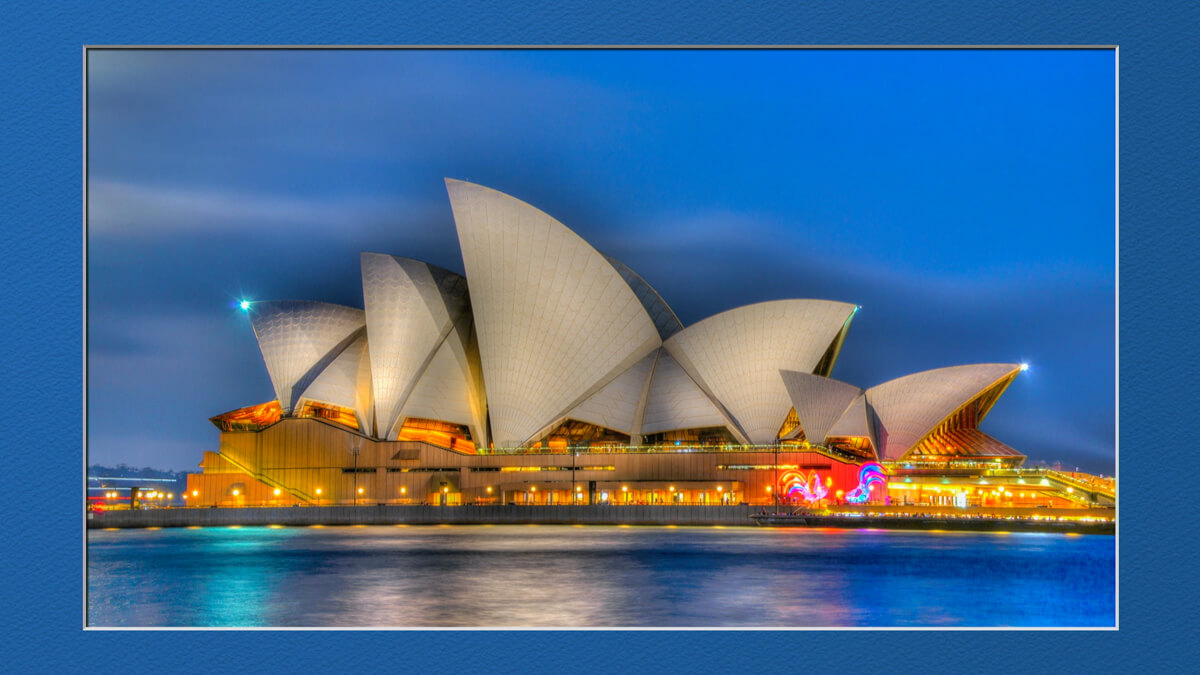
So the idea was to reformat all photos to 16:9, where not too much content was lost, and leave the rest of the images in their original format, including portraits or panorama photos.
If you don’t like this approach and still want to have a 3:2 display, you will need to hide parts of the screen with a physical mat described in the articles by Rob and Josh. This is a great idea, and the now-discontinued Canadian Memento digital frames took the same approach.
However, it is painful to have a large screen and then have to hide 20% of the display surface.
For a long time, I had decided that my next frame would use a physical mat, but when Jeff came up with the matting feature, I changed my mind.
What is different between a 32-inch frame coming from a 24-inch model?
The first thing that you’ll notice when you unpack the 32-inch monitor is that it’s a lot heavier than the smaller model.
I was worried if the aluminum frame would still be strong enough to support it. But alas, that seems to be the case.
I am writing this article on day 20 of the new frame hanging on the wall, and so far, it hasn’t come crashing down.
The old 24” display had 2.3M pixel at 1920 x 1200px, the larger 4K brother 8.3M pixels at 3840 x 2160px, so 3.6x as many.
You’ll get 1,648 cm2 for the 24-inch and 2,789 cm2 for the 32-inch model in terms of the display surface, so 69% more.
However, the height only changes by 23%, whereas the width is extended by 37%.
The energy consumption increases from 23 W to 35 W, so about 50% more. For 3.6x as many pixels that need to be lit, I didn’t think it was much. This includes both Raspberry Pi and the monitor.
I guess that is also due to the higher degree of energy efficiency of the more modern display.
The CPU temperature of the Raspberry Pi 4 in a Flirc case running a 4K monitor is unchanged at 48 degrees Celsius (118 Fahrenheit).
Price-wise, the larger 4K screen is about 450€/$ more expensive than the smaller model, but it also has a much higher resolution.
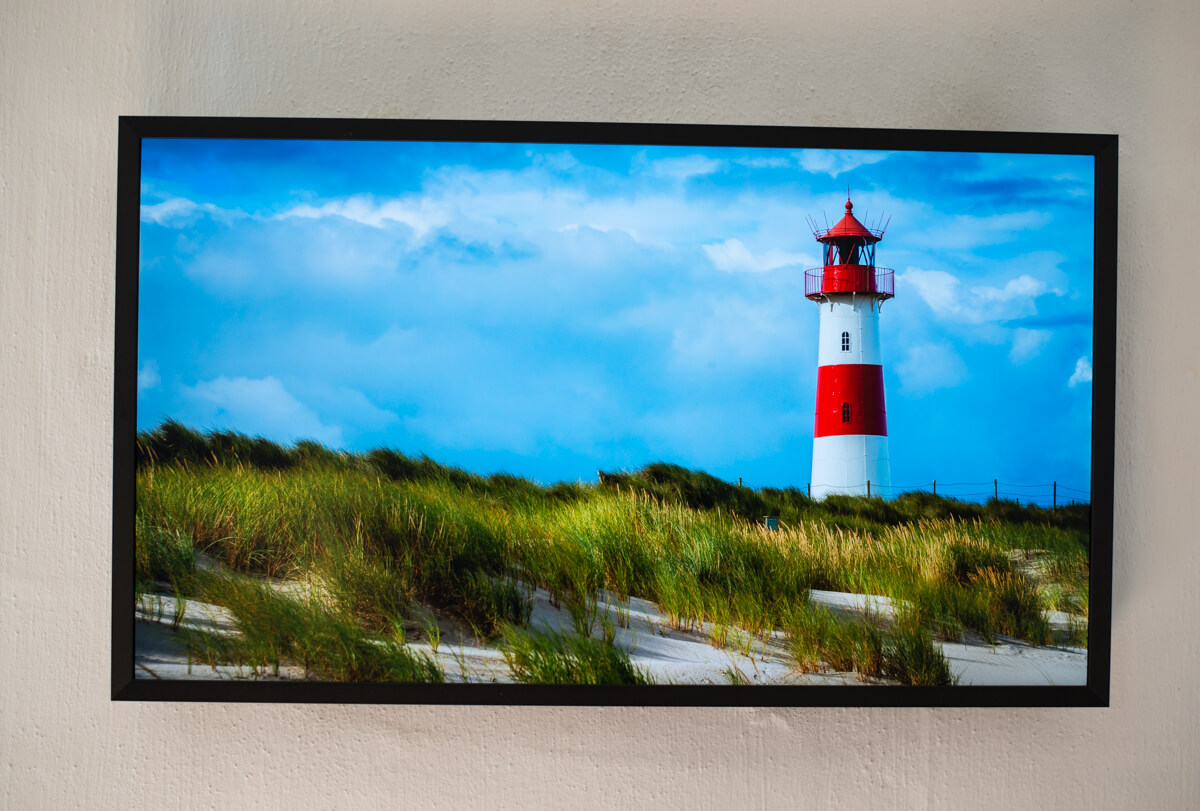
More important than mere numbers is the visual impression. My wife’s first reaction was that you rediscover your photos because they are displayed so much bigger and sharper.
The 4K resolution makes a huge and visible difference to the smaller HD display version.
Make sure that your monitor is set to “Overscan = OFF” or else your images will be heavily cropped.

How to mount it
I used the same wooden panels but extended them to 65 cm (25 inches) in width.
Make sure that the frame is fully positioned on the wood if you have a metal frame, as I do. This way, you evenly spread the weight of the monitor over a long stretch.
How to configure it for Pi3D PictureFrame
For some reason, the Pi3D PictureFrame can only produce about seven fps during crossfading. This is not an issue if you like really smooth and slow cross-fadings.
However, I discover that setting fps to 10 does extend the actual crossfading time but is smooth without any flicker. My fade time is set to 10 seconds, but in reality, it’s closer to 20.
You may have to experiment with what works best for you. We like very slow crossfading because it often creates remarkable effects.
viewer:
fps: 20.0 # default=20.0
show_text_sz: 40 # default=40, text character size

model:
time_delay: 200.0 # default=200.0, time between consecutive slide starts – can be changed by MQTT
fade_time: 10.0 # default=10.0, change time during which slides overlap – can be changed by MQTT”
You may want to change the character size because the image information is displayed smaller on a 4K screen.
But there isn’t anything else that is different from connecting it to lower-resolution displays.
Conclusion
After almost five years with an HD 24-inch display, the step-up to a 32-inch 4K model is impressive, and I can recommend it.
I suppose there won’t be too many people who will use a 32-inch high-quality screen as a digital picture frame. Including the Raspberry Pi, SD-card, high-quality power supply, and aluminum frame, you are looking at a 1000€/$ price tag which is more than most people will spend on a television.
However, I cannot stress enough that having a TV in the living room run photos non-stop is not comparable from the viewing experience to a well-designed digital picture frame. The TV is optimized for a lower sitting position; the digital picture frame is typically positioned much higher on the wall where your head is.
People spend a lot of money on photography equipment and travel. With a large digital picture frame, your memories will put a smile on your face every day. Priceless.
Was this article helpful?
Thank you for your support and motivation.
Related Articles
- Discover the complete hard- and software setup of my Raspberry Pi digital picture frame (December 2023)
- How to build a stunning high-end 32 inches 4K digital photo frame with the Raspberry Pi 4
- How I built a digital picture frame with a Raspberry Pi
- How to build a giant 8k digital picture frame with an Orange Pi 5 and Debian Bookworm