
I recently browsed the aisles of an electronics outlet and was amazed at how large television screens had become. Some of them feature an 8k resolution, which caught my attention.
The Raspberry Pi 5 can only do 4k, but a microcomputer cousin, the Orange Pi 5, can drive an 8k HDMI output.
So, with the encouragement and support of Paddy, the developer of Pi3D, I decided to venture into the unknown world outside of the Raspberry Pi realm and give it a try.
Note: This article is a work in progress. I decided to publish it early because it helps get interested readers’ feedback while building it. Also, I do not own an 8k television (our largest screen is our 32” 4K digital picture frame), so if anybody out there wants to test drive it, that would be amazing.
Tested with: Orange Pi 5 (4GB), OS Debian Bookworm (December 2023), and a 4k display.
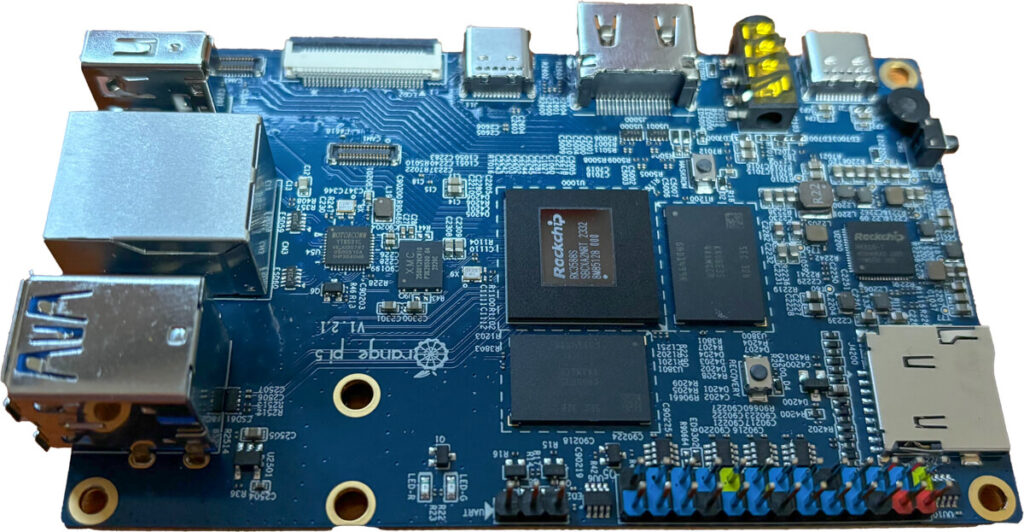
The Orange Pi 5
The Orange Pi 5, developed by the Shenzhen Xunlong company, is quite an advancement in the world of single-board computers (SBC). It was released in 2021.
The development is part of the Orange Pi family, which began in 2014 and includes a range of open-source SBCs similar in design to the Raspberry Pi.
I am not going into the technical details, but in a nutshell:
- The Orange Pi 5 generally surpasses the Raspberry Pi 5 in terms of raw computational power and speed, particularly in processor-intensive tasks. While the Raspberry Pi 5 is limited to 8 GB RAM, you can get up to 32 GB on the Orange Pi 5.
- Raspberry Pi’s community is unrivaled, and tinkering with the Orange Pi requires quite a bit of patience and an explorer attitude.
- The Orange Pi 5 is about as expensive as the Raspberry Pi 5 if you take into account the much better hardware specifications. On the face of it, the Raspberry Pi 5 is about a third cheaper, but you would be comparing apples with oranges.
- The Orange Pi does not have Wifi out of the box, but that can be added with a Wifi module that is plugged into the motherboard. The Orange Pi 5 Plus comes with onboard WiFi and Bluetooth.
- The Raspberry Pi has wonderful Flirc cases available. There is also an aluminum case for the Orange Pi 5, but the manufacturing quality and design were rather poor. Maybe I received a counterfeit model because the holes for the screws and the connector openings did not align perfectly.
- The Orange Pi works with many operating systems that you can choose from.
- If you want to drive an 8k display for your digital picture frame, there is only one choice: The Orange Pi 5.
Thank you to Nova from Shenzhen Xunlong for sending me an Orange Pi 5 board review model. The views in this article are entirely mine and not influenced by any sponsors.
Basic Setup
Several operating systems work on the Orange Pi, but I opted to go with Debian Bookworm as it is widely used and rather similar to the Raspberry Pi OS Bookworm.
To install Debian onto an SD card (64 GB or more recommended, given the size of 8k photos), download Balena Etcher for your OS.
Download the Debian Bookworm Server image, unzip it, and use Etcher to flash it onto the SD.

Insert the SD card into your Orange Pi 5. Also, plug in an ethernet cable to have internet access, as the Wifi isn’t configured yet.
I haven’t found an equivalent to the most useful Raspberry Pi installer, which allows you to specify the WiFi settings when flashing the image. If this exists, please let me know.
Connect the Orange Pi to power, wait two minutes, and launch Angry IP scanner to find out your IP address. Alternatively, just find the device in your router.
Open a Terminal on your Mac or Windows machine and type:
ssh orangepi@192.168.178.xxwith “xx” being the last two digits of your device’s IP address.
The default password is “orangepi”.
If you see this screen, then you are on the right path.

Run the following commands to set the time zone and to update the system:
sudo dpkg-reconfigure tzdata
sudo apt-get update
sudo apt-get upgrade -y
Next, install Samba
sudo apt-get install samba -y
sudo smbpasswd -a orangepi
Enter your password for the user “orangepi”, e.g. “orangepi”.
Open the Samba config file with
sudo nano /etc/samba/smb.confDelete all lines by holding CTRL+k and paste this section into the file:
[global]
security = user
workgroup = WORKGROUP
netbios name = ORANGE_PI
server role = standalone server
map to guest = Bad User

#The following seven lines is fine tuning for macOS users. I you are only using Windows, you don't need to include them. But they don't harm either.

fruit:aapl = yes
fruit:metadata = stream
fruit:model = RackMac
fruit:posix_rename = yes
fruit:veto_appledouble = no
fruit:wipe_intentionally_left_blank_rfork = yes
fruit:delete_empty_adfiles = yes

[orangepi]
path = /home/orangepi
valid users = orangepi
browseable = yes
read only = no
create mask = 0775
directory mask = 0775
Restart Samba and Netbios
sudo systemctl restart smbd
sudo systemctl restart nmbd
Set the permission for the shared directory
sudo chown -R orangepi /home/orangepi
sudo chmod -R 775 /home/orangepi
Deleting the Desktop does not seem possible. The file is recreated immediately after deletion.
To broadcast the presence of your Orange Pi server on the network, especially on a macOS network, install Avahi with
sudo apt-get install avahi-daemon -y
sudo systemctl start avahi-daemon
Installation of Pi3D PictureFrame
This chapter describes the installation of Pi3D PictureFrame, the image-viewing software.
sudo apt install python3-venv git libsdl2-dev wayfire wlr-randr -yWhen this dialogue appears
Configuration file '/etc/pulse/client.conf'
 ==> File on system created by you or by a script.
 ==> File also in package provided by package maintainer.
   What would you like to do about it ?  Your options are:
    Y or I  : install the package maintainer's version
    N or O  : keep your currently-installed version
      D     : show the differences between the versions
      Z     : start a shell to examine the situation
 The default action is to keep your current version.
*** client.conf (Y/I/N/O/D/Z) [default=N] ?
just hit Return to accept the default.
Go on with
mkdir venv_picframe
python -m venv /home/orangepi/venv_picframe
source venv_picframe/bin/activate
python -m pip install git+https://github.com/helgeerbe/picframe@sdl2
When you see something like this
Successfully installed IPTCInfo3-2.1.4 Pillow-9.5.0 PyYAML-6.0.1 defusedxml-0.7.1 ninepatch-0.2.0 numpy-1.26.2 paho-mqtt-1.6.1 pi-heif-0.14.0 pi3d-2.51 picframe-0+untagged.524.ge437440 pysdl2-0.9.16it means that you are on your way!
sudo apt-get install libopenblas0-pthread libgfortran5 libopenjp2-7 -y
mkdir DeletedPictures Pictures
picframe -i /home/orangepi/
When
This will configure  /home/orangepi/picframe_data/config/configuration.yaml
To keep default, just hit enter
Enter picture directory [~/Pictures]:
appears, just hit Return three times to accept the default. You can always change these settings later.
We need to make one change in the configuration file right away. Open it with
nano ~/picframe_data/config/configuration.yamlSearch for this entry (in the upper section)
use_sdl2: Falseand change it to
use_sdl2: TrueAutostarting PictureFrame
nano start_picframe.shPaste this paragraph
#!/bin/bash
wlr-randr --output HDMI-A-1 --off
export SDL_VIDEODRIVER=wayland
source /home/orangepi/venv_picframe/bin/activate
picframe &
wlr-randr --output HDMI-A-1 --on
Save and close.
chmod +x ./start_picframe.sh
nano .config/wayfire.ini
Paste this paragraph
[core]
plugins = autostart
xwayland = false

[autostart]
picframe = /home/orangepi/start_picframe.sh
Save and close. Then type
mkdir .config/systemd/user -p
nano ~/.config/systemd/user/picframe.service
Paste this paragraph
[Unit]
Description=PictureFrame

[Service]
ExecStart=/usr/bin/wayfire
Restart=always

[Install]
WantedBy=default.target
Save and close.
systemctl --user enable picframe.service
sudo reboot
I don’t know yet why, but the picframe.service does not run. Currently trying to figure this out. let me know if you have any idea!
If you can see the image below, you have installed Pi3D PictureFrame on Raspberry Pi Bookworm successfully!

Add a few pictures to the Pictures directory via the network from another computer (that is why you installed Samba), and they will appear after 200 seconds (the default setting, which you have probably not changed at this point.
Customize PictureFrame to your needs in the configuration.yaml file. For all the details about fine-tuning, read this article.
Et voilà, you got Pi3D Picture Frame running on the Orange Pi 5!
As it stands, your picture frame installation is now complete. But for tinkering (it never stops), knowing how to control the app’s launch manually is helpful.
More on starting and stopping
Turning the picture frame script on and off is controlled by the systemctl service.
If you want to know more about how this works, I recommend my article, “The ultimate guide on using systemd to autostart scripts on the Raspberry Pi“.
Starting and stopping PictureFrame at boot
- Enable service
systemctl --user enable picframe.service - Disable service
systemctl --user disable picframe.service
This setting survives a reboot. If you choose the disable option, you will boot in the console only, and PictureFrame will not start automatically.
Manually starting and stopping PictureFrame
- Start service
systemctl --user start picframe.service - Stop service
systemctl --user stop picframe.service - Stop restart
systemctl --user restart picframe.service
Still to be figured out
A few bugs still to iron out! Most of all, how to get picframe.service to run.
And also currently, there is no way of blanking the screen, i.e., turning the HDMI output on/off via a software command. All the previous methods, and even those that I described here, fall short.
But it shouldn’t be long. Stay tuned!
Was this article helpful?
Thank you for your support and motivation.
Related Articles
- Which Raspberry Pi model should you get for your digital photo frame?
- How to build a gorgeous digital photo frame with a Raspberry Pi (OS Bookworm Edition)
- How I built a stunning 32-inch 4K digital picture frame with a Raspberry Pi 4 featuring smooth image crossfading transitions
- Discover the complete hard- and software setup of my Raspberry Pi digital picture frame (December 2023)