The selection of a suitable display for your Raspberry Pi digital picture frame project is probably the most important component decision that you will make.
If you want to create a really impressive digital picture frame, here are some useful tips for you.
In short, get a slim 24 inches matte IPS monitor with a resolution of 1920 x 1200 (aspect ratio of 16:10) and downward facing HDMI and power input. Or, with the Raspberry Pi 4, go really wild with a 4K monitor in sizes ranging from 27 to 75 inches. The sky is the limit!
Let’s go into a bit more detail.
Display size and resolution: When size really matters
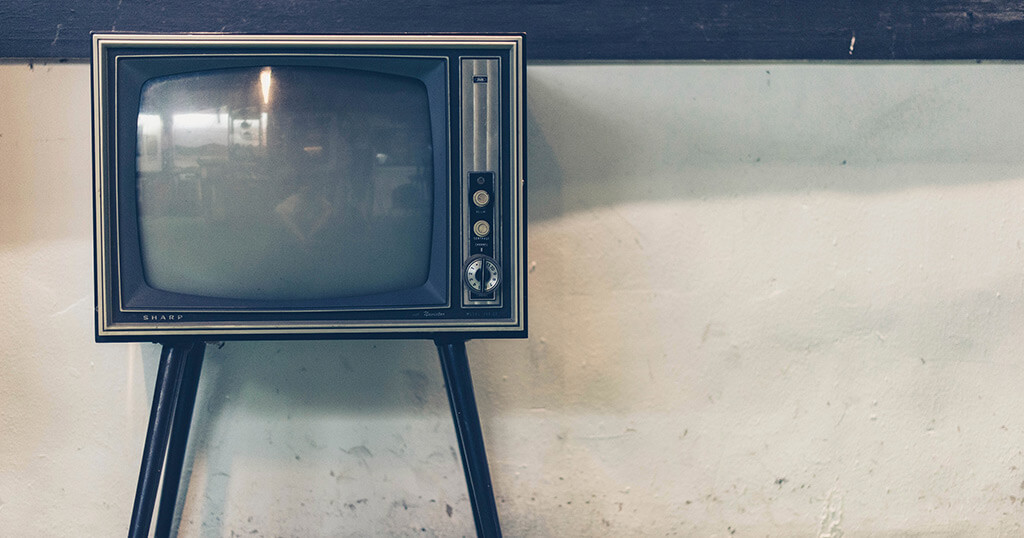
There are plenty of 9 or 10 inches (and smaller) digital photo frames on the market to buy. However, their size, image quality, contrast, and resolution is generally not enjoyable for very long, and you or your family may lose interest.
What you want is something that will bring up memories, will create conversational topics, and lets you dream. You want your digital picture frame to be a highlight of your living room. This is why size matters a lot.
Look at how average television screens sizes have gone from a mere 30 to 75 inches in the last twenty years (not to mention Samsung’s “The Wall” television shown at Las Vegas CES 2019 with 219 inches). The baby boomers will remember their first computer screens having a size of 13 or 15 inches.
A large screen provides a much better visual experience to a digital picture frame and this is why you shouldn’t pick a small one.
So how big can you go?
Up until the Raspberry Pi 3, the maximum resolution was 1920 x 1200px. With the introduction of the Raspberry Pi 4 in mid-2019 also came 4K. This means that you can now hook up monitors with a resolution of 3840 x 2160 px and take advantage of tack-sharp images ranging from 27 to 75 inches in size.
A 24 inches monitor with a 1920 x 1200/1080px resolution probably has the best cost/value ratio. But a large 4K is also very tempting!
If you choose a monitor larger than 24 inches and keep the resolution at 1920 x 1200/1080px, the dot pitch size (the distance between pixels on a display) will increase, and the image quality will not be as sharp.
If you plan on using your digital picture frame in advertising or you need a larger screen size and don’t care so much about the best possible image quality, then use the largest quality screen you can find that works at 1920 x 1200/1080px resolution. As a guideline, the closer people can get to a display, the better the resolution should be.
Aspect ratio – why does it have to be so confusing?
Since the 1920s the commonly used aspect ratio for movies was 4:3 as determined by Thomas Edison. They called it “the magic rectangle” and it was used in movie theaters and later at home in television sets.
When in the 1950s the CinemaScope technology made the wide-screen format popular, the aspect ratio of movies was changed forever to wide-screen, and television sets later followed this form factor to a certain degree (wide screens at the movie theaters are still much wider than most “wide-screen” television sets).
In photography, the Single Lens Reflex (SLR) standard for film and slides had a format of 36 x 24 mm, which translated into an aspect ratio of 3:2. This hasn’t changed with the arrival of digital SLR cameras.
But the cheaper compact digital cameras and their subsequent replacement by mobile phones have led to many different formats.
There are micro four-thirds cameras (as the name implies 4:3 aspect ratio), cameras that let you choose between different aspect ratios and mobile phones that are 4:3, 1:1, and many more.
This makes it difficult to choose a display. Or not. Because in contrast to movies, most of the photos are generally taken in either 4:3 or 3:2 format.
Unfortunately, the manufacturers of computer displays have followed the wide-screen trend of television sets.
Above a screen size of 24 inches, you will be hard-pressed to find a monitor that doesn’t at least have 16:9 or even a wider aspect ratio. Luckily, there are still a few 16:10 monitors in the 24 inches size range to be found. But not too many and I wonder for how long.
4K monitors are only available in 16:9 mode which may require some thoughts about how you crop your photos.
The wider screen display you choose, the more your images will have to be cropped or have a black frame around.

Neither is ideal.
I would recommend that you go with a 1920 x 1200 px monitor which provides a 16:10 aspect ratio.
Display technology – IPS vs. VA and TN
LCD panels come in different types of technologies with varying degrees of suitability for high-end digital picture frames. These technologies keep evolving over the years and sub-categories are being introduced as well.
IPS (In-Plane Switching) displays are my favorite ones as they do great in image quality, color accuracy, and viewing angles up to almost 180 degrees. They also tend to be the most expensive ones.
VA (Vertical Alignment) displays have the advantage of higher contrast ratios compared to other panel types, which leads to better black levels but their biggest disadvantage is color shifting. Color shifting is when the image viewed from one angle changes which is not great for a digital picture frame which is often viewed from the side.
TN (Twisted Nematic) displays are the most widely used panel type in the manufacture of LCD monitors. Unfortunately, the color reproduction, viewing angles, and contrast ratios of TN panels are not on the same level as IPS or VA. TN panels are inexpensive and fine for normal office computers but not really my favorite for photo frames.
If you are looking for a high-end digital frame, get an IPS display.
Viewing angle
This is also an important issue as it defines how well you can see what is on the screen from a multitude of viewing directions. The image may become darker, garbled, or show strange colors if the viewing angle is low.
Especially in a living room or in a professional setting, you want to have a screen that can be viewed just as well from about any direction. The theoretical maximum viewing angle is 180 degrees both horizontally and vertically.
The industry has made a lot of progress in this area so that most modern IPS displays allow for viewing angles greater than 160 degrees horizontal and 140 degrees vertical which are excellent for any living room application.
But it always helps to check!
Glossy versus matte – screen glare or very vivid colors
Do you prefer more vivid colors (glossy) or a non-reflecting screen (matte)?
This is a subject of much debate.
Apple has changed all of its computers to glossy screens because they provide great colors. Many of their competitors have followed their lead.

But especially in situations with direct sunlight but also indoor with light sources shining on the display, you will see noticeable reflections that can make a glossy display pretty much unusable in direct sunlight.
Matte screens carry an anti-glare coating and are therefore better at preventing reflections. However, their rendering of colors is considered to be somewhat less vivid.
Eventually, it all boils down to your personal preferences.
My personal experience is that matte digital picture frame is preferable for any living room situation. The colors are great and not as exaggerated as glossy displays. A matte digital picture frame blends in nicely into a social setting without drawing too much attention.
I work with glossy computer displays all day, but for a digital picture frame, I would still choose a matte screen.
For a darker setting like in a museum with lights coming down straight from the ceiling and the sunlight coming through the frosted glass, reflections are less of an issue, and glossy screens will look great.
It’s a matter of taste and intended application area.
HDMI Display Connector – the only one you need
The Raspberry Pi comes with an HDMI connector so that is what you should be looking for on the monitor side.
There are adapters from DVI to HDMI but this takes up precious real estate behind your monitor and the wall, so it is preferable to avoid it.
Don’t use a VGA to HDMI adapter as the image will be analog instead of digital and may induce flicker.
What’s important is the direction of the HDMI connector. Make sure that you choose one which points downwards instead of outwards as the latter will increase the depth of your picture frame.
If that is not possible, there are right angle HDMI cables. When you pick one of those, make sure that the direction of the right angle cable is what you need, most likely one that goes upward from your HDMI output.
Depth of monitor – physical dimensions to make your frame fit nicely
The physical depth of the display will determine the distance of your frame from the wall.
Overall modern IPS displays have gotten quite slim, but there are still substantial differences.
Units with an integrated power supply are deeper by design than those with an external power adapter. And high-end displays tend to be a bit thicker than basic types.
Unless you want to make a large rectangle hole in your wall which may not be extremely popular with your significant other (spousal guidance recommended), you may want to look at the physical dimensions of the screen.
You will remove the monitor stand anyway, so you can deduct this when you compare screens. The display itself is only about 0.4 in/1 cm thick, but the power supply and the LCD controller often take up another 0.8-1.2 in/2-3 cm.
Usually, the rather bulky power supply is located in the middle of the display, and you can use the space on the sides to mount your Raspberry Pi with its power supply and cables, but that still means that you have a display to wall distance of about 2.7in/7 cm.
So assuming you have a frame construction that has a depth of 1.2in/3 cm, you will end up with a distance between frame and wall of 1.2-1.6 in/3-4 cm which is perfectly fine and helpful for proper ventilation of the electronics.
My recommendation is to look for a screen that has a total net depth (=without the monitor stand) of not more than 1.2-1.6 in/3-4 cm. The final distance to the wall will increase a little bit anyway with cables.
Power consumption – don’t make your electricity bill go up
My first digital picture frame built in 2005 had an energy consumption of about 60 watts, my latest one from last year only 20 watts. The difference was the more modern IPS technology which is a lot more energy efficient than the older displays.
Electricity prices vary greatly from country to country, but as your digital picture frame is likely to be lit around 16 hours every day, it does make sense to choose a monitor that is both excellent and friendly to your wallet.
A modern 24 inches monitor should not exceed 20 watts in power consumption with no compromise on image quality. There are even good monitors that only consume 10 watts.
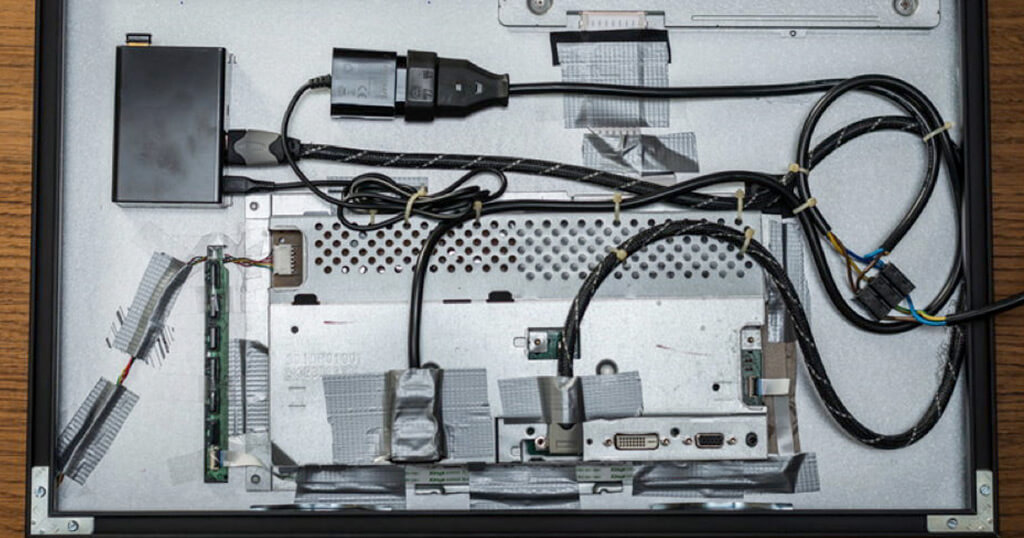
Stripping it down to the core – how to peel your computer monitor
The question is, how easy it is to take the monitor apart so that we can put it into the frame.
Usually, the monitor, power supply, and LCD controller is one unit and you only need to remove the front bezel.
If the display comes in a metal housing, it will be complicated to take it apart. Most of them, however, come in plastic enclosures, which are easy to dismantle. Those are the ones that you should choose.
This is a point that requires some confidence, but you may find just the right instruction video on YouTube for manuals. Tools like the ones sold by iFixit are most helpful for this, but the complexity is lower than you would think.
Internal or external power supply – both have their tradeoffs
Does the monitor have an internal or an external power supply?
It used to be that all monitors had an internal power supply, but with the introduction of modern display technologies and the ensuing reduction in power consumption, many monitors nowadays have an external power supply.
Displays with external power supplies tend to be slimmer, but then you need some space behind the frame to put the power supply block in. If it’s external, check how big the power supply is and if you can fit it behind the frame.
Displays with an internal power supply should have a downward-facing connector, which will reduce the space between the frame and the wall (like with the HDMI connector). If that isn’t the case, get right angle power cables.
What you don’t need to care about:
Touch screens
For a large digital picture frame, I have found them of no use as the control happens with your mobile phone, desktop computer, or via Alexa/Google Home voice command.
Monitor Stands
As the display is being stripped anyway, the monitor stand will be put removed. Unless of course, you don’t want to put the frame up on the wall but put it on a piece of furniture instead.
Speakers
As the picture frame is about image and not sound, they won’t be needed.
Conclusion
I hope these points will prove to be helpful when you go on the search for your display for your Raspberry Pi digital picture frame project. It makes great sense to put some thoughts into this.
Of course, you can pick any old display that you have lying around, but if you love your photographs as much as I do, invest $200 in a good display. After all, you haven’t bought an expensive camera to show your digital images on an inferior screen.
Or, if you want the best image quality with super high resolution, have a look at 4K monitors. The screen quality is amazing and will spoil you.
Head over to my article here to see my recommendations for 24 inches displays.
Was this article helpful?
Thank you for your support and motivation.
Related Articles
- The best 24 inches displays in 16:10 aspect ratio for your DIY Raspberry Pi digital photo frame project
- How much energy does a digital picture frame consume – and how to keep it low with no lack of convenience
- How to get a professional and automatic aspect ratio crop for your images on your Raspberry Pi digital picture frame
- How I built a digital picture frame with a Raspberry Pi