
MQTT is a great communication protocol for internet-connected devices of any size. It has proven especially helpful for linking up Internet-of-things (IoT) systems like a digital picture frame.
In many articles here on this website, I am using MQTT to control the playback of the picture frame with Pi3d, forward data to a home automation system like Home Assistant, or automate tasks like presence detection to save energy.
In principle, MQTT is very simple to set up and to operate, but every once in awhile, it just doesn’t work, and you may spend hours trying to find the bug only to eventually conclude that it was just a silly small thing that you forgot.
So the objective of this article is to save you a lot of time by systematically checking a few of the most common issues quickly.
Have you installed the paho package?
The Raspberry Pi needs the paho package to connect to an MQTT broker and to receive and send any messages.
Install it with
sudo pip3 install paho-mqttIf you are not sure if you have installed it, run the above command. If the answer is
Requirement already satisfied: paho-mqtt in /usr/local/lib/python3.7/dist-packages (1.5.1)then you’re fine.
If the answer is
Successfully installed paho-mqtt-1.5.1then it wasn’t installed yet but is now.
Have you activated MQTT in Pi3D PictureFrame?
In configuration.yaml, you need to activate MQTT.
This line activates the use of MQTT in Pi3D:
use_mqtt: TrueHave you specified your MQTT server?
In configuration.yaml, you need to specify your MQTT server.
If you have installed Mosquitto on your local Raspberry Pi, just enter the IP address of your system. If you are using an external Cloud-based MQTT server, enter the URL like “mqtt.eclipse.org“
server: "your_mqtt_broker" #"localhost" or something like 192.168.178.50 (without quotes)If you are using a local MQTT server, you don’t have to change anything in the next lines, unless you have specified a user and a password.
For any external server, enter the port and login credentials.
  port: 1883
  login: ""
  password: ""
Have you installed Mosquitto?
If you have specified a local MQTT server in your Pi3D config script, have you already installed Mosquitto?
Enter
sudo apt install -y mosquitto mosquitto-clientsThis will either install Mosquitto or tell you that it is already installed.
mosquitto-clients is already the newest version (1.5.7-1+deb10u1).Use MQTT Explorer to listen to the MQTT traffic
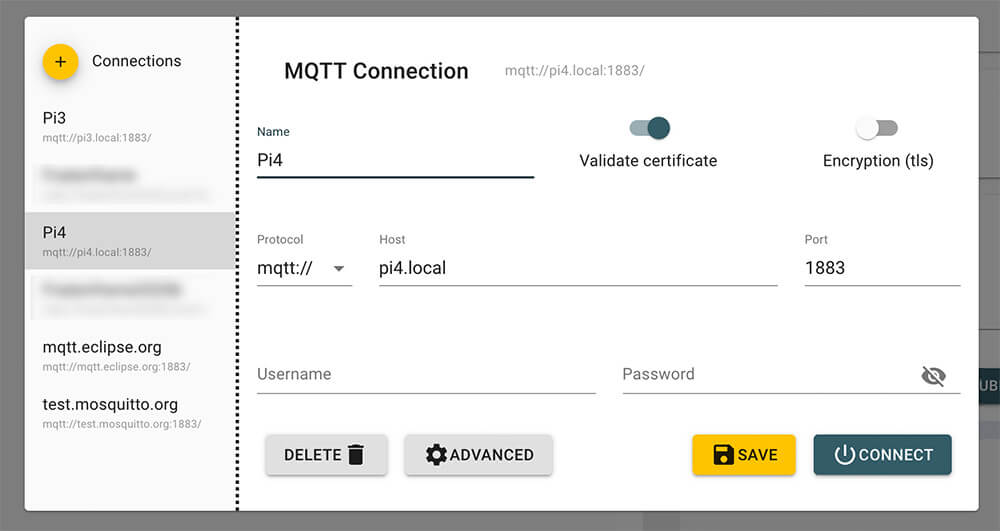
Whenever I am experimenting with MQTT, I launch a little app called MQTT Explorer to send and listen to MQTT messages.
MQTT is a free MQTT client written by Thomas Nordquist and available for Windows, macOS, and Linux.
Just connect to your local or remote broker, and you will see everything that happens.
If you are you using PiHelper or DashMQTT, you can immediately verify if messages are being sent and what their payload is.
It is an excellent tool for testing and debugging. Thanks, Thomas!
Listen on the command line
If there is a particular command that just doesn’t work, listen to MQTT on the command line of your Raspberry Pi by typing e.g.
mosquitto_sub -h localhost -v -t homeassistant/switch/picframe_paused/set ONIn this example, you will listen to the topic “homeassistant/switch/picframe_paused/set”, and any payload that you send e.g., via MQTT Explorer will be shown, like “ON” here:
pi@pi4:~ $ mosquitto_sub -h localhost -v -t homeassistant/switch/picframe_paused/set
homeassistant/switch/picframe_paused/set ON
Check your spelling of the topics
A classic mistake, but it’s always hard to spot your own typos. Is it “frame/paused” or “fram/paused”?
Also, did you set the “/” correctly?
It’s “frame/paused” not “/frame/paused”.
Conclusion
I hope you were able to quickly locate the issue that was preventing you from deploying MQTT successfully on your system.
If you have made another mistake that is not covered here or have found a better method for spotting bugs, please let me know.
My experience is that as soon as you understand MQTT, you will come up with a lot of applications where you can put it to use. Be it for automating tasks, maintenance, system warning, information, or just plain fun.
Click here to see all the articles featuring MQTT on this website to get some inspiration.
Was this article helpful?
Thank you for your support and motivation.
Related Articles
- How to use the DashMQTT Android app to remote control your Raspberry Pi photo frame
- How to effortlessly select different image folders in Pi3D PictureFrame via mobile phone or voice
- How to use the free PiHelper iPhone app as a remote control for your Raspberry Pi picture frame
- How to show the place where your photo was taken with the Raspberry Pi digital picture frame geolocation feature