Some time ago, Wolfgang described a method for voice control of your picture frame using Home Assistant and Amazon Alexa.
But for some folks, this may be too much of an effort, or they prefer a solution that is not cloud-based.
So when PiHut recently mentioned a cheap off-line AI voice recognition chip, I ordered one right away.
Note: This article is work in progress.
The M5Stack ASR Unit with Offline Voice Module (CI-03T)
So, no doubt, a practical solution for adding intelligent voice interaction to our Pi3D digital picture frame!
As The PiHut says:
The ASR Unit is an AI-based offline voice recognition module that uses the CI-03T intelligent voice chip. It provides several advanced functions, including speech recognition, voiceprint recognition, voice enhancement, and voice detection.
It features Acoustic Echo Cancellation (AEC), which helps reduce echo and noise interference. This improves the accuracy of voice recognition, especially in noisy environments. The unit also allows mid-conversation interruption, so it can respond quickly to new voice commands while already processing another.
The module comes with 42 pre-configured English wake-up and feedback words. It communicates using UART serial transmission and can be activated either by UART commands or voice keywords. Users can customise wake-up words in multiple languages and define up to 300 voice commands.
The unit includes a built-in microphone for clear voice input and a speaker for audio feedback. It’s suitable for use in AI assistants, smart home systems, security monitoring, in-vehicle controls, robotics, smart devices, and healthcare products.
So, no doubt, made for our Pi3D picture frame!
Connecting the M5Stack to the Raspberry Pi
To connect the voice chip to the Raspberry Pi, you need access to the Pi GPIO pins.
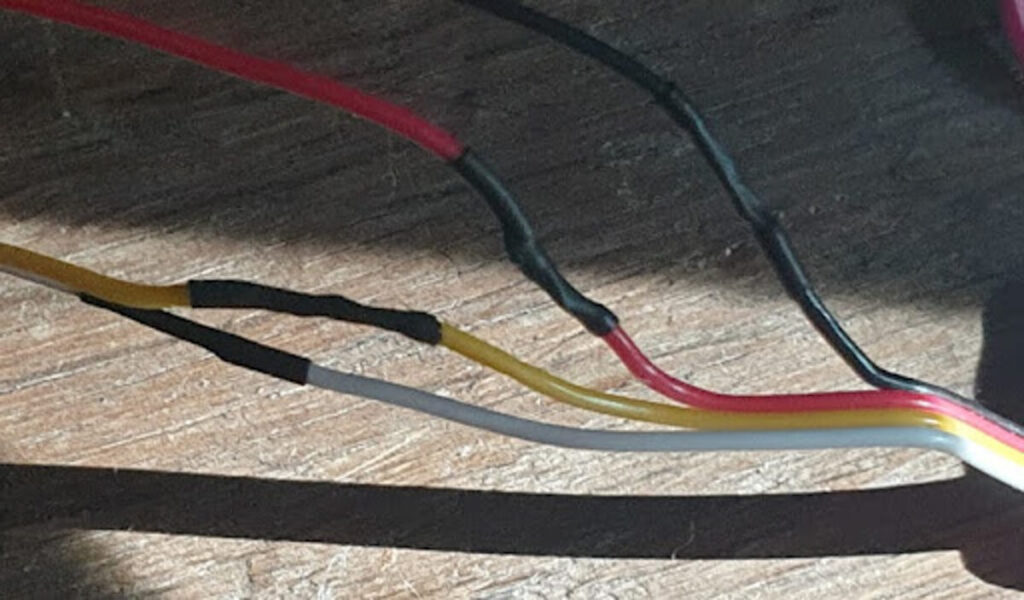
Cut the serial ribbon that came with the transducer and soldered female connectors so I could attach it to the Raspberry Pi GPIO pins, which are larger, 2.54mm spacing.

I had some tidy shrink wrap tubing, solder, and female-to-female wires, but you could obtain crimp-on ends from various sources if you search online.
There is a handy set of four adjacent GPIO pins: 5V, GND, Tx, and Rx, which can be connected directly to the serial ribbon of the voice recognition chip.

Note: Tx (transmit) on Pi GPIO needs to be connected to Rx (receive) on the chip end, and vice versa, Rx Pi goes to Tx chip.


Once power is connected to the chip, it should start working, so you can try speaking to it.
The default wake-up phrase is “Hi, M five” which should trigger a response “I’m here”.
You can then try all the other built-in phrases listed here.
To get your Pi to respond to voice commands, you need to set up serial communication over the GPIO pins.
That means opening a terminal and type
sudo raspi-config
Go to Interface_Options, then I6_Serial_Port, you then need to select No in response to the first question about the login shell, but Yes to enable serial port hardware.
To use the serial port in a relaxing way from Python, you must install the pyserial module.
If you have set up everything in a virtual environment, as instructed by Wolfgang’s script, you will need to activate the Python virtual environment and then install pyserial.
pi@mypixyz:~ $ source venv_picframe/bin/activate
(venv_picframe) pi@mypixyz:~ $ python -m pip install pyserial
The voice recognition chip sends a string of five bytes for each command it recognises, as shown in the table listed on the m5stack link.
This simple Python script checks bytes arriving over the serial port and reacts to ones it recognises by sending a command to the picframe HTTP interface.
Create it with
sudo nano voice_http.pyand paste the following content
import serial
import time
from urllib import request


URL = "http://localhost:9000"
INSTR = {0x07:'next={}', #forward
        0x0a:'back={}',
        0x12:'display_is_on=ON', #start
        0x13:'display_is_on=OFF', #stop
        0x14:'display_is_on=ON', #turn on
        0x15:'display_is_on=OFF', #turn off
        0x16:'paused=FALSE', #play
        0x17:'paused=TRUE', #pause
        0x1a:'back={}', #previous
        0x1b:'next={}'}


ser = serial.Serial('/dev/ttyAMA0', baudrate=115200)
ser.flush()


buffer = []
time.sleep(10.0) #give picframe a chance to start the http server
while True:
   if ser.in_waiting > 0:
       buffer.append(ord(ser.read(1)))
       if buffer[-2:] == [0x55, 0xaa] and buffer[-5:-3] == [0xaa, 0x55]:
           message = buffer[-3]
           buffer = []
           if message in INSTR:
               request.urlopen(f"{URL}?{INSTR[message]}")
The MQTT equivalent needs something like the following.
sudo nano voice_mqtt.py
import serial
import time
import paho.mqtt.client as mqtt


URL = "http://localhost:9000"
INSTR = {0x07:('homeassistant/button/picframe_next/set', 'ON'), #forward
        0x0a:('homeassistant/button/picframe_back/set', 'ON'),
        0x12:('homeassistant/switch/picframe_display/set', 'ON'), #start
        0x13:('homeassistant/switch/picframe_display/set', 'OFF'), #stop
        0x14:('homeassistant/switch/picframe_display/set', 'ON'), #turn on
        0x15:('homeassistant/switch/picframe_display/set', 'OFF'), #turn off
        0x16:('homeassistant/switch/picframe_paused/set', 'OFF'), #play
        0x17:('homeassistant/switch/picframe_paused/set', 'ON'), #pause
        0x1a:('homeassistant/button/picframe_back/set', 'ON'), #previous
        0x1b:('homeassistant/button/picframe_next/set', 'ON')}


ser = serial.Serial('/dev/ttyAMA0', baudrate=115200)
ser.flush()


client = mqtt.Client()
client.connect('localhost', 1883, 60)
client.loop_start()


buffer = []
time.sleep(1.0) #give picframe a chance to settle, mqtt server starts on boot
while True:
   if ser.in_waiting > 0:
       buffer.append(ord(ser.read(1)))
       if buffer[-2:] == [0x55, 0xaa] and buffer[-5:-3] == [0xaa, 0x55]:
           message = buffer[-3]
           buffer = []
           if message in INSTR:
               (topic, msg) = INSTR[message]
               client.publish(topic, msg)
For either the HTTP or MQTT versions, you can start the Python script on boot using the same technique used for starting picframe.service. You will need a script that starts the virtual environment and then runs the Python script. That script needs to be run by systemd.
How it works
I’ve created a short video to demonstrate how it works.
Conclusion
So here is a simple, low-cost, and cloud-free way to voice-control your digital picture frame.
Please let me know on the Pi3D forum about any tweaks you’ve developed.
Was this article helpful?
Thank you for your support and motivation.
